Ever stared at those grimy, outdated cabinet pulls and thought, “If I have to look at these one more day, I might just rip ‘em off with my bare hands”? Yeah, I’ve been there. My first kitchen was a rental in Austin, where the summer heat baked everything, even the crusty old brass knobs that looked like they’d crawled out of the 1970s. I spent weeks dreaming of a sleek, modern look but didn’t have the cash for a full remodel. Then I stumbled head-first into the world of painting hardware—and let me tell you, it changed everything. That one weekend project turned my whole kitchen from sad to sharp, and I’ve been hooked since. But it wasn’t smooth sailing. I’ve had paint peel off like sunburn, sprays that gunked up in humid Seattle basements, and finishes that scratched faster than a Texas tumbleweed rolls. What I’m about to give you is my busted-knuckle, hard-earned playbook—the real deal on how to transform those pulls without losing your mind or your style. I want you to skip the rookie mistakes I made and get straight to the good stuff, the kind of tricks folks will kick themselves for not knowing sooner. Whether you’re tackling a fixer-upper or just sick of staring at dull metal, this guide’s gonna hand you everything I learned the messy way—so you can finally love the kitchen you wake up to. Ready? Because I promise, by the end, you’ll be itching to grab a screwdriver and make some magic happen, no matter if it’s 3 a.m. and you’re half-delirious or bright-eyed with a cup of coffee in hand. Let’s dive deep and paint like it’s 2025, not 1995.
Why Paint Your Cabinet Pulls? The Secret to a Total Kitchen Glow-Up
Sometimes, all it takes to lift an entire room is a tiny shift—like swapping a tired story for a fresh chapter. That’s what painting cabinet pulls can do. Back in 2022, I was drowning in renovation quotes—$25,000 for a kitchen facelift? No thanks. That’s when I realized that even a small change, like updating those pulls, could flip the whole vibe of the place. The truth is, cabinet hardware is the handshake of your kitchen—the first thing you touch, the last thing you see. Freshly painted pulls can inject new life without emptying your wallet. Plus, with 2025’s wave of eco-conscious design, folks are ditching full replacements for smart refreshes that save cash and cut waste. Think of it this way: painted pulls are your shortcut to style, a fast lane past the dust and debt of a full remodel. In Texas, I saw neighbors transform dated oak cabinets into sleek stunners just by hitting the hardware with matte black spray. Meanwhile, my cousin in rainy Portland ditched her brassy knobs for soft sage tones that made her tiny space feel twice as big. The real kicker? Most people never realize how much those little pieces matter. So if you’re itching to upgrade without gutting your space, painting pulls is your ticket. It’s like swapping muddy boots for polished kicks—you’ll stand taller every time you walk in. And if you’re still wondering, “Will this really work for me?”—I’ll bet you a cold beer it will. Because the biggest secret is this: it’s not about the cabinets; it’s about the confidence you get from doing it yourself. That’s the glow-up nobody tells you about, and it’s yours for the taking.
What You’ll Need: The 2025 Must-Have Toolbox for Painting Pulls
Before you dive in, you gotta have the right gear—otherwise, you’re just spinning your wheels. My first attempt? Total disaster. I used leftover wall paint and a crusty brush, and those pulls looked worse than when I started. Lesson learned. Nowadays, I stick to a battle-tested toolkit that never lets me down. Here’s what’s in my stash for 2025:
- Degreaser/Cleaner: To strip away years of grime and fingerprints
- Fine-grit sandpaper (220-320 grit): For scuffing the surface so paint sticks
- Primer (metal/plastic specific): Because skipping primer is asking for chips
- High-quality spray paint: Satin, matte, or gloss—your call, but make it durable
- Topcoat spray: Keeps your new finish safe from scratches
- Screwdriver: To yank those pulls off cleanly
- Drop cloths/cardboard: Unless you like paint freckles on your driveway
- Disposable gloves & mask: Because safety’s sexy, and fumes are no joke
| Tool | Why You Need It | Pro Tip |
|---|---|---|
| Degreaser | Removes oils for better paint adhesion | Use warm water to boost cleaning power |
| Sandpaper | Roughs up finish so paint grips | Wrap around a sponge for even pressure |
| Primer | Prevents peeling, adds durability | Two thin coats beat one thick one |
| Spray Paint | Goes on smooth, dries fast | Multiple light passes avoid drips |
| Topcoat | Seals in color, resists wear | Matte topcoat looks modern, glossy adds pop |
Trust me, when you’ve got the right setup, it’s like having a secret weapon. No more patchy finishes or peeling corners a week later. And if you’re working in a chilly Seattle garage or sweating it out in Houston’s August heat, these tools hold up. So before you even crack that paint can, round up your arsenal—it’s the difference between a weekend win and a regret you hide behind closed cabinet doors.
Prep Work: The Dirty Little Secret That Makes or Breaks Your Finish
If there’s one thing I learned the hard way, it’s that prep is everything. I once skipped proper cleaning because I was in a rush—big mistake. The paint peeled faster than sticker paper in a kid’s backpack. Here’s my no-nonsense prep routine that never fails. First, unscrew every pull and toss them into a bucket with warm, soapy water or degreaser. Let ‘em soak for 15 minutes, then scrub with an old toothbrush to get every bit of grime. Rinse and dry thoroughly. Next, grab that fine-grit sandpaper and lightly scuff each pull, even if they’re smooth metal or slick plastic. This roughs up the surface just enough for the primer to cling. Wipe down all dust with a lint-free cloth. Now, lay out your drop cloth or cardboard—whether it’s in your humid Florida garage or under the blazing New Mexico sun, you want a clean, dry space. Don’t rush this; prep is 80% of the job. Skipping steps now means heartbreak later. I still remember a buddy in Brooklyn who tried to shortcut the process—his pulls looked killer for a week, then started flaking when the temps dropped. Save yourself that pain. Think of prep like the foundation of a house: invisible but essential. Clean, sanded, and bone-dry pulls mean your paint will stick tight, survive every grab and slam, and keep that fresh-outta-the-box look for years. So breathe deep, crank some tunes, and get your hands dirty. This is where you win or lose the whole game.
Priming Cabinet Pulls: The Make-or-Break Move Most Folks Skip
Here’s the secret sauce most folks skip—primer. I used to think primer was optional. Boy, was I wrong. The first time I painted without it, the finish chipped faster than you can say “rookie mistake.” Now, I never skip it, and neither should you. After your pulls are clean and sanded, hit them with a primer made for metal or plastic, depending on what you’ve got. Lay them flat on your drop cloth and spray in light, even passes. Don’t drown ‘em—multiple thin coats beat one thick, drippy mess every time. The goal? A smooth, even base that feels like velvet, not sandpaper. Let it dry completely—usually about 30 minutes to an hour, depending on humidity. Down in sticky Georgia summers, I wait a little longer. Up north, things dry fast but double-check anyway. Primer grabs the paint tight and keeps it from peeling or scratching when you yank open that stubborn drawer. It’s like the secret handshake that makes the whole finish last. And here’s a pro tip I learned the hard way: if you see shiny spots after priming, hit those again. Bare patches mean weak points later. Think of primer as your insurance policy—skip it, and you’re gambling with all your hard work. Trust me, nothing hurts more than watching fresh paint bubble up or flake off after one rough grab. So take the extra 15 minutes, prime like a pro, and set yourself up for a finish that sticks around long after the trend cycle spins again.
Choosing Your Paint: Colors, Finishes, and Trends That Are Crushing 2025
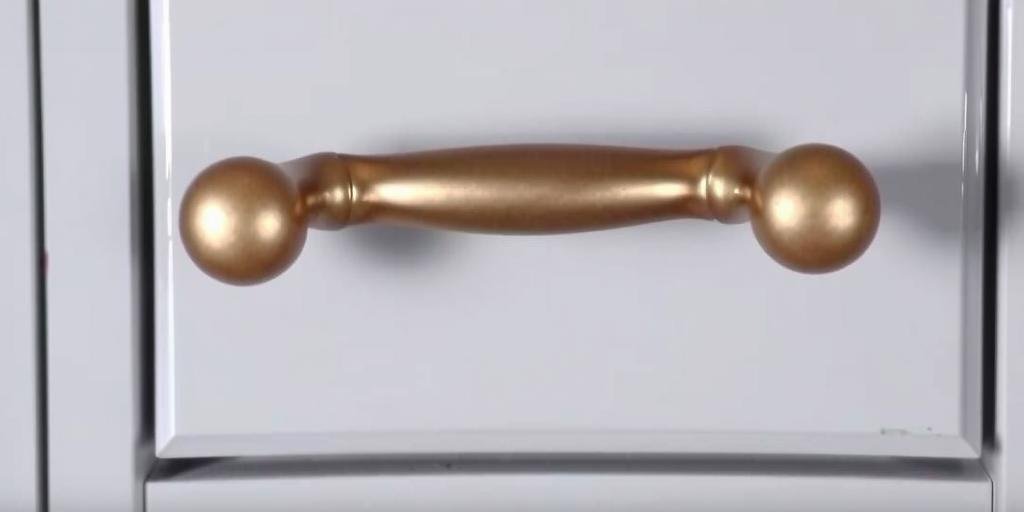
Back in the day, options were thin—glossy black or plain white. Not anymore. In 2025, the world of cabinet pull colors has exploded. Think soft matte sage, deep hunter green, champagne gold, or even textured finishes that look like hammered bronze. I’ve seen kitchens from steamy Miami to foggy San Francisco pop with bold hues and subtle tones alike. The trick is picking what fits your style—and what holds up. Satin and matte finishes are hot right now because they hide fingerprints and scratches better than high gloss. But if you want that shiny, luxe vibe, gloss can still rock—as long as you seal it right. When it comes to color, go with what makes your heart thump. Are your cabinets white? Try black or brushed brass pulls. Dark wood? Lighter tones or muted metallics add contrast. Here’s my cheat sheet:
- Modern look: Matte black or deep navy
- Warm farmhouse: Soft gold or antique bronze
- Coastal vibes: Sage green, pale blue
- Industrial edge: Brushed nickel, gunmetal
Remember, lighting changes everything. What looks killer in a bright Texas kitchen might feel gloomy in a Seattle basement. So test a swatch if you can. And here’s a little secret: two-tone pulls—say, matte black base with a gold accent—are making waves in 2025. They add depth without the cost of custom hardware. So don’t be afraid to play. After all, paint’s the cheapest way to experiment. If you mess up, sand and start over. This is about making your space yours, no apologies. That’s the power of paint, and it’s all yours to grab.
Painting Like a Pro: The No-Fail Spray Technique They Don’t Teach You
If you want a finish that looks factory-fresh, forget the brushes and rollers—spray is the way. I learned this after my first brush job left streaks uglier than a muddy bootprint. Since then, it’s all about the spray. Here’s how to nail it: Shake your can for a full minute—seriously, set a timer. Then hold it about 6-10 inches away and use quick, light passes. Start spraying off to the side, then move across the pull and release after. This avoids heavy blobs at the start or end. Do multiple thin coats—usually two to three—with a 10-minute dry time in between. It sounds slow, but it beats sanding drips later. And always spray in a well-ventilated spot—open garage, backyard, or porch. In humid Houston, I paint early mornings to avoid sticky air; in chilly Denver, I wait ‘til midday warmth. Here’s a quick list to remember:
- Shake, shake, shake—don’t cut corners on this
- Thin coats over thick globs
- Keep moving—don’t hover or you’ll get drips
- Dry time matters—patience pays
One trick I learned? Stick screws into a cardboard box and mount the pulls upright—it keeps them steady and lets you hit all angles. It’s like a mini hardware forest. By the end, you’ll have a smooth, even coat that looks pro-grade, not DIY disaster. And if you mess up? Wait, sand lightly, and repaint. No shame in a redo. Remember, this part’s where the magic happens. Nail it, and every time you open a drawer, you’ll feel like a million bucks. That’s worth every extra minute.
Sealing the Deal: Topcoat Secrets That Lock In Your Hard Work
Here’s the part folks often skip—and then regret big time. A clear topcoat is what keeps all your sweat and style from chipping away when life gets messy. I learned this after my fresh matte black pulls started scratching from my kid’s sticky fingers and my own rush-job cleaning. Never again. After your paint’s bone dry (give it a full 24 hours if you can), hit those pulls with a high-quality clear coat—matte, satin, or gloss, whatever suits your finish. Spray just like the paint: thin, even passes, multiple coats better than one heavy blast. Let each layer dry 15-20 minutes before the next. This topcoat acts like an invisible shield—blocking scratches, sealing color, and adding just the right amount of sheen. Whether you’re in a salty-air beach house or a dusty Arizona ranch, it keeps that fresh look locked in. And here’s a pro move: for extra durability, lightly sand with ultra-fine grit (400+) between coats. It helps the layers bond tight. Think of it like armor for your hard work. Skip this, and you might be repainting in six months. But seal it right, and those pulls will stay sharp well into 2026 and beyond. It’s the difference between a quick fix and a lasting upgrade. So don’t rush the finish line—seal that deal and enjoy the payoff every single day.
Reinstalling Your Pulls: The Final Mile That Makes All the Difference
This is where all your effort pays off—or falls flat if you rush it. I’ve been guilty of slapping pulls back on too soon, only to smudge fresh paint and wanna scream. Here’s how to nail the finish line. First, wait. Even if the paint feels dry, give it 24-48 hours to fully cure. Patience now saves heartbreak later. Once cured, line up your screws carefully and reattach each pull. Don’t over-tighten—you risk cracking the new paint or stripping the holes, especially on old wood. If screws feel loose, add a toothpick dabbed in wood glue to fill out the hole. Down in humid Alabama, I use a small fan to keep air moving during curing, so nothing sticks or warps. Reinstalling is also a good moment to clean cabinet faces or touch up paint dings. Sometimes, I swap a pull’s position if one’s slightly off—nobody notices, but it keeps everything looking pro. When you’re done, step back. Those once-ugly pulls now pop like new jewelry on an old friend. That’s the thrill of a job done right. And if you want to take it up a notch, add a dab of mineral oil inside the screw holes to prevent future rust. Little secrets like this are what I wish someone told me sooner. You’ve come this far—don’t rush the last lap. Finish strong, and every time you open that cabinet, you’ll smile knowing you did it yourself, the right way.
Common Mistakes: My Biggest Flops and How You Can Dodge ‘Em
If I had a nickel for every time I screwed up painting pulls, I’d buy you all new hardware myself. But since I can’t, I’ll spill my worst blunders so you don’t repeat ‘em. Number one: skipping the clean and sand. I once painted right over greasy, glossy pulls—looked great for a week, then peeled like old wallpaper. Lesson? Prep is king. Another? Spraying too close or too thick, leaving ugly drips that dried like candle wax. Always use light, sweeping coats. Then there’s impatience—reinstalling before full cure, only to leave fingerprints or chips. Give it time. And don’t forget a topcoat—that mistake cost me hours of sanding and redo after scratches showed up fast. Here’s a quick cheat sheet of what not to do:
- Skip cleaning: Paint won’t stick, period.
- Forget primer: Chips faster than cheap nail polish.
- Spray too thick: Leads to drips and sags.
- Rush dry time: Smudges and fingerprints galore.
- No topcoat: Easy scratches, early wear.
I’ve seen friends in muggy South Carolina find their pulls sticky for days because they didn’t factor in humidity. Or buddies in dry Colorado rushing coats that cracked. Weather matters. And if you do mess up? Take a breath, sand lightly, and try again. This isn’t brain surgery—it’s a chance to learn. What’s the one thing you’re scared to screw up? Chances are, I’ve done it already. So trust me, dodge these rookie mistakes, and you’ll save yourself time, money, and a whole lot of cursing.
Maintaining Your Painted Pulls: Keeping That Fresh Look in 2025 and Beyond
Once you’ve put in all this work, you want those pulls to stay sharp as new boots. Here’s what I learned after a few slip-ups. First, avoid harsh cleaners—skip bleach or ammonia. Instead, use a mild soap and soft cloth. I used a rough scrubber once and scratched my fresh finish so bad I had to repaint. Never again. If you’re in a humid Florida kitchen or a dry Nevada trailer, watch for grime buildup and gently clean monthly. For any tiny chips, dab matching paint with a cotton swab, then seal with clear coat. And if screws loosen over time, tighten gently—don’t strip ‘em. Here’s a quick list:
- Wipe weekly with soft cloth
- Skip harsh chemicals
- Touch up chips fast
- Re-seal every year if needed
- Check screws twice a year
It’s kinda like caring for a good pair of boots—clean, polish, protect. Do that, and your pulls will keep shining long after trends shift again. Plus, every time you see ‘em gleam, you’ll remember you did this yourself. That’s a feeling no store-bought hardware can match. So show ‘em some love, and they’ll pay you back every single day.
FAQs: Quick-Fire Answers You Need Before You Pick Up That Spray Can
How long does painted hardware really last?
Done right—with cleaning, primer, paint, and a good topcoat—your pulls can last 3-5 years easy, sometimes longer. Remember when I said prep is key? That’s why.
Can I paint over shiny brass or chrome pulls?
Absolutely, but you must sand and prime or the paint will peel fast. I learned this the hard way on some slick chrome knobs that flaked in a week.
What if I don’t like the color after painting?
No sweat. Just sand lightly, prime again, and repaint. Paint’s cheap, mistakes are lessons.
Is spray paint really better than brush?
For hardware, yes. It gives a smoother, more durable finish—no brush marks. Trust me, I tried both and spray won, hands down.
How soon can I clean my cabinets after reinstalling pulls?
Wait at least a week before heavy cleaning, so the paint fully cures. Gentle wipes are fine sooner. Like I said, patience pays off.
Conclusion: Your Kitchen, Your Rules—Now Go Make It Yours
So there it is—my no-fluff, hard-earned playbook for turning beat-up, boring pulls into the kitchen jewelry you deserve. I’ve blown it plenty of times, but every mistake taught me a trick I just handed you. From cleaning to sealing, it’s the little steps that add up to a big win. Because here’s the gut-punch truth: you don’t need a fat wallet or fancy gear to transform your space. Just guts, grit, and a weekend’s worth of sweat. I still remember that first rental kitchen—all cheap laminate and crusty brass. Painting those pulls was my first taste of real control, a tiny rebellion that made that place feel like mine. Now, years later, I still get that thrill every time I change up hardware. It’s more than paint—it’s proof you can change your world, one little piece at a time. So I’m daring you: grab that screwdriver, get messy, and make your kitchen yours. Spill your war stories below, pass this to a buddy who needs a push, or dive into more of my DIY rants. Because if you’ve read this far, you’re ready. Don’t wait ‘til next month or next year. Start now—before doubt creeps in. I promise, when you see those fresh pulls gleaming back at you, you’ll wonder why you didn’t do this sooner. And that’s a feeling worth chasing, every single day.