
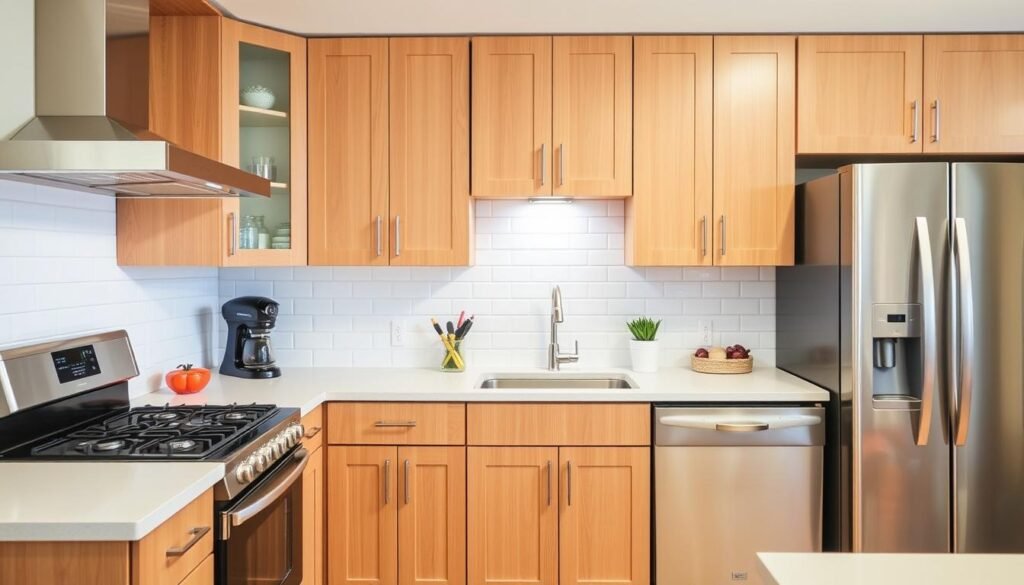
Kitchen cabinet repainting is a budget-friendly way to update your kitchen. The painting process can be detailed, but with the right help, you can get amazing results. Painting your cabinets yourself needs patience, hard work, and knowing the steps.
Knowing how long it takes to paint your cabinets is key for planning. The whole process, from start to finish, takes time. But, it’s worth it for a great look. This article will guide you through painting your kitchen cabinets, including how long it takes, tips, and what tools and materials you’ll need.
To paint your cabinets well, you need to understand the process and how long it takes. By following the right steps and using the right materials, you can get a stunning finish. Whether you want to update your cabinets or change your kitchen’s look, repainting is a smart choice.
Key Takeaways
- Kitchen cabinet repainting is a cost-effective way to give your kitchen a fresh new look
- The cabinet painting process requires patience, dedication, and a clear understanding of the process
- DIY cabinet painting can be time-consuming, but it’s essential to get it right
- Understanding the time it takes to complete the project is crucial for planning and execution
- A comprehensive guide is necessary for a successful DIY cabinet painting project
- Using the right materials and following the right steps is essential for a beautiful and long-lasting finish
Understanding the Cabinet Repainting Process
Renovating your kitchen cabinets can seem daunting. But, breaking it down into simple steps makes it easier. The process includes preparation, painting, and drying. The time needed depends on your kitchen’s size, the number of cabinets, and how detailed you want it.
If you’re doing it yourself, setting realistic goals is key. Plan well for each step, including the materials and tools you’ll need. Knowing the process helps you get professional results.
Overview of Required Steps
The cabinet repainting process has several important steps. These include:
- Removing hardware and doors
- Cleaning and sanding the surfaces
- Applying primer and paint
- Allowing the paint to dry and cure
Each step is vital for a smooth finish.
Factors Affecting Project Duration
The time it takes to renovate your cabinets depends on several things. These include your kitchen’s size, the number of cabinets, and the detail level. The paint and primer types also affect drying time and project duration.
Setting Realistic Expectations
Knowing what affects your project’s time helps you plan better. Allow enough time for each step. Be ready for any unexpected delays or issues.
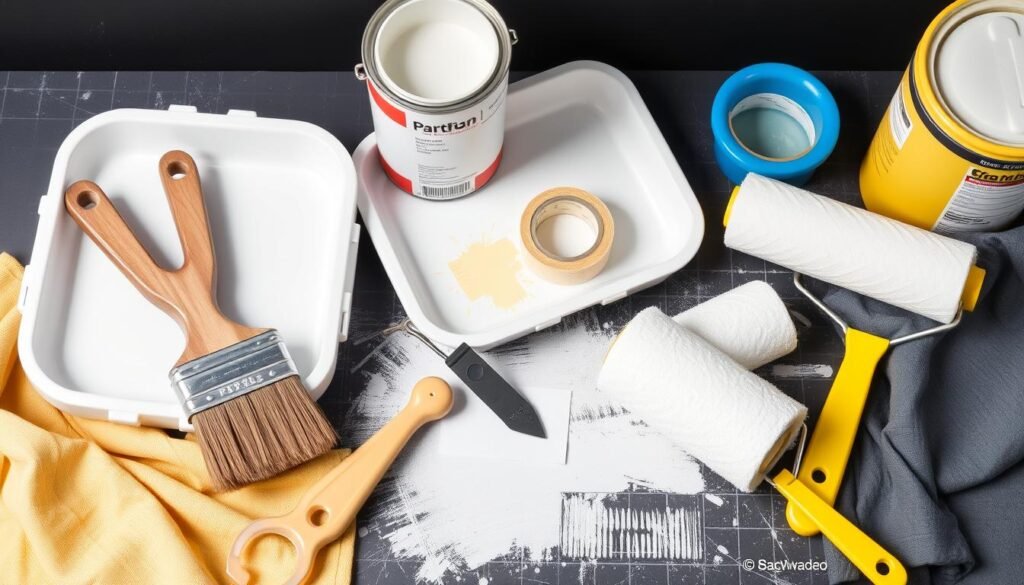
Essential Tools and Materials Needed
To repaint kitchen cabinets well, you need the right cabinet painting supplies and DIY tools. You’ll need sandpaper, primer, paint, and a paintbrush. Also, a safe workspace and protective gear like gloves and a mask are key.
Choosing the right kitchen renovation materials is important. Quality and durability matter for a lasting repaint. Here are some essential items:
- High-quality paint and primer
- Durable brushes and rollers
- Sandpaper and other tools for preparing the surface
- Drop cloths and protective gear
Using the right tools and materials makes repainting easier and faster. The cost can vary based on quality and brand. But, investing in quality cabinet painting supplies and DIY tools is worth it in the long run.
With all the right kitchen renovation materials and DIY tools, you’re ready for your project. Always follow safety rules and take your time for a great finish.
How Long Does It Take to Repaint Kitchen Cabinets: Complete Timeline
Repainting kitchen cabinets takes time. Knowing the timeline is key for a successful DIY project. A kitchen renovation has several phases.
The whole process includes planning, preparation, painting, and drying. Each step has its own time frame. Understanding these is vital for a realistic schedule.
Breaking Down the Phases
Planning takes 1-2 days. You’ll plan the project, pick materials, and get the workspace ready. Preparation takes 2-3 days. This depends on cleaning, sanding, and priming the cabinets.
The painting part takes 3-5 days, based on the number of coats. Drying and curing take 2-4 days. Knowing these times helps plan your DIY project and kitchen renovation.
| Phase | Timeline |
|---|---|
| Planning | 1-2 days |
| Preparation | 2-3 days |
| Painting | 3-5 days |
| Drying and Curing | 2-4 days |
Preparing Your Workspace for Cabinet Painting
For a successful kitchen renovation workspace, preparation is key. Before you start painting your cabinets, clear the area and cover the floor and countertops. Remove any hardware or fixtures. This makes your workspace safe and efficient, letting you focus on the cabinet painting preparation.
A well-prepared workspace is crucial for a DIY project preparation like cabinet painting. By setting up your workspace, you’ll work more efficiently and avoid mistakes. Here are some steps to prepare your workspace:
- Clear the area of any clutter or obstructions
- Cover the floor and countertops with drop cloths or plastic sheets
- Remove any hardware or fixtures from the cabinets
- Ensure good ventilation and lighting in the workspace
By following these steps, you’ll create a safe and efficient workspace. This will help you achieve a beautiful, professional-looking finish. Remember, thorough preparation is key to success.
With a well-prepared workspace, you can focus on the cabinet painting preparation process. A well-prepared workspace is essential for a professional-looking finish and a successful DIY project preparation.
| Workspace Preparation Steps | Importance Level |
|---|---|
| Clearing the area | High |
| Covering the floor and countertops | High |
| Removing hardware or fixtures | Medium |
| Ensuring good ventilation and lighting | High |
Cabinet Removal and Hardware Management
Removing cabinets is key when repainting your kitchen. It’s a step that needs careful planning and execution. You’ll need to take out the cabinets, doors, and hardware for a smooth painting process. Managing your hardware well is also crucial to avoid losing or damaging any parts.
Having a good DIY project organization system is essential. It helps you keep track of the cabinets, doors, and hardware. Use labels, tags, or numbers to identify each piece. This way, you can put everything back together correctly, saving you time and effort.
- Use a labeling system to identify each cabinet, door, and hardware component
- Store the hardware in a safe and secure location to prevent loss or damage
- Organize the doors and drawers in a way that makes it easy to access and work on them
By following these tips and using a good DIY project organization system, you can make your cabinet removal and hardware management a success. This will make your kitchen cabinet repainting project much easier.
Surface Preparation Techniques
When you’re getting ready to paint your cabinets, surface prep is key. A smooth, even finish and good paint adhesion depend on it. Start by cleaning, sanding, and filling any holes or cracks. This step is crucial for a DIY project preparation to look professional.
Removing grease, grime, or wax is a must. It helps the paint stick well and prevents peeling. Use a degreaser or soap and water to clean. Then, sand the surface to remove any imperfections.
- Fill holes or cracks with wood filler and sand it down.
- Apply a primer for a strong bond between the surface and paint.
- Paint and let it dry before adding more coats.
By using these surface preparation techniques, you’ll get a pro-looking finish. Your DIY project preparation will be a hit.
Choosing the Right Paint and Primers
Choosing the right paint for your kitchen cabinets is key. There are many options, making it hard to pick the best paint and primer. Think about your cabinets and the look you want.
Deciding between oil-based and water-based paint and primer is important. Oil-based gives a hard finish but dries slowly and has strong smells. Water-based is easier to clean up and smells less, but might not last as long. Think about your cabinets and the finish you want when deciding.
- Type of cabinets: Oil-based works well for wood cabinets. Water-based is better for laminate or MDF.
- Desired finish: Oil-based is great for glossy finishes. Water-based works for matte or satin.
Professional-Grade Products
Using top-quality paint and primer makes a big difference. Look for products from well-known brands made for cabinet painting. They give a smooth finish and last longer against scratches and fading.
Color Selection Guidelines
Picking the right color for your cabinets can be tough. Think about your kitchen’s style and the colors of your walls, countertops, and floor. Use DIY painting tips like testing colors on a small area first. With the right primer selection and paint, you can get a beautiful finish that makes your kitchen look great.
| Paint Type | Finish | Drying Time |
|---|---|---|
| Oil-Based | High-Gloss | 24-48 hours |
| Water-Based | Matte | 2-4 hours |
Professional Application Methods
When painting your kitchen cabinets, professional painting techniques are key. Using the right methods, like rolling and brushing, is crucial for a smooth finish. Always paint in a well-ventilated area and wear protective gear to avoid accidents.
Here are some DIY painting tips for a great cabinet painting project:
- Prepare the surface well for better paint adhesion
- Choose high-quality paint and primer for a lasting finish
- Apply thin paint coats, letting each dry before adding the next
By using these cabinet painting methods and tips, you can get a professional look on your cabinets. Always follow safety rules and take your time for a successful project.
With the right techniques and materials, your kitchen can get a fresh new look. Whether you’re experienced or new to DIY, professional painting techniques can help you get the look you want.
| Painting Method | Description |
|---|---|
| Rolling | Using a roller to apply paint to large surfaces |
| Brushing | Using a brush to apply paint to smaller surfaces and details |
Avoiding Common Time-Consuming Mistakes
When painting cabinets, it’s important to avoid common mistakes. These errors can make your project fail. Not cleaning or sanding the surface right can lead to a bad finish.
Some common mistakes include inadequate surface preparation. This can happen if you don’t clean or sand well, or skip the primer. Also, applying too much paint or using the wrong brush can cause issues.
Environmental factors like humidity or temperature can also affect your project. To avoid these mistakes, follow a few simple tips:
- Prepare the surface properly by cleaning and sanding
- Apply a primer to ensure a good paint finish
- Use the right brush and apply the right amount of paint
- Check the environmental conditions before starting the project
By following these tips, you can avoid common mistakes and have a successful project. Remember, the right preparation and techniques will help you get a professional-looking finish.
Tips for Speeding Up the Process
To get the job done fast, planning and working smart are key. A top DIY painting tip is to paint in sections. This way, you can finish one area before moving to the next. It keeps things organized and avoids delays.
Having everything you need ready is also crucial. This includes paint, primers, brushes, and more. Being prepared lets you focus on painting without looking for tools. Cabinet painting tips often stress the need for good prep for a smooth process.
Here are some more tips to speed things up:
- Use a paint sprayer for big areas
- Apply multiple coats for the best finish
- Paint in a well-ventilated area to avoid fumes
By using these DIY painting tips and focusing on painting efficiency, you can finish your project quickly. Stay organized, work step by step, and use tools that help you work smarter.
With practice, you’ll get better at DIY painting. You’ll be able to get professional-looking results easily and efficiently.
| Tip | Description |
|---|---|
| Work in sections | Complete each area before moving on to the next |
| Use a paint sprayer | Cover large areas quickly and efficiently |
| Apply multiple coats | Achieve the desired finish and ensure durability |
Quality Control Measures
Getting a professional finish is key when painting cabinets. Quality control steps are crucial throughout the process. Regular checks help spot mistakes early, allowing for quick fixes. This focus on detail keeps your painting quality high.
When checking your cabinet painting, look at these important points:
- Color consistency and evenness
- Smoothness of the paint finish
- Attention to detail around edges and corners
By focusing on these, you can make sure your cabinets look great.
For example, minor imperfections can be fixed with touch-ups. A small brush can correct small mistakes. This ensures a perfect finish, which is key for top-notch cabinet painting. By paying attention to quality, your kitchen will look amazing, showing off your style and improving your home’s look.
Putting effort into quality control is worth it. It leads to a stunning kitchen you’ll love for years. High-quality control means your painting will be exceptional, making your cabinets stand out.
Post-Painting Care and Maintenance
Proper post-painting care is key to keeping your cabinets looking great. Avoid harsh chemicals and abrasive cleaners. Instead, use mild soap and water to clean them. Make sure to dry them well to avoid water spots.
Regular DIY painting maintenance is important too. Dust and polish your cabinets often to stop dirt and grime buildup. Also, touch up any scratches or scuffs to keep your cabinets looking good.
By following these tips, your cabinets will last for many years. Always handle them with care. Don’t use them to store heavy objects or harsh chemicals. With the right care, your cabinets will stay beautiful and useful in your kitchen.
When to Consider Professional Help
Repainting kitchen cabinets can be tough, especially if you’re new to it. If you’re not sure you can get a pro finish, think about hiring cabinet painting professionals. They can give you top-notch results, saving you time and effort.
Think about the cost of DIY versus professional painting services. DIY might seem cheaper at first, but remember the cost of materials, tools, and possible mistakes. Professional services might cost more upfront, but they usually come with a warranty and guarantee.
Cost Comparison
- DIY: $500-$1,000 (materials and tools)
- Professional painting services: $1,500-$3,000 (labor and materials)
Also, consider the time and quality trade-off. DIY takes longer, but professional painting services offer quicker results and better quality. Your choice to hire cabinet painting professionals depends on what matters most to you and your budget.
Time vs. Quality Considerations
When deciding between DIY and professional, think about these points. A pro finish can boost your home’s value and last longer. If you’re short on time or unsure, hiring cabinet painting professionals might be the smart choice for you.
| Option | Cost | Time | Quality |
|---|---|---|---|
| DIY | $500-$1,000 | Several days/weeks | Varying |
| Professional painting services | $1,500-$3,000 | Several days | High |
Conclusion: Making Your Cabinet Repainting Project a Success
Turning your kitchen cabinets into something new is very rewarding. By using the tips from this article, you can make your cabinets look great. You’ll also have a kitchen that shows off your style and lasts a long time.
Don’t worry if you’re new to painting. With patience and the right tools, you can make your kitchen look amazing. It’s all about the details and being willing to learn.
Be proud of your work and enjoy every step. Your cabinets will look amazing and show off your effort. Let your new cabinets be the start of making your home even better.
FAQ
How long does it take to repaint kitchen cabinets?
The time needed to repaint kitchen cabinets varies. It depends on the kitchen's size and detail level. Generally, it takes 1-2 days for planning, 2-3 days for preparation, 3-5 days for painting, and 2-4 days for drying.
What are the common time-consuming mistakes to avoid during the cabinet repainting process?
Common mistakes include not properly cleaning or sanding the surface. Also, avoid applying too much paint or using the wrong brush. Environmental factors like humidity or temperature can also slow down the drying and curing process.
What are some tips for speeding up the cabinet repainting process?
To speed up, work in sections and use a paint sprayer. Applying multiple coats can also help. Make sure you have all your tools and materials ready to avoid delays.
When should I consider hiring a professional for my cabinet repainting project?
Consider hiring a professional if you're unsure about repainting. Compare DIY costs to professional services. Think about the time and quality trade-off. A professional finish might be worth the extra cost and time.