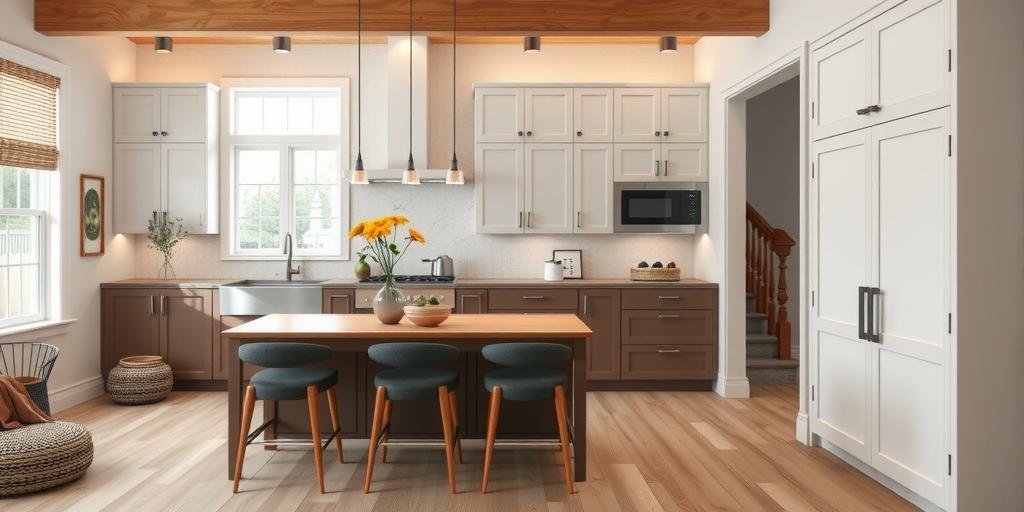
Ever tried prying up old kitchen flooring at 2 a.m. because you just can’t look at that cracked linoleum one more minute? Maybe you’re clutching a crowbar, staring down those heavy, stubborn cabinets, wondering, “Do I really have to rip these out too?” I’ve been there—sweating through a sticky Dallas night, cursing every screw, every warped board, every time I wished I’d just left well enough alone. But you’re here, and you want answers that don’t dodge, don’t sugarcoat, and don’t leave you hanging when your hands are covered in dust and regret.
Let’s cut through the noise: Do you have to remove kitchen cabinets to replace your flooring? It’s the question that sends folks spiraling down DIY rabbit holes, sets off arguments with spouses, and keeps contractors laughing all the way to the bank. I’ve watched friends in Seattle spend hours yanking out cabinets for no reason, and I’ve seen a neighbor in Atlanta lay new floors around his cabinets, only to regret it every time he tries to fit his fridge. You’re not just chasing a pretty kitchen—you’re fighting for your sanity, your back, and every dollar you’ve got.
Stick with me. I’ll spill the hacks I wish I’d known sooner, the messes I stumbled through, and the local tricks I picked up sweating it out from Texas to Tacoma. I’ll lay it out raw: when you absolutely must yank those cabinets, when you can leave them alone, and the little tricks that’ll save your bacon. If you’ve ever wondered what the pros really do—or how to dodge the disasters they never talk about—this is for you. Grab your coffee, shake off the dread, and let’s tackle this head-on. Your dream kitchen floor is closer than you think, and by the end of this, you’ll know exactly what to do—no more guessing, no more sleepless nights.
Why This Question Won’t Die in 2025 Kitchens
Every year, over 2 million American kitchens get a flooring facelift. That’s a lot of folks sweating the “cabinet question.” Why? Because, let’s be honest, nobody wants to make their life harder—or trash a perfectly decent cabinet setup. I still remember a buddy in humid New Orleans, convinced he had to gut his whole kitchen to lay down new tile. He called me, voice cracking, “Is this really how it’s done?” I could hear the panic—like he was about to pull the wrong wire and take down the whole block.
The truth? This isn’t just about looks—it’s about time, money, and sanity. Cabinets aren’t just boxes; they’re anchors. Remove them and you could be opening a can of worms: plumbing surprises, broken drywall, or a domino effect where every fix leads to another. But leave them in, and you risk awkward height differences, stuck appliances, or weird transitions that haunt you every time you mop. Here’s a quick table I sketched out in a Denver coffee shop to break it down:
| Option | Pros | Cons |
|---|---|---|
| Remove Cabinets |
|
|
| Leave Cabinets |
|
|
This is the crossroads—mess it up, and you’ll replay it every time you cook. Nail it, and your kitchen just works. If you’re losing sleep over this, you’re not alone. But stick with me and I’ll get you to the other side, with your wallet—and your weekends—intact.
How Flooring Type Changes the Game
The biggest thing nobody tells you? Your flooring choice is the secret boss level. I’ve seen folks in rainy Portland rip out cabinets just to lay tile, while my cousin in Phoenix slipped new vinyl right under his toe kicks and called it a day. The rules change with every material—what works for hardwood won’t fly with floating laminate, and tile’s a whole different beast.
Here’s the hard-won truth I wish I’d known:
- Tile and Stone: Best under cabinets for strength, but a nightmare to demo. If you’re dreaming of a cool, stone floor to beat that Georgia heat, be ready for heavy lifting—unless you’re okay with slight height mismatches.
- Floating Floors (Laminate/LVP): Popular in 2025 for their DIY-friendliness. Lay them up to, but not under, cabinets. Why? They need room to expand—trap them and watch them buckle like a Texas road in July.
- Sheet Vinyl: Still the king of quick flips. You can slide it under toe kicks, but full cabinet removal? Rarely worth it.
- Solid Hardwood: Traditionalists in Boston swear by installing under cabinets for a flush, future-proof look. But it’s pricey, and most pros today say it’s overkill unless you’re gutting the whole kitchen anyway.
I once tried to lay click-together laminate under my cabinets, thinking I’d outsmart the pros. Spoiler: I trapped the floor, it warped, and I had to redo half my work while my dog watched, tail wagging at my misery. Don’t repeat my mistakes—match your move to your material. What’s your dream floor? Pick it, then let that call the shots.
When You Absolutely Must Remove Cabinets
There are times when there’s no way around it—you have to bite the bullet and yank those cabinets. I learned this the hard way during a muggy July in Houston, wrestling with cabinets that hadn’t budged since the ‘70s. Here’s when you need to grab the screwdriver and brace yourself:
- Your floor is being raised significantly—think thick tile, new subfloor, or radiant heating.
- Major water damage under cabinets—if it smells like a swamp, you’ve got to see what’s lurking underneath.
- You’re gut-renovating the kitchen—if you’re already stripping it to the studs, might as well go all-in.
- Cabinet bases are rotting or unstable—don’t build on a shaky foundation.
I’ll never forget a couple in Minneapolis who tried to shortcut this—left rotten bases under new floors, only to have everything sag and shift. Six months later, they were back to square one, wallets and spirits both a little lighter. Sometimes, you just have to do the hard thing.
When You Can Skip Cabinet Removal (And Not Regret It)
Most of the time, you can lay new floors right up to the cabinet bases and sleep just fine. I’ve done this in everything from a steamy Miami condo to a wind-whipped Chicago bungalow. The trick? Prep is everything.
- Use underlayment to level out height differences.
- Trim around toe kicks—invest in a good jigsaw, or borrow one from that neighbor who owes you a favor.
- Finish edges with quarter round or shoe molding for a clean, pro look.
- Double-check appliance clearances—don’t end up cursing under your breath when the dishwasher won’t fit.
I once skipped the final trim in a rush, only to have the floor edge catch every crumb and spill for a year. Lesson learned! Clean edges and a snug fit make all the difference. If your cabinets are solid and you’re not raising the floor much, you’re in the clear—save your energy for pizza night, not demo day.
Dealing with Height Differences and Appliance Mayhem
Let’s talk about the sneaky villain: height differences. Lay a thick floor next to fixed cabinets and suddenly your dishwasher is trapped like a cat in a closet. I saw this play out in a South Philly rowhome—brand new floors, but the fridge wouldn’t slide back in. The homeowner had to shave down cabinet trim while his wife shot him the look. You don’t want that look.
Here’s the cheat sheet I wish someone had handed me:
- Check appliance specs before you start—know your clearances down to the millimeter.
- Some appliances have adjustable feet—use them to gain a little extra wiggle room.
- If you’re raising the floor more than 1/2 inch, consider removing at least the lower cabinet runs or building up the rest to match.
- For floating floors, leave a gap under the appliance (not the cabinets) so you can remove it for repairs.
One trick that saved my bacon: Lay a sample piece of your new floor in front of the appliance, then try to slide it in and out. If it sticks, adjust your plan before you commit. It’s like a dress rehearsal for your kitchen.
| Floor Thickness | Cabinet Removal Needed? | Appliance Clearance? |
|---|---|---|
| Less than 1/4 inch | No | Usually fine |
| 1/4 to 1/2 inch | Maybe (check appliances) | May need to adjust |
| More than 1/2 inch | Likely | Serious clearance issues |
What Pros Are Doing in 2025 (And What They Won’t Tell You)
Here’s what I’ve seen behind the curtain: most contractors in 2025 skip cabinet removal unless they have to. Why? It’s faster, cheaper for the client, and less risk of damage. But here’s the kicker—they’ll charge you extra if you insist on “floor under everything.” I sat with a crew in Austin last spring, swapping horror stories about DIYers who’d half-removed a cabinet, only to strip a screw and split the face frame. The pro’s advice? “If it ain’t broke, don’t fix it. But don’t cut corners, either.”
Pro tips I stole (and you should too):
- Use matching transition strips at cabinet edges—nobody will notice if you do it right.
- Ask about “cabinet toe kick saws”—they make trimming old floors a breeze without pulling anything out.
- Seal gaps with color-matched caulk to keep spills from sneaking under.
- Keep photos of your base cabinets before and after—future you will thank you when it’s time to sell.
The big reveal? As long as your cabinets are solid and your new floor isn’t outrageously thick, most pros will lay right up to the cabinet base, trim it clean, and call it good. Save your back—and your budget—for what matters.
How to Prep Like a Kitchen Warrior
Before you swing a hammer or peel back a single tile, prep is your secret weapon. I’ve rushed this step too many times—once ripped up flooring in a foggy Seattle rental only to find decades of mouse nests and a cracked subfloor. Not my best moment. Here’s my battle plan:
- Empty cabinets and clear the room—less to trip over, more room to curse in peace.
- Mark appliance locations and check all clearances.
- Measure the floor height with and without new layers—don’t eyeball it, or you’ll pay later.
- Lay down a vapor barrier if you’re anywhere near a damp climate (shout out to everyone battling Pacific Northwest mildew).
- Keep a shop vac handy—old flooring hides more dust than a West Texas windstorm.
Slow down and do it right—your future self will thank you every time you step into that kitchen.
Local Realities: North, South, East, West
I’ve worked kitchens from the icy edges of Maine to the swampy heat of Florida, and here’s what I’ve learned: Local climate changes everything. In Phoenix, your floors are battling dry heat and sun, so floating floors are the go-to. In Boston, humidity swings mean expansion gaps are non-negotiable, or you’ll see buckling by Thanksgiving.
- Cold climates: Check for uneven subfloors from frost heave. Don’t slap new floors down and hope for the best.
- Wet climates: Mold is the hidden enemy. If you smell mustiness, take a peek under those cabinets before you commit.
- Hot, dry regions: Floors shrink and expand—leave all the expansion gaps you can.
- High traffic or sandy areas: Edge trim and sealing are your best friends—keep grit from sneaking under and scratching up your hard work.
I once ignored a moisture check in a Louisiana rental—six months later, the floor buckled like a bad joke. Don’t be me—play to your climate and your kitchen will last a lifetime.
What to Watch for: Sneaky Mistakes That Haunt You
There are a few classic blunders that’ll haunt your nights and weekends. Miss these and you’ll be calling for help halfway through, cursing your past self for skimping.
- Not checking for level cabinets—if they’re crooked, your floor will be too.
- Forgetting to undercut door jambs—leaves ugly gaps and trip hazards.
- Laying floating floors under heavy cabinets—they need room to breathe, or they’ll warp in the next heatwave.
- Ignoring transitions to other rooms—don’t let your kitchen floor trip you every time you carry groceries in.
Here’s my secret stash: Always keep a scrap of your flooring for future repairs. I once had to patch a spot after a dropped cast iron pan, and that extra plank saved my skin.
Cost, Sweat, and What’s Worth It
Money talks, and in 2025, labor costs are up 12% over last year. Every time you add demo, you’re burning cash—and hours you can’t get back. Here’s what I’ve learned, from scraping pennies in Detroit to splurging in LA:
- Cabinet removal adds $1,500–$2,500 to most jobs—minimum.
- Expect 1–2 extra days for demo and reinstall, more if you hit snags.
- DIY? You might save cash, but factor in your time and any “Whoops, broke it” moments.
- Pros can often trim, level, and finish without removing a thing—ask for itemized quotes and don’t be afraid to negotiate.
I once spent a weekend and three trips to the hardware store just getting old cabinets off the floor—only to realize I didn’t need to touch them. Sometimes, the best money you spend is the money you don’t spend at all.
My Biggest Wins—and Most Embarrassing Flops
Let’s get real: I’ve won big and lost bigger. My proudest moment? Helping a buddy in muggy Tampa lay new LVP without touching his ancient cabinets—saved him a grand and a week of headaches. My worst? Tearing out cabinets in a cold Boston winter, only to realize the floor would’ve fit just fine underneath. I spent two days patching drywall and four days apologizing to my wife.
- Win: Careful planning, clean edge work, and not overthinking it.
- Flop: Rushing, skipping the measuring step, and ignoring that little voice that says, “Double check, buddy.”
What’s your mess? Have you ever ripped out more than you needed to? Got a trick that saved your hide? Share it below—let’s build a cheat sheet together, one story at a time.
FAQ: Fast Answers to Burning Questions
1. Can I lay new floors right over old ones without touching cabinets?
Yes—if the old floor is stable and thin. But stack too many layers and you’ll face height and appliance issues. Remember when I said, “Check your clearances?” This is why.
2. What if my cabinets are already a little wobbly?
Fix them first. Don’t build on a shaky base. Shim, level, and anchor them before you lay anything new, or you’ll pay later—just like my buddy in Chicago learned after his drawers wouldn’t close.
3. Will skipping cabinet removal hurt my home’s value?
Not if it looks clean and functions well. Most buyers care about finish, fit, and no weird transitions. Ask your real estate agent—this question comes up at every open house.
4. What about toe kicks? Do I have to remove them?
Usually not. You can undercut toe kicks or trim flooring to fit. Just seal edges to keep water and crumbs out. That’s the move I learned after chasing Cheerios for a year.
5. What’s the one thing I should never skip?
Prep and measurements. Like I said before—measure twice, curse once. It’s the step that saves you from every major mess.
The Final Word: Your Kitchen, Your Call—But Don’t Go It Alone
Here’s the gut-punch truth: There’s no one-size-fits-all answer. Every kitchen is its own beast, every floor a fresh start or a lurking nightmare. If you remember nothing else, remember this: Plan for the finish line, not just the first swing of the hammer. Don’t rip out cabinets unless you have to. Don’t let a pro talk you into extra work unless it really matters. And don’t, for the love of your aching back, skip the prep.
What’s the one thing you’re scared to screw up? I’ve been there—standing in a stripped-down kitchen at midnight, wondering if I just made a $2,000 mistake. Sometimes, the hardest part isn’t the work—it’s trusting yourself to make the call. So dare yourself: ask questions, share your story below, or pass this to a friend who’s about to swing a hammer. You’ll save them more trouble than you know.
Looking back, I wish I’d had someone to tell me the honest truth: You don’t have to do it all. You just have to do it right, for you. These floors, these cabinets, this kitchen—it’s more than wood and nails. It’s Sunday breakfasts, midnight snacks, and every mess in between. Don’t let fear—or a slick sales pitch—cost you comfort or peace of mind. Take a breath. Make your plan. And when you win—or flop—come back here and tell me about it. Because every kitchen battle is better shared, every win is sweeter when you know you earned it, and every mess is just a story waiting to help someone else.