As a homeowner, I know how important it is to have a space that shows off my style. Modifying RTA cabinets is a great way to make my home unique. In this guide, I’ll show you how to modify RTA cabinets, including DIY upgrades and custom changes.
With the right tools and skills, you can turn plain cabinets into something special that shows off your taste. This guide is for both DIY experts and beginners. It will give you the confidence to make your RTA cabinets your own.
We’ll cover many topics, like DIY upgrades, to help you create the perfect space. By following this guide, you’ll be able to easily modify your RTA cabinets. You’ll get the look you want with our RTA cabinet modifications.
Key Takeaways
- Learn how to modify RTA cabinets to create unique and tailored solutions for your home
- Discover the process of DIY RTA cabinet upgrades and RTA cabinet modifications
- Gain the knowledge and confidence to tackle your RTA cabinet modification project
- Understand the importance of having the right tools and techniques for RTA cabinet modifications
- Learn how to transform generic cabinets into custom pieces that reflect your personal style with how to modify RTA cabinets
- Get started with your RTA cabinet modification project and achieve the look you want with DIY RTA cabinet upgrades
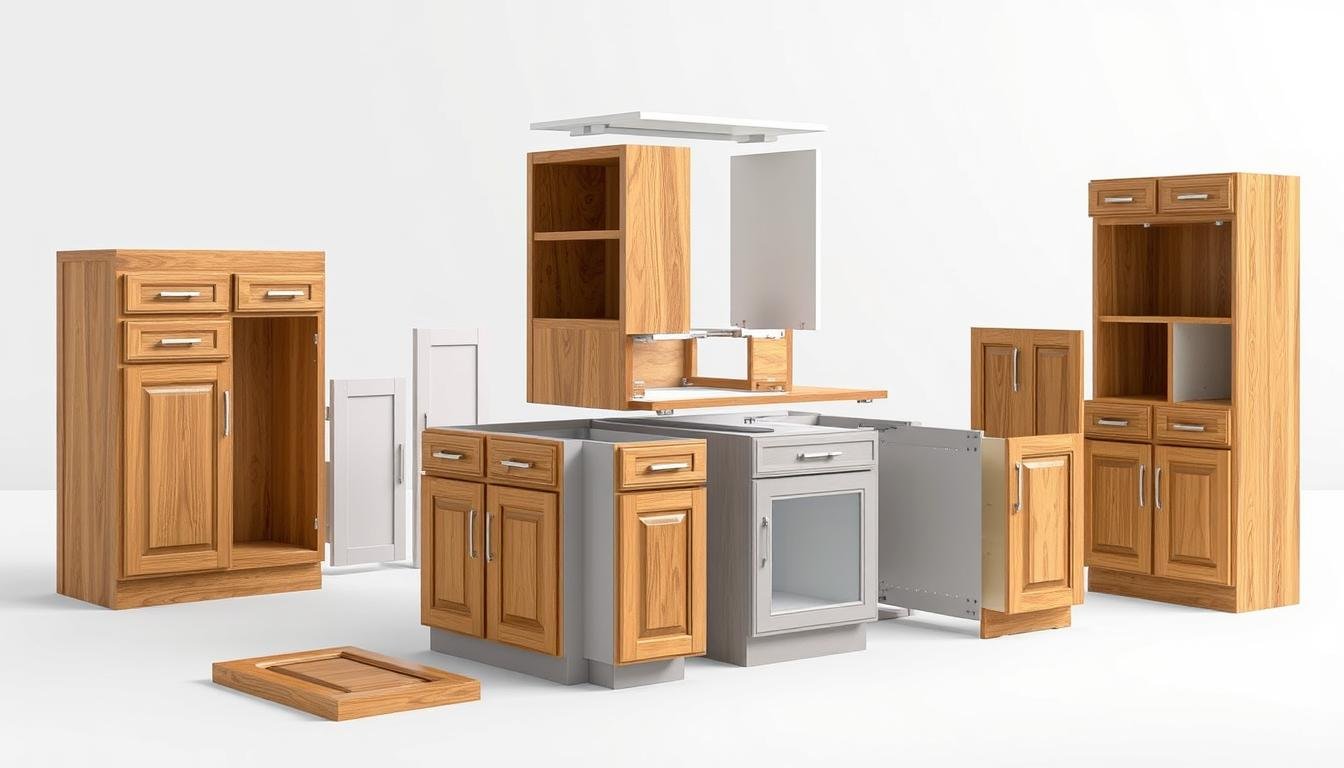
Understanding RTA Cabinet Basics
Customizing ready-to-assemble cabinets starts with knowing the basics. This knowledge is key to a successful project. RTA cabinets are made from wood, medium-density fiberboard (MDF), and plywood. Each material has its own strengths and weaknesses.
Before starting your RTA cabinet project, learn about common construction methods. These include frameless, face-frame, and inset construction. Knowing these methods helps you choose the right approach for your project. Also, learning tips for RTA cabinet alterations will guide your makeover ideas.
Types of RTA Cabinet Materials
- Wood: A popular choice for RTA cabinets, wood offers a natural look and feel.
- MDF: A cost-effective option, MDF is dense and flat, making it ideal for painting.
- Plywood: A versatile material, plywood is resistant to warping and shrinking.
Common Construction Methods
RTA cabinets use different construction methods. Frameless construction gives a sleek, modern look. Face-frame construction offers a traditional, sturdy design.
Standard Sizes and Specifications
RTA cabinets come in various sizes and specifications. Knowing these will help you plan your project well. From base cabinets to wall cabinets, each type has specific dimensions and needs. By considering these, you can create a customized RTA cabinet that fits your needs and space.
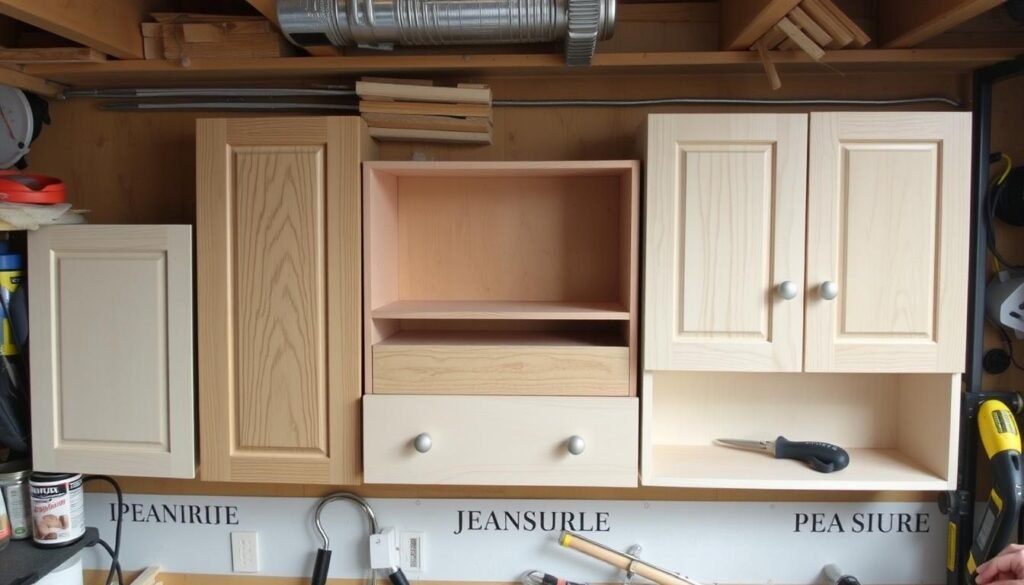
Essential Tools and Materials for Cabinet Modifications
To start a diy rta cabinet upgrades project, you need the right tools and materials. This includes power tools like drills, saws, and sanders. You’ll also need hardware like hinges, handles, and drawer slides. Make sure you have the right materials, such as wood, laminate, or MDF, and safety gear like gloves and safety glasses.
A good toolkit is key for any cabinet project. Here are some must-haves:
- Power tools: drill, saw, sander
- Hardware: hinges, handles, drawer slides
- Finishing materials: wood stain, paint, laminate
- Safety equipment: gloves, safety glasses, dust mask
When picking materials, think about durability and look. Solid wood adds warmth and style, while laminate is cheaper and easy to clean. With the right tools and materials, you can make your diy rta cabinet upgrades look great and work better.
Investing in good tools and materials helps you tackle tough projects with confidence. Always follow safety rules and best practices for a smooth and safe project.
| Tool/Material | Purpose |
|---|---|
| Drill | Drilling holes for hardware |
| Saw | Cutting wood and other materials |
| Sander | Smoothing out surfaces |
Assessing Your Cabinet Modification Needs
To start making your RTA cabinets better, first check their current state. Look for areas that need improvement. This will help you find the best makeover ideas for your cabinets.
Think about the condition, how well they work, and how they look. Decide which changes are needed.
When looking at what needs to be changed, consider a few things:
- Current cabinet condition: Check for damage, wear, and tear.
- Modification goals: Think about what you want to change, like more storage or better function.
- Timeline: Plan when you can do the changes, based on how complex they are and how busy you are.
By looking at these points, you can make a plan to change your RTA cabinets. You’ll get a space that fits your needs and shows your style. With good ideas and a plan, you can make your space look and work better.
Start your cabinet change project knowing what you want. This way, you’ll make a space that looks good and works well. With creativity and the right mindset, you can make your RTA cabinets look great and improve your daily life.
Safety Considerations When Modifying RTA Cabinets
When I work on custom RTA cabinet solutions, safety is my number one concern. I make sure to have proper ventilation, wear protective gear, and follow electrical safety rules. These steps help me avoid hazards and ensure a successful project.
Some key safety tips include:
- Wearing protective gear, such as gloves and safety glasses, to prevent injury from power tools and sharp objects
- Ensuring proper ventilation in the work area to prevent inhalation of dust and fumes
- Following electrical safety guidelines to avoid shock or electrocution
By following these safety tips, I can make custom RTA cabinets that fit my needs without risking injury or damage. Learning how to modify RTA cabinets safely is crucial for a successful and worry-free project.
To stay safe, I also check the manufacturer’s instructions for modifying RTA cabinets. Combining these guidelines with my own research and experience helps me create a safe and effective plan. This plan meets my needs and budget.
| Safety Consideration | Precaution |
|---|---|
| Power tools | Wear protective gear, ensure proper ventilation |
| Electrical safety | Follow electrical safety guidelines, avoid overloading circuits |
| Sharp objects | Handle with care, wear protective gloves |
Planning Your Cabinet Modifications
Planning is crucial for rta cabinet modifications. I start by looking at my current cabinets and finding what needs to change. I measure the space carefully, noting the length, width, and depth of each cabinet. I also check for any obstacles like plumbing or electrical fixtures.
For a successful diy rta cabinet upgrades project, knowing what materials and tools you need is important. I make a list of everything I’ll need, including hardware, adhesives, and finishes. This helps me budget and avoid surprises.
Creating a plan for your modifications is also key. I think about the materials, how hard it will be, and how long it will take. By setting priorities and making a schedule, I can keep my project on track and finish it on time.
Some important steps for planning rta cabinet modifications include:
- Creating a detailed design plan
- Measuring and marking the cabinet components
- Preparing the necessary tools and materials
- Executing the modification plan
By following these steps and thinking about my specific needs, I can have a successful and easy diy rta cabinet upgrades project.
Structural Modification Techniques
Customizing ready-to-assemble cabinets requires knowing about structural changes. You can modify the frame, shelves, and doors for a better look and function. I’ll share tips for making these changes, ensuring your cabinets are sturdy and stable.
First, check your RTA cabinets’ current structure and find what needs changing. This might mean strengthening the cabinet frame or changing where the shelves are. These steps help make your storage space more useful and organized.
Important things to think about when changing RTA cabinets include:
- Ensuring the cabinet parts are properly aligned
- Choosing the right materials and hardware for the changes
- Following safety rules to prevent injuries or damage
By using these tips for rta cabinet changes and exploring different structural methods, you can tailor your cabinets to fit your needs. Always keep stability and safety in mind when making changes.
With the right tools and materials, you can turn your RTA cabinets into a unique and useful storage solution. This will improve your space’s look and feel.
How to Modify RTA Cabinets for Custom Sizes
Modifying RTA cabinets to fit your needs is common. You can change their height, width, or depth. These changes make your cabinets more functional and personal.
Start by checking your current cabinets and what size you want. This will guide you on how to modify them. For example, adding risers can increase height. Cutting or reconfiguring can change width or depth.
Height Adjustments
Changing the height of your cabinets can be useful. Adding or removing shelves helps with storage. You can also add crown molding or trim for a unique look.
Width Modifications
Changing the width of your cabinets requires cutting or reconfiguring. It’s a bit tricky but doable with the right tools. Make sure the changes look good with your design.
Depth Changes
Changing the depth of your cabinets can improve storage. You can use fillers or add custom panels. This makes your cabinets more functional.
These techniques help you make RTA cabinets fit your needs. They can make your space more functional and personal. Whether you want to change the size or look of your cabinets, these methods can help.
- Measure accurately for a perfect fit
- Use the right tools and materials
- Think about the look and design of your space
- Make your cabinets more functional with smart changes
By following these tips, you can make RTA cabinets that fit your needs. They will make your space more functional and personal.
| Modification Technique | Description |
|---|---|
| Height Adjustments | Adding or removing shelves to create a customized storage solution |
| Width Modifications | Cutting or reconfiguring cabinets to fit a specific space |
| Depth Changes | Adjusting the depth of cabinets to optimize storage space and create a functional layout |
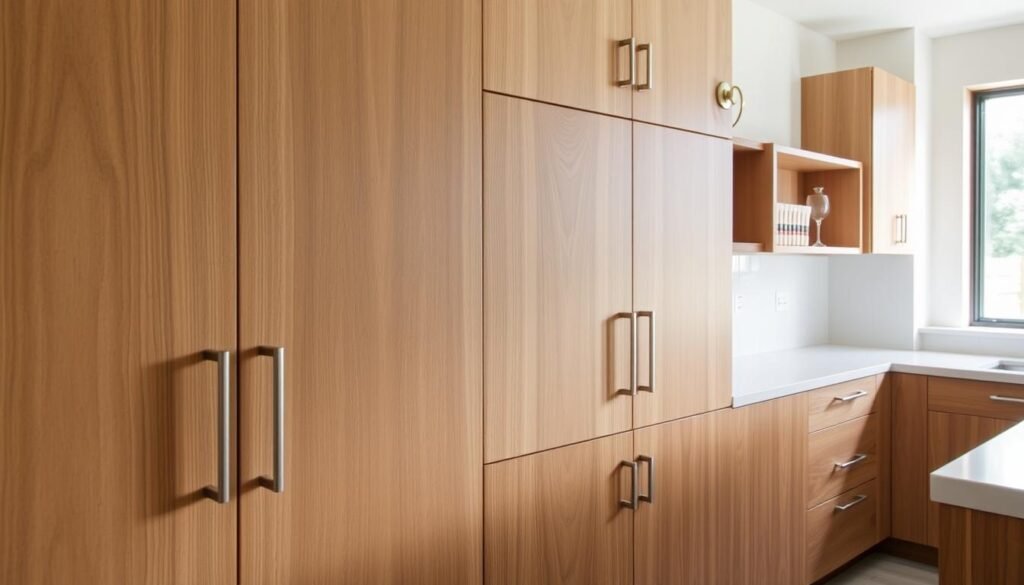
Adding Custom Features and Hardware
Adding custom features and hardware can really transform RTA cabinets. Unique elements like drawer slides, hinges, and handles can make your cabinets stand out. Look for custom RTA cabinet solutions that fit your project perfectly.
Some popular custom features to consider include:
- Soft-close drawers for a smooth and quiet operation
- Adjustable shelves to maximize storage space
- Decorative trim and molding to add a touch of elegance
Choosing the right hardware is key. For example, modern handles can give a sleek look, while traditional hinges offer a classic feel. The right hardware can make your space both unique and functional.
Remember to think about your space’s design and function as you modify your cabinets. Custom RTA cabinet solutions can make your area beautiful and useful.
With creativity and planning, you can turn your RTA cabinets into a stunning space. Whether it’s your kitchen, bathroom, or bedroom, custom RTA cabinets can help you get the look you want.
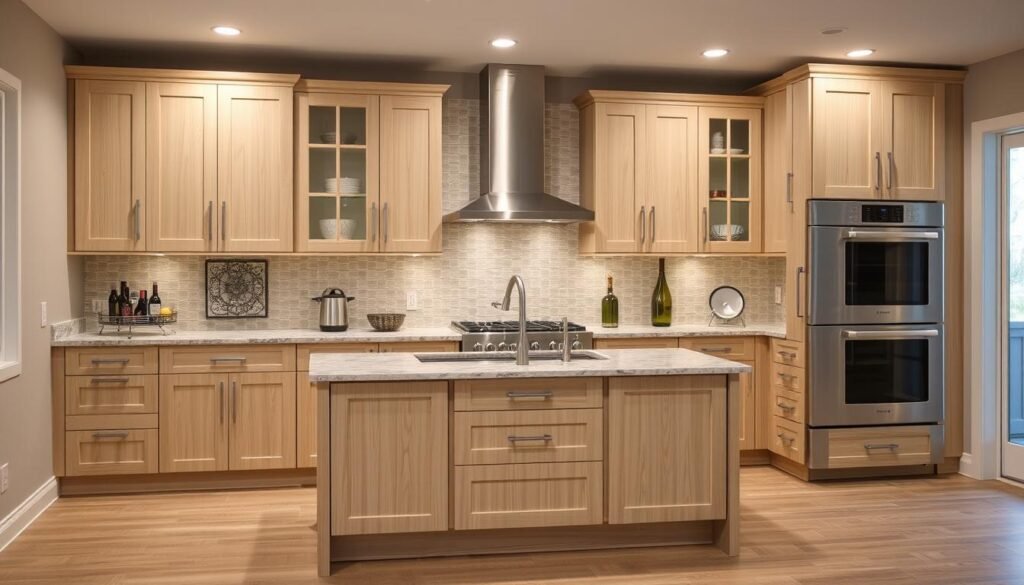
Surface Modifications and Finishing
Modifying RTA cabinets can really show off your style. You can make your cabinets stand out with surface changes. Think about how to modify RTA cabinets to match your taste.
There are many ways to refinish cabinets, each with its own look. You can paint, stain, or add a new veneer. It’s important to choose wisely based on the look you want. For example, staining or painting can add a unique design.
Refinishing Options
- Painting: a great way to completely change the color and look of your cabinets
- Staining: perfect for adding a rich, warm tone to your cabinets
- Applying a new veneer: a good option if you want to change the material or texture of your cabinets
After refinishing, you can add decorative touches. This could be new hardware or intricate carvings. Make sure it matches your kitchen’s style. By modifying RTA cabinets, you can make your kitchen unique and functional.
Installing Organization Solutions
When you’re into diy rta cabinet upgrades, think about adding organization solutions. They make your RTA cabinets more useful and efficient. As you customizing ready-to-assemble cabinets, pick solutions that fit your needs.
Popular choices include drawer dividers, shelf liners, and cabinet organizers. They help keep things organized and easy to find. Here are some tips for choosing:
- Measure your cabinet space carefully to ensure the solutions you choose fit properly
- Think about the types of items you’ll be storing in your cabinets and choose solutions that cater to those items
- Consider the style and design of your cabinets and choose solutions that complement them
Installing organization solutions makes your RTA cabinets more functional. This is key for diy rta cabinet upgrades. It helps you use your space better and adds a customized touch. Whether it’s for a kitchen, bathroom, or other room, these solutions help you achieve your goals.
Choose solutions that match your needs and style. Don’t hesitate to get creative with your diy rta cabinet upgrades. With some planning and imagination, you can create a storage system that’s perfect for you and your space.
Troubleshooting Common Modification Issues
When you’re working on RTA cabinets, you might face some problems. Even with great ideas, material issues can pop up. Knowing your materials and techniques well is key.
Common issues include uneven surfaces, wrong measurements, and hardware problems. To solve these, have a plan ready. This means double-checking measurements, using top-notch hardware, and testing surfaces before you install them.
If you’re new to RTA cabinet makeovers, getting help from a pro might be a good idea. They can share the best makeover ideas and guide you through the process. They can also help fix any problems that come up.
- Checking measurements and plans for accuracy
- Inspecting materials for damage or defects
- Testing hardware and surfaces before installation
By following these steps and being ready for issues, you can make your RTA cabinets look and work great. You’ll get the look you want.
| Issue | Solution |
|---|---|
| Uneven surfaces | Check measurements and use shims or adjusters |
| Incorrect measurements | Double-check measurements and plans |
| Hardware malfunctions | Test hardware before installation and use high-quality materials |
Maintenance Tips for Modified Cabinets
To keep your modified cabinets in great shape for years, follow some key maintenance tips. Regular cleaning and checks can stop damage and make your cabinets last longer. Think about the materials and finishes you choose, as they impact how easy they are to maintain.
Here are some important tips to remember:
- Use a soft cloth to clean the surfaces, avoiding harsh chemicals that can damage the finish.
- Apply a protective wax to prevent scratches and spills from penetrating the surface.
- Avoid exposing your cabinets to extreme temperatures or humidity levels.
By following these tips, you can enjoy your modified cabinets for many years. For more info on how to modify rta cabinets, check out online resources or talk to a professional.
Remember, proper maintenance is crucial for your custom rta cabinet solutions to last. By cleaning, inspecting, and protecting your cabinets, you can keep them looking beautiful and functional for years.
| Maintenance Task | Frequency | Tips |
|---|---|---|
| Cleaning | Weekly | Use a soft cloth and avoid harsh chemicals. |
| Inspections | Monthly | Check for damage and wear and tear. |
| Wax application | Quarterly | Apply a protective wax to prevent scratches. |
Conclusion
As you start to change yourrta cabinet modifications, remember the possibilities are endless. You can make your kitchen or bathroom look new again. This guide shows you how to do it. Whether you want to make your cabinets more useful, look better, or be your own, thediy rta cabinet upgrades way lets you do it. You can make your cabinets truly special. Start the project, enjoy it, and try new things. With some patience and the right tools, you’ll get amazing results. Your friends, family, and even future buyers will be impressed. So, go ahead, get creative, and turn your cabinets into something amazing. Your dream kitchen or bathroom is just a few steps away.
FAQ
What are the typical construction methods for RTA cabinets?
RTA cabinets use dowel, cam, or knock-down hardware. This makes them easy to assemble and disassemble.
What are the standard sizes for RTA cabinets?
RTA cabinets come in various sizes. Widths range from 12 to 48 inches. Heights are from 12 to 96 inches. Depths are from 12 to 24 inches.
What are the essential tools and materials needed for RTA cabinet modifications?
You'll need power tools like saws, drills, and routers. Also, hardware (hinges, drawer slides, handles), finishing materials (paint, stain, or laminate), and safety gear (goggles, gloves, respirator).
How do I assess my RTA cabinet modification needs?
First, check your cabinets' condition. Then, decide what changes you want. Lastly, plan a realistic timeline for your project.
What safety considerations should I keep in mind when modifying RTA cabinets?
Always ensure good ventilation. Wear protective gear. Follow electrical safety to avoid hazards.
How do I plan for my RTA cabinet modification project?
Start by making detailed measurements. Then, plan your modifications and budget for tools, materials, and labor.
What structural modification techniques can I use for my RTA cabinets?
You can modify the frame, shelves, and doors. Make sure they're aligned and stable.
How can I modify my RTA cabinets for custom sizes?
Adjust the height, width, and depth. Make sure your measurements and cuts are accurate.
What custom features and hardware can I add to my RTA cabinets?
You can add drawer slides, hinges, and handles. This enhances functionality and personalizes the look.
How can I modify the surface of my RTA cabinets?
Refinish, add decorative elements, and use paint and stain techniques. This creates a unique look.
What organization solutions can I install in my modified RTA cabinets?
Install drawer dividers, shelf liners, and cabinet organizers. This maximizes storage.
How can I troubleshoot common modification issues with my RTA cabinets?
Be ready to handle material limitations and common mistakes. Know when to seek professional help.
How do I maintain my modified RTA cabinets?
Clean them regularly, protect the finish, and prevent scratches. Fix wear and tear issues to keep them looking good.