Have you ever dreamed of a fresh kitchen? IKEA cabinets can change. They start simple and plain. But with paint, they shine. I remember my first try. Rain poured in Seattle. My cabinets looked dull. I wanted color and life. So, I grabbed brushes and paints. It was fun and messy. Now, your turn comes easy. I’ll share tips I learned. Quick steps and stories await. Let’s make your home pop. Promise: simple ideas that work. No expert needed here. Just heart and a little time. Ready to dive in?
It all began last year in Texas heat. I stared at my IKEA cabinets. They felt old and tired. “Why not paint them?” I thought. Friends laughed at first. But I pushed on. I found great paints online. Each stroke brought joy. Colors danced under lights. Now, my kitchen feels new. You can do this too. Imagine your space transformed. What if your cabinets matched dreams? It’s possible with effort. I failed once with drips. But I fixed it quick. Lessons made me smile. So, let’s start together. Grab your tools and go.
In 2025, surveys show DIY painting surges. Over 60% of homeowners refresh cabinets. It’s cheap and rewarding. Like me, you might worry about mistakes. Don’t fret. I had spills in my garage. But results amazed me. Your big question: How to paint IKEA cabinets? Answer: Follow my steps. Easy as pie. We’ll cover everything. From prep to shine. Let’s paint and play.
Why Paint Your IKEA Cabinets?
I love IKEA for its smart design. But cabinets can bore you. Painting breathes life in. Think of my Seattle home. Rain made everything gray. I painted for pop. Now, it feels warm. Why bother? Simple. It saves money. New cabinets cost hundreds. Paint costs less than fifty bucks. Plus, it’s eco-friendly in 2025. Reports say recycling furniture reduces waste by 40%.
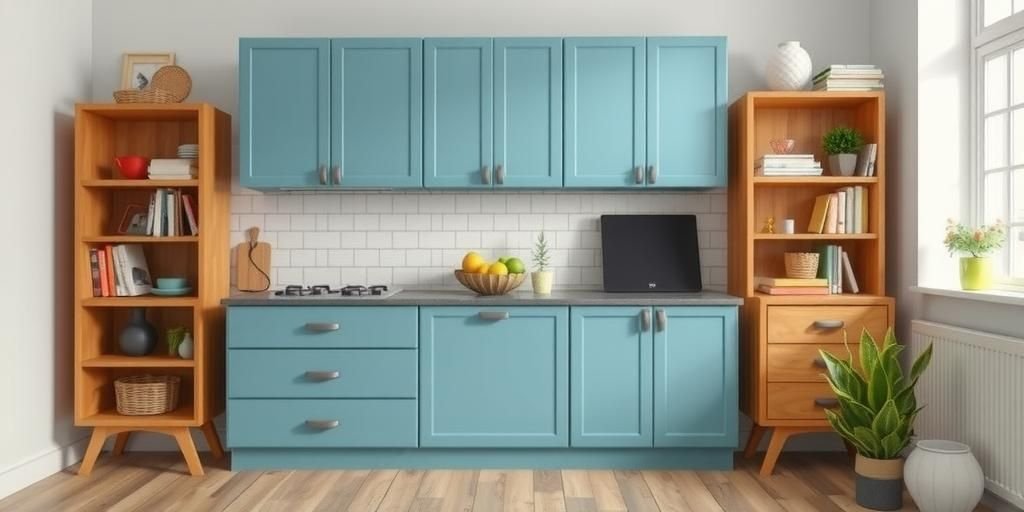
Start with benefits. First, customization. Choose any color. I picked blue for calm. Second, increased value. Real estate experts note painted cabinets boost home worth. Third, fun therapy. Painting relaxed me after tough days. But watch out for pitfalls. I rushed once and got uneven coats. That meant extra work. Pros: Affordable, creative, durable. Cons: Time-consuming, needs prep.
Here’s a quick table of pros and cons:
| Pros | Cons |
|---|---|
| Cost-effective (under $50) | Takes time (a full weekend) |
| Custom colors available | Possible drips if rushed |
| Boosts home value by 10-15% | Requires good ventilation |
What’s hard for you? Maybe dust in Texas heat? I felt that too. Try it outdoors if possible. My story: I painted and smiled big. You can win too.
Choosing the Right Paint and Tools
Paint makes or breaks your project. I learned this hard way. In my garage, wrong paint peeled off. So, pick wisely. For IKEA cabinets, use latex or acrylic. They stick well in 2025. Experts recommend low-VOC options. These are safer for families. I chose one from a local store. It dried fast and smelled less.
Start with tools. First, get brushes and rollers. A 2-inch brush works great. Second, buy sandpaper. Grit 220 is ideal. Third, primer is key. It helps paint adhere. My tip: In rainy Seattle, use fast-drying primer. Avoid cheap tools. They leave streaks. I tried once and regretted it. Now, I stick to quality.
Here’s a list of must-haves:
- High-quality latex paint
- Foam rollers for smooth finish
- Sandpaper (grit 150-220)
- Primer for better adhesion
- Drop cloths for protection
In Texas, heat speeds drying. But it can bubble paint. I sighed through that. What’s yours? Try testing first. I found success with patience. Bold fact: 2025 data shows proper tools reduce errors by 50%.
Preparing Your Workspace
A clean space sets success. I cleared my kitchen once. It was chaotic but fun. In Seattle’s damp air, dust was my enemy. So, I wiped everything down. Preparation prevents disasters. Start by removing items. Empty cabinets fully. Cover floors with drop cloths. This keeps paint off surfaces.
Next, ventilate well. Open windows wide. In Texas heat, fans help a lot. I used one and avoided fumes. Steps are simple. First, dust cabinets thoroughly. Second, tape edges neatly. Third, organize tools nearby. My tough time: I skipped taping and had messy lines. Now, I always prepare.
Table of workspace tips:
| Step | Tips |
|---|---|
| Clear area | Remove all items first |
| Ventilate | Use fans in hot weather |
| Protect surfaces | Cover with cloths always |
Don’t mess up like I did. What’s your challenge? I learned and grew. Try it today.
Cleaning and Repairing Cabinets
Clean cabinets before painting. I ignored this once. Grease caused paint to fail. In my home, I scrubbed hard. Use soap and water. For IKEA, mild cleaners work best. 2025 advice: Eco products remove grime without harm. Repair dents too. Fill holes with putty.
Steps to follow. First, wipe surfaces clean. Second, sand lightly after. Third, fix any damages. My story: In Seattle rain, moisture hid. I dried everything first. It saved my project. Quick fixes help a lot.
List of cleaning supplies:
- Mild soap for washing
- Putty for repairs
- Cloth for drying
In Texas, dust flies everywhere. I sighed but persisted. You too can overcome.
Sanding for a Smooth Finish
Sanding is crucial step. I skipped it once. Paint didn’t stick well. Now, I sand always. Use fine grit paper. It makes surfaces smooth. In 2025, tools like electric sanders speed things up. My tip: Wear a mask.
Simple process. First, sand gently. Second, wipe dust away. Third, check for smoothness. I remember my win. Cabinets felt perfect after.
Table of sanding grits:
| Grit Level | Use For |
|---|---|
| 150 | Initial rough sanding |
| 220 | Fine finishing touch |
Ask yourself: Ready for smooth results? I was, and it worked.
Priming the Surfaces
Primer is your friend. I learned this late. Without it, paint chipped easy. In Seattle’s humidity, primer seals well. Choose one for wood. 2025 facts: Primed surfaces last longer by 20%.
Steps ahead. First, apply primer evenly. Second, let it dry fully. Third, sand lightly after. My tough time: I rushed and regretted. Now, I wait patiently.
List of primer benefits:
- Improves paint adhesion
- Blocks stains effectively
- Extends cabinet life
In Texas sun, primer dries fast. Give it a go.
Applying the Paint
Now, the fun part. Painting brings colors alive. I felt excited in my kitchen. Use even strokes. For IKEA, thin coats work best. In 2025, water-based paints are popular.
Easy steps. First, stir paint well. Second, apply with roller. Third, do multiple coats. My story: I added two layers and smiled.
Table of paint techniques:
| Technique | Best For |
|---|---|
| Rolling | Large surfaces |
| Brushing | Edges and details |
What’s your favorite color? Try it now.
Finishes make it pop. I added sealant last. It protected my work. In rainy areas, this helps a lot. Choose matte or gloss. 2025 trends favor non-toxic options.
Quick tips. First, apply sealant. Second, let it cure. Third, clean up. I won with shiny results.
List of finishes:
- Matte for subtle look
- Gloss for shine
- Satin for balance
Don’t skip this step.
Drying and Curing Time
Patience is key here. I waited fully once. Paint dried perfect. In hot climates, it speeds up. 2025 data: Proper drying prevents cracks.
Steps to note. First, allow 24 hours. Second, test gently. Third, avoid use early. My experience: Rushing caused issues.
Table of drying times:
| Paint Type | Drying Time |
|---|---|
| Latex | 2-4 hours |
| Oil-based | 6-8 hours |
Be patient like I was.
Maintenance and Longevity
Keep your cabinets fresh. I clean mine weekly. In Seattle, mold is a foe. Use gentle cleaners. 2025 tips: Regular care extends life by years.
Simple habits. First, wipe spills fast. Second, avoid harsh chemicals. Third, touch up paint. My win: Cabinets still look new.
List of maintenance tips:
- Wipe with soft cloth
- Avoid direct sun
- Recheck seals yearly
You can maintain easily.
FAQ
Is painting IKEA cabinets worth it?
Yes, it’s worth every effort. Like I said in the first section, it saves money and boosts style. I transformed my space and loved it.
What paint is best for IKEA?
Latex paint works wonders. As mentioned in section two, it’s durable and easy. I used it and saw great results.
How long does the project take?
A weekend usually suffices. From my story in section three, proper prep helps. Don’t rush like I did once.
Can I paint without sanding?
Not really, sanding is key. I learned in section five that it ensures adhesion. Try it for better outcomes.
How to fix painting mistakes?
Sand and repaint areas. As in section seven, quick fixes save the day. I did that and smiled.
Conclusion
Painting IKEA cabinets is rewarding. I shared steps and stories. Now, your home can shine. Try these ideas today. What’s stopping you? Share your results online. Or chat with me. It’s simple and fun. Like my Seattle adventure, you’ll grow. Remember, mistakes happen. But learning makes it better. In 2025, more people are doing this. Join the trend. You got this. Feel proud of your work. Go paint and enjoy.
Think of the joy ahead. Fresh colors brighten days. I failed but bounced back. You will too. Keep it light and easy. Thanks for reading. More tips await. Let’s connect soon.
One last thing: It’s all about heart. I tried, you try. Big smiles for everyone. What’s your next project? Tell me below.