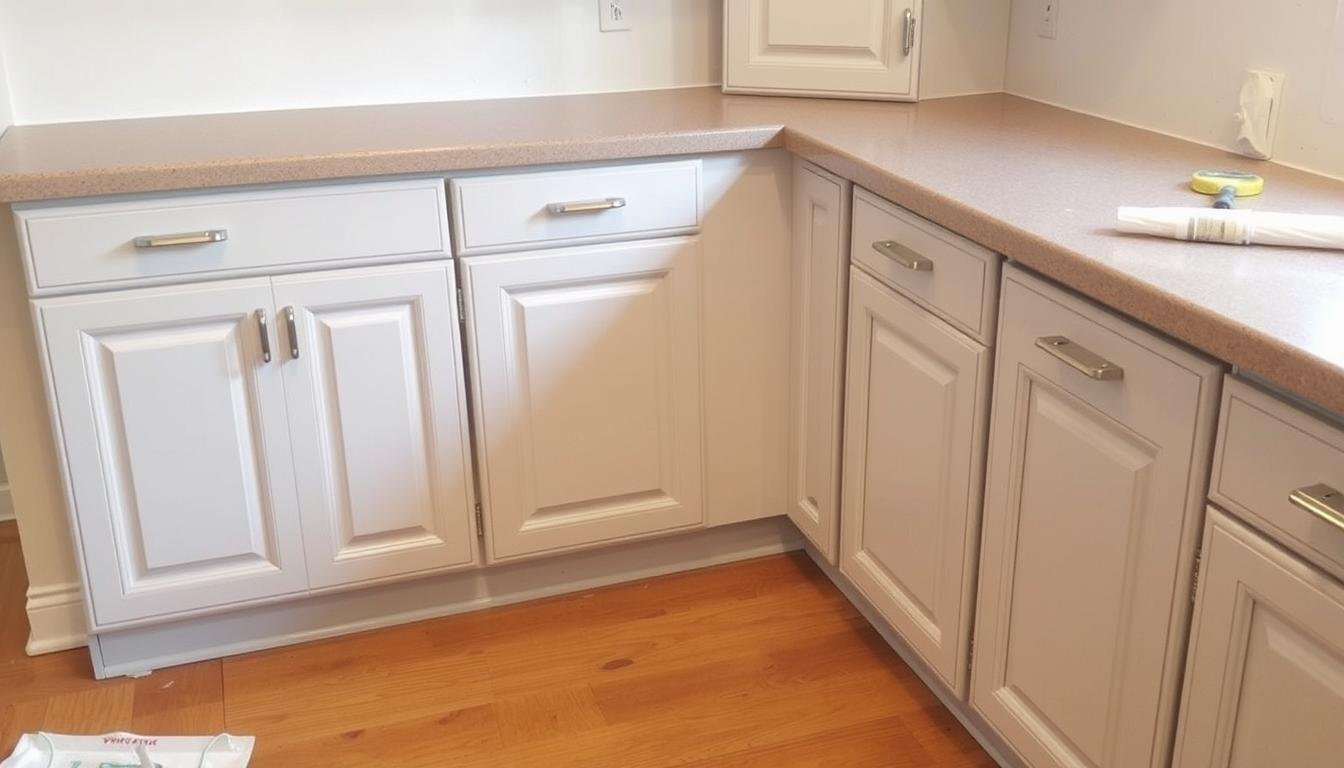
Yes, you can paint over painted cabinets. It’s a cost-effective way to update your kitchen. But, it needs careful planning and execution for a professional finish.
Before you start, check your cabinets’ condition. Learn about techniques for painting over existing paint. The right steps and materials will help you achieve a beautiful finish.
This guide will cover repainting kitchen cabinets. We’ll talk about cabinet makeovers and surface preparation. Whether you’re DIY-savvy or just want to refresh your kitchen, you’ll find the info you need here.
Introduction to Repainting Cabinets
We’ll explore cabinet repainting in this article. We’ll discuss painting over existing paint and share tips for success. By the end, you’ll be ready to tackle your own cabinet painting project.
Key Takeaways
- Painting over painted cabinets is a viable option for giving your kitchen a fresh new look.
- Assessing the current condition of your cabinets is crucial before starting your project.
- Proper surface preparation is essential for a successful repainting project.
- Understanding the factors that affect paint adhesion is vital for a long-lasting finish.
- Researching different techniques for repainting kitchen cabinets can help you achieve a professional-looking finish.
- Using the correct materials and following the right steps can ensure a beautiful, long-lasting result.
Can I Paint Over Painted Cabinets: Understanding the Basics
Updating painted cabinets is a great way to refresh your kitchen without spending a lot. First, you need to know the basics. This means figuring out what kind of paint is already on your cabinets. It could be latex, oil-based, or epoxy.
Before you start, think about how paint sticks to the surface. This includes getting the surface ready, using primer, and considering the environment. If the old paint is peeling or the surface is damaged, you might need to remove it first. But with the right steps and materials, you can make your cabinets look like new.
Types of Existing Paint Finishes
- Latex paint: water-based and easy to clean up
- Oil-based paint: durable and resistant to wear and tear
- Epoxy paint: highly durable and resistant to chemicals
Knowing the type of paint and how it affects adhesion helps you make the right choices. This way, you can get a smooth finish and have cabinets that look great for years.
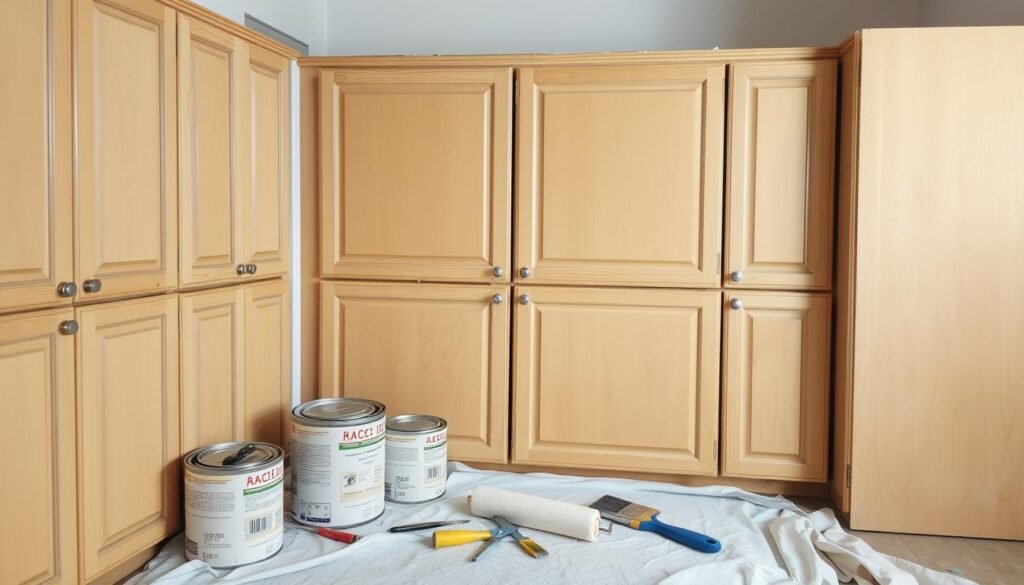
Essential Tools and Materials for Cabinet Repainting
Refinishing painted cabinets needs the right tools and materials. I start by collecting various paintbrushes, rollers, and sprayers for a smooth finish. Sandpaper is key for smoothing surfaces and bonding the new paint to the old.
For a good job, I use quality primer and paint made for painted cabinets. The paint type, like water-based or oil-based, depends on the finish and durability you want. Water-based paint is easy to use and has a low odor. Oil-based paint gives a hard, durable finish.
Working safely is important, so I wear gloves, masks, and protective eyewear. Here’s what you need to start:
- Paintbrushes and rollers
- Sandpaper and a sanding block
- Primer and paint
- Protective gear, including gloves, masks, and eyewear
With these tools and materials, you’re ready to achieve a professional finish on your cabinets.
| Tool/Material | Purpose |
|---|---|
| Paintbrushes and rollers | Applying paint and primer |
| Sandpaper and sanding block | Smoothing out surfaces |
| Primer and paint | Creating a strong bond and durable finish |
Preparing Your Work Space for Cabinet Painting
When I start painting my cabinets, I know I need to get my work space ready. It’s not just about the painting. It’s about making a safe and efficient area to work in. First, I protect the floors and countertops from spills and stains.
I use drop cloths and plastic sheets to cover these areas. This makes cleaning up easier and prevents damage. Next, I think about ventilation. Good air flow is key when painting to avoid fumes and dust. I open windows and use fans to keep the air moving.

Setting up a painting station is also important. I need a worktable, paint trays, and a place to clean. Having everything organized helps me work better and faster. This makes my cabinets look professional.
Key Considerations for a Painting Station
- A sturdy worktable to hold my cabinets and painting supplies
- Paint trays and liners to prevent paint from spilling and making a mess
- A cleaning area with soap and water to clean my tools and brushes
Preparing my work space and setting up a station makes painting easier. It lets me focus on the painting and get the look I want for my kitchen.
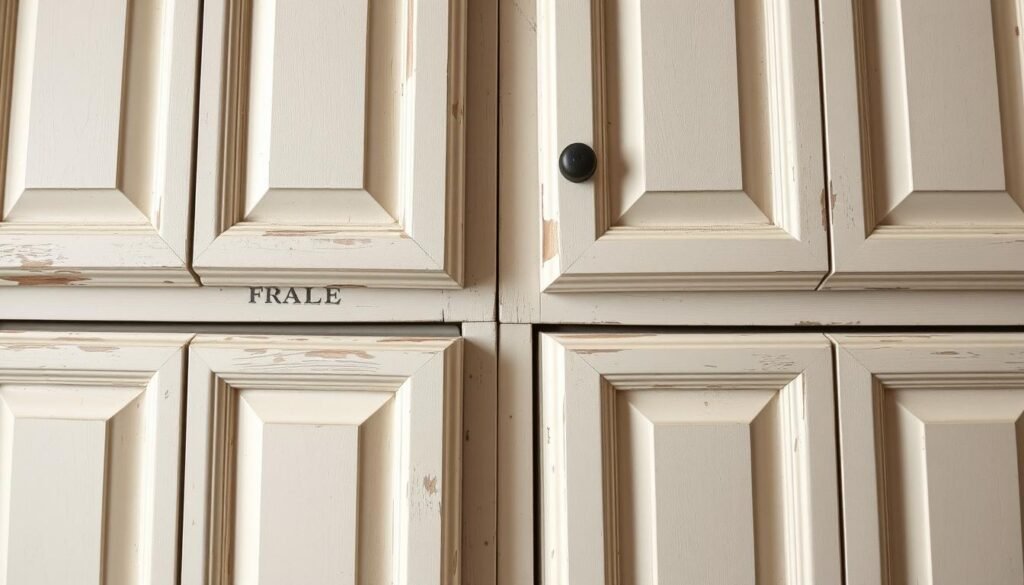
Assessing Your Cabinet’s Current Condition
To figure out the best way to paint, you need to check your cabinet’s state. Look for damage like dents, scratches, and water spots. It’s a good idea to make a list of what needs fixing. This keeps you focused and organized.
When checking your cabinets, think about these things:
- Damage: Find dents, scratches, and water spots that might need fixing before painting.
- Surface roughness: See if the surface is rough. It might need sanding for a smooth finish.
- Cleanliness: Check how dirty your cabinets are. They’ll need cleaning before painting.
Learning how to freshen up painted cabinets takes patience and detail. By carefully checking your cabinets, you’ll spot areas needing extra care. This ensures a professional finish. Start by cleaning and degreasing your cabinets to remove dirt and grime.
Assessing your cabinet’s condition is key to painting well. It helps you achieve a beautiful, lasting finish. With the right tools and knowledge, you can how to freshen up painted cabinets and make your kitchen look new.
Surface Preparation Techniques
When painting over cabinets, getting the surface right is key. Start by cleaning and degreasing the cabinets. Use soap and water to remove dirt and grease. This step is vital for a good bond between the old and new paint.
After cleaning, think about sanding. Sanding makes the surface smooth for better paint adhesion. You can hand sand small areas or use power sanding for bigger ones. The choice depends on the surface’s condition.
Cleaning and Degreasing
- Use a mixture of soap and water to wipe down the cabinets
- Remove any dirt, grime, or grease that may be present
- Use a degreaser for tough stains or grime buildup
Sanding Methods
- Hand sanding: good for small areas or delicate surfaces
- Power sanding: better suited for larger areas
- Use a fine-grit sandpaper for a smooth finish
Dealing with Damaged Areas
For damaged areas like holes or cracks, fill them first. Choose a filler that matches the surface. Sand it smooth for a flawless finish. These steps ensure your paint job looks professional.
| Surface Preparation Step | Importance |
|---|---|
| Cleaning and Degreasing | High |
| Sanding | Medium |
| Dealing with Damaged Areas | High |
Choosing the Right Paint and Primer
When repainting kitchen cabinets, picking the right paint and primer is key. I look at the paint type, whether it’s water-based or oil-based. I also consider the primer needed, based on the surface and paint type. For example, painting over existing paint requires a specific primer.
Paint sheen is also crucial. Most kitchen cabinets do well with a flat or eggshell finish. But, a semi-gloss finish is better for durability and cleaning. I think about these factors to get the look and durability I want.
- Type of paint: water-based, oil-based, or latex-based
- Primer type: universal, stain-blocking, or bonding primer
- Paint sheen: flat, eggshell, semi-gloss, or high-gloss
Choosing the right paint for cabinets is vital. These paints are made to last through daily use. They come in various finishes. By picking the right paint and primer, I get a finish that looks professional and lasts long.
By considering these points and choosing wisely, I get a beautiful and lasting finish. This improves my kitchen’s look and my home’s value.
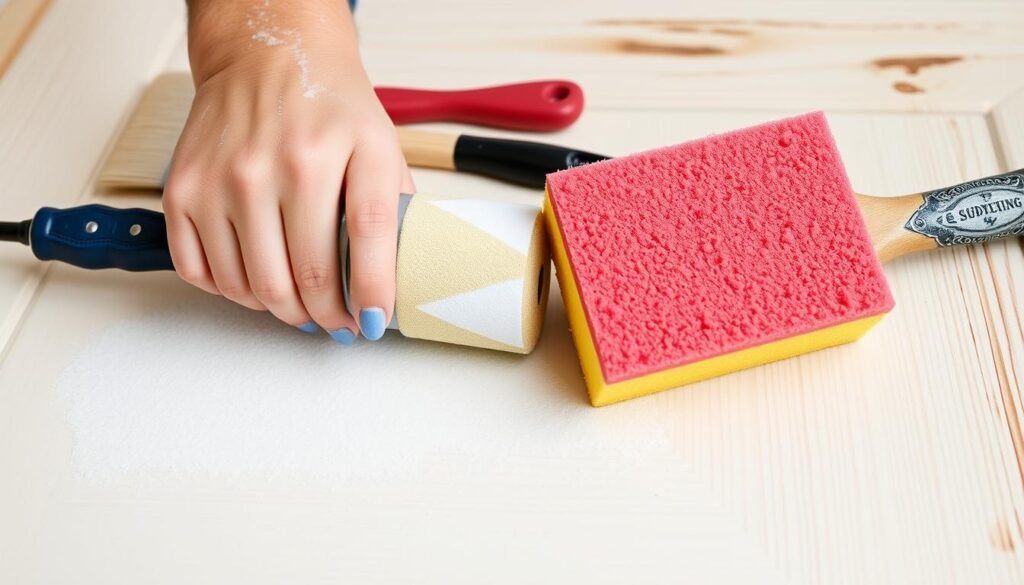
Professional Tips for Paint Application
Updating or refinishing painted cabinets requires careful paint application. Choosing the right tools and techniques is key for a smooth finish. Consider the size and complexity of your cabinets to pick between a brush, roller, or sprayer.
Brushes work well for small, detailed areas, giving you control and precision. Rollers are best for big, flat surfaces, covering them evenly and quickly. Sprayers are fast for large areas but need extra prep and cleaning.
Choosing the Right Tool
- Brush: best for small, intricate areas and detail work
- Roller: ideal for larger, flat surfaces and efficient coverage
- Sprayer: suitable for large areas, but requires additional preparation and cleanup
Proper paint layering is crucial, starting with a primer for a strong bond. Make sure to let each coat dry fully to avoid unevenness. This ensures a professional finish on your cabinets.
Paint Layering and Drying Time
By using these professional tips, you can get a beautiful, lasting finish on your cabinets. Whether updating or refinishing, your cabinets will look great.
Common Mistakes to Avoid When Painting Cabinets
Painting cabinets can be tricky. Mistakes like not preparing the surface or using the wrong paint can ruin the look. It’s key to clean, degrease, and sand the surface first. This ensures a smooth finish.
Another mistake is not letting paint dry long enough between coats. This can cause drips, unevenness, and brush strokes. Always follow the drying time instructions and apply thin coats of paint. For a fresh look, use high-quality primer and paint made for cabinets.
- Not preparing the surface properly
- Using the wrong paint or primer
- Not allowing sufficient drying time between coats
- Applying too much paint at once
Avoid these mistakes and follow the right techniques for painting cabinets. This way, you’ll get a beautiful, lasting finish that makes your kitchen or bathroom look great.
| Mistake | Consequence | Solution |
|---|---|---|
| Not preparing the surface | Uneven finish | Clean, degrease, and sand the surface |
| Using the wrong paint or primer | Peeling or flaking paint | Choose a high-quality primer and paint specifically designed for cabinets |
| Not allowing sufficient drying time | Paint drips or unevenness | Follow the manufacturer’s instructions for drying time |
Hardware Considerations During Repainting
When repainting cabinets, think about the hardware like knobs, handles, and hinges. I take out and keep the hardware safe before painting. This step is key for a smooth painting process, especially with the best paint.
To remove hardware, I use tools like screwdrivers and wrenches. It’s also vital to label and organize the hardware. This makes it easy to put back after painting. By doing this, I can focus on getting a professional finish with the best paint.
Removing and Storing Hardware
- Remove all knobs, handles, and hinges from the cabinets
- Label and organize the removed hardware
- Store the hardware in a safe and secure location
Updating Hardware Options
After repainting, I might change the hardware to fit the new look. This could mean getting new hardware or refinishing the old to match the new color. Updating hardware gives my cabinets a fresh, modern look.
By following these steps and using the best paint, I get a professional finish. Whether it’s removing and storing hardware or updating it, I know my cabinets will look new again.
| Hardware Type | Removal Tool | Storage Location |
|---|---|---|
| Knobs | Screwdriver | Labelled container |
| Handles | Wrench | Secure drawer |
| Hinges | Pliers | Safe box |
Achieving a Professional-Looking Finish
Repainting kitchen cabinets needs a professional finish. I focus on the steps to get a smooth finish. First, I make sure the surface is ready by sanding and filling any flaws.
This step takes time but is key for a top-notch finish. I sand and fill to smooth the surface. Then, I apply the final paint coat. Choosing the right paint and primer is crucial for a durable finish.
Smoothing Techniques
To get a smooth finish, I use several techniques. These include:
- Sanding: I use fine-grit sandpaper to smooth the cabinets.
- Filling: I fill imperfections or holes with a filler.
- Priming: I apply primer for a strong paint bond.
By following these steps and using the right techniques, I get a professional finish. Whether you’re painting over old cabinets or starting fresh, focus on detail and take your time.
Final Coat Applications
The final paint coat is crucial for a professional look. I use high-quality paint and apply it in thin, even layers. I let each layer dry before adding the next. This ensures a long-lasting, smooth finish.
| Technique | Description |
|---|---|
| Sanding | Using a fine-grit sandpaper to smooth out the surface of the cabinets. |
| Filling | Using a filler to fill in any imperfections or holes in the surface of the cabinets. |
| Priming | Applying a primer to the surface of the cabinets to create a strong bond between the paint and the surface. |
Curing and Care Instructions
After painting, it’s key to follow the right steps to keep the finish looking good. This means letting the paint dry and harden fully. This can take a few days to a week, depending on the paint and the environment.
To dry the paint, keep the cabinets in a place with good air flow. Make sure they’re away from sunlight and moisture. Also, don’t put anything on the cabinets or use them too much during this time. For updating painted cabinets, always check the maker’s guide for drying times and conditions.
Here are some tips for caring for your newly painted cabinets:
- Avoid using harsh chemicals or abrasive cleaners, as they can damage the paint finish.
- Use a soft, dry cloth to wipe down the cabinets regularly.
- Avoid exposing the cabinets to extreme temperatures or humidity levels.
By following these steps, you can make your painted cabinets last longer. Always use the right cleaning products and let the paint dry properly. This way, your cabinets will stay in great shape when painting cabinets over existing paint or updating painted cabinets.
Maintaining Your Newly Painted Cabinets
To keep your cabinets looking great, follow some simple care tips. When refinishing already painted cabinets, think about the painting techniques for cabinets. This ensures a smooth and lasting finish.
Every day, take care of your cabinets. Wipe them down with a soft cloth. Stay away from harsh chemicals. For deeper cleaning, a mild soap solution works well.
Daily Care Tips
- Wipe down cabinets with a soft cloth after each use
- Avoid using harsh chemicals or abrasive cleaners
- Use a mild soap solution for more extensive cleaning
Long-term Maintenance
For long-term care, fix scratches and scuffs right away. Use touch-up paint that matches the original color. Also, think about refinishing already painted cabinets every 5-7 years. This keeps them looking good and protects the surface.
By following these care tips and using the right painting techniques for cabinets, your cabinets will stay beautiful for years.
| Maintenance Task | Frequency |
|---|---|
| Daily wiping down | After each use |
| Touch-up paint | As needed |
| Refinishing | Every 5-7 years |
Conclusion
We’ve covered how to paint over painted cabinets, and I’m sure you’re ready to start. You now know the basics, what tools and materials to use, and how to do it step by step. This will help you give your kitchen cabinets a new look and update your home.
If you want to freshen up your painted cabinets or find the best paint for painting over cabinets, this guide has you covered. It shows you how to get professional results. Just remember, with patience, detail, and effort, you can make your cabinets look amazing and show off your style.
So, get ready to start this DIY project. With the right steps and a little practice, your cabinets will look stunning. Enjoy the process and let your creativity shine as you make your kitchen look new again.
FAQ
What factors affect the adhesion of new paint on my cabinets?
Several things can affect paint adhesion. These include the type of paint finish, surface prep, primer use, and environmental conditions. Knowing these can help your painting project succeed.
When should I consider stripping the existing paint instead of painting over it?
Strip the paint if it's damaged, flaking, or in bad shape. This ensures a smooth surface for new paint.
What are the essential tools and materials I’ll need for cabinet repainting?
You'll need paintbrushes, rollers, sandpaper, primer, paint, and drop cloths. Also, painter's tape and safety gear like gloves and masks are important.
How do I prepare my work space for cabinet painting?
Protect areas with drop cloths and plastic sheets. Ensure good ventilation and set up a painting station with a worktable and paint trays.
How do I assess the current condition of my cabinets before painting?
Inspect your cabinets for damage like dents, scratches, or water spots. Fix holes, sand rough spots, and clean the cabinets for a smooth paint job.
What surface preparation techniques should I use before painting?
Clean and degrease the cabinets first. Then, sand the surfaces for a smooth finish. Fix any damaged areas by filling holes and cracks.
How do I choose the right paint and primer for my cabinets?
Choose paint and primer based on the surface and desired finish. Water-based or oil-based paints with a compatible primer are usually best.
What are some professional tips for applying the paint to my cabinets?
Painting cabinets needs skill and patience. Use a brush, roller, or sprayer. Focus on layering paint and letting it dry fully between coats.
What common mistakes should I avoid when painting my cabinets?
Avoid not preparing the surface well, using the wrong paint or primer, and not letting paint dry enough. Fixing these mistakes can lead to a professional finish.
How do I handle the hardware during the repainting process?
Remove and store hardware like knobs and hinges to avoid damage. You might also want to update the hardware to match the new paint.
How can I achieve a professional-looking finish on my painted cabinets?
For a professional finish, pay attention to detail. Use smoothing techniques, apply paint correctly, and let it dry fully between coats.
What are the curing and care instructions for my newly painted cabinets?
After painting, follow the curing instructions. Also, keep up with cleaning and maintenance to protect the finish.
How do I maintain my newly painted cabinets in the long run?
To keep your cabinets looking good, clean them with a soft cloth daily. Address any maintenance needs, like touching up scratches or refinishing, as needed.