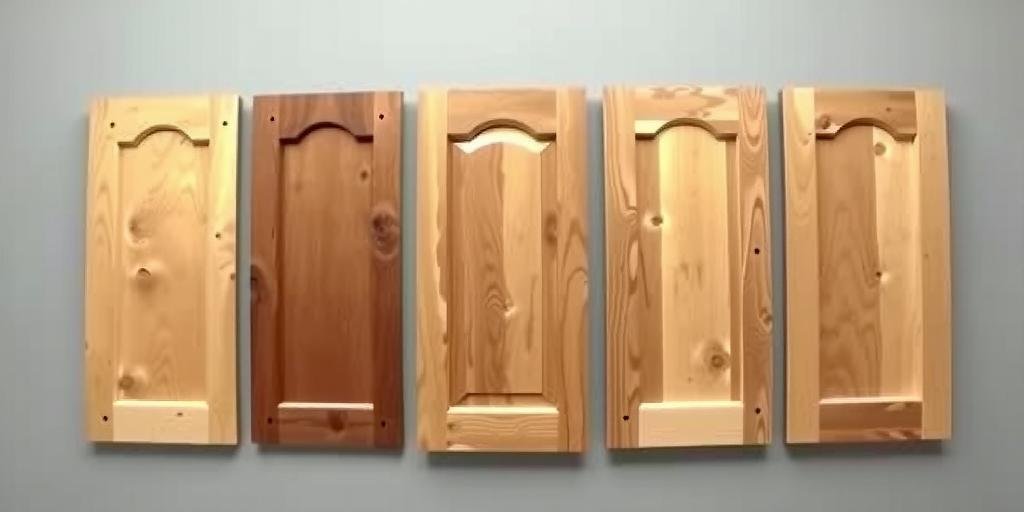
Why Making Shaker Cabinet Doors from Old Flat Fronts Might Just Save Your Kitchen—and Your Sanity
Ever stared at those dated, flat-front cabinets—all yellowed from the sweaty Texas heat or the damp chill of a Seattle winter—and thought, “Man, this place looks like grandma’s basement”? I remember that gut-punch feeling walking into my kitchen at 3 a.m., bleary-eyed after another sleepless night, knowing those sad, plain doors were killing my vibe and any dream I had of a fresh start. But the price tag on new custom Shaker doors? Might as well buy a second house. That’s when desperation—and a little stubborn grit—kicked in. I started clawing through online hacks, half-baked advice, and my own pile of screw-ups to figure out how to turn those flat fronts into gorgeous, crisp Shaker cabinets without torching my wallet or pride.
What nobody tells you is this trick isn’t just about saving cash. It’s about reclaiming your space, making something dead come alive again. Like that first deep breath after a rainstorm breaks a Texas drought, or the first cup of hot coffee on a foggy Seattle morning. This isn’t just sanding and gluing. It’s fighting back against the mess that life throws on your dreams. And yeah, I’ve botched some doors so bad you’d think a raccoon built them, but I’ve also found shortcuts and secrets—like the perfect trim width or the glue that won’t quit—that I swear will save you days of cussing and regret. This guide is my bruises turned into your cheat sheet. If you’re tired of feeling stuck with ugly, worn-down cabinets, or scared you’ll screw up and have to live with worse, stick with me. Because by the end, you’ll have the guts, the steps, and the fire to walk into that kitchen and finally say, “Hell yes, I built this.”
Gathering Your Tools and Materials: The Real-World Shopping List That Won’t Break You
When I first tackled this, I blew two paychecks on stuff I never used—fancy clamps, overpriced paints, useless gadgets. Save yourself the heartbreak. Here’s the bare-knuckle list you actually need:
- 1/4” thick plywood strips (usually poplar or MDF, 2” wide works best)
- Wood glue—skip the cheap stuff, trust me
- Clamps, painter’s tape (or both if you’re stubborn like me)
- Miter saw or hand saw for crisp cuts
- Sandpaper, 120 and 220 grit
- Wood filler for hiding those little sins
- Primer and paint (2025’s best are zero-VOC and self-leveling)
- Drill, screws, hinges if re-mounting
Think of this as your survival kit. When I cheaped out on glue, my trim popped off faster than you can say “rookie mistake.” When I tried cutting without a sharp blade, I ended up with jagged edges that haunted me for weeks. Here’s my quick-hit truth: quality tools save days of sanding and swearing. And in 2025, prices have dipped on cordless gear, so no excuses. Grab your list, double-check it, and don’t overthink—because half this battle is just starting with the right stuff.
| Item | Must-Have? | My Take |
|---|---|---|
| Plywood strips | Yes | Perfect width = pro look |
| Power saw | Optional | Saves time, but hand saw works |
| Fancy clamps | No | Tape does the trick |
| High-end paint | Yes | Levels better, no brush marks |
If you’re sweating the cost, remember: new cabinets run five figures easy. This stash? Under $250. And the pride? Priceless.
Measuring and Planning: Don’t Just Wing It—Here’s How to Avoid the Rookie Screw-Ups
First time, I eyeballed it. Big mistake. My doors looked like a toddler’s art project—crooked trim, weird gaps. So here’s my no-nonsense, war-tested advice: measure twice, cut once. Grab that tape measure like your life depends on it. Map out a 2” border around each cabinet door—top, bottom, and sides. Why 2 inches? It’s the sweet spot: bold enough to pop, slim enough to look custom.
Sketch your layout on the door with pencil first. Stand back. Imagine it finished. If it looks off—even a hair—erase and redraw. Trust me, a tiny shift now saves hours down the road. And if you’ve got uneven doors (thanks to old house charm), adjust each one. No shame in that game. It’s about making it look right, not perfect.
Here’s the kicker: account for hinge placement. I once glued trim right where the hinge needed to sit. Had to rip it off and start over. So check your hardware layout before you commit. And if you’re reusing old hinges, make sure they clear the new trim. Sometimes a little sanding or shaving is all it takes.
This step is your blueprint. Skimp here, and the whole thing wobbles like a rickety Seattle pier in a storm. Nail it, and you’re halfway home. So slow down, double-check, and picture how damn good it’ll look when done. Because this is where you decide if your kitchen’s gonna sing—or sag.
Cutting the Trim: How to Get Crisp, Clean Lines Without Losing a Finger (or Your Mind)
I’ve had blades bind, plywood splinter, and on one sweaty Texas afternoon, nearly took a chunk out of my thumb. Don’t be me. Start by securing your strips tight—use clamps if you’ve got ‘em, or a buddy’s foot if you don’t care about friendship. Mark each cut with a sharp pencil, then double-check those marks.
Use a miter saw if you can—it’ll give you buttery smooth cuts every time. But if you’re working with a hand saw, go slow, steady, and let the blade do the work. Rushing just means splinters and crooked cuts. Sand the edges smooth after each slice; this tiny step makes the difference between pro and hack.
For corners, you can do simple butt joints (where one piece butts into the other) or fancy 45-degree miters. I’ve done both. Miters look slick, but take practice. If you’re new, go with butt joints, fill any tiny gaps later, and no one will be the wiser. Here’s the secret sauce: label each piece as you cut. Saves you from the nightmare of mismatched parts.
Cutting’s where most folks lose steam. But think of it like prepping a meal—slow and steady gets you steak, rushing gives you burnt toast. So breathe, take your time, and imagine the payoff: those crisp shaker lines that make your kitchen look brand new. And if you mess one up? Welcome to the club. Just cut another. Nobody’s grading you but yourself.
Attaching the Trim: From Shaky Hands to Solid Style (And the Glue Trick Nobody Told You)
This is where the magic—and the mess—happens. I used to slap on glue, throw on clamps, and hope for the best. Result? Popped trim, glue blobs everywhere. Here’s the real deal: run a thin, even bead of wood glue along the back of each strip. Don’t drown it—too much oozes out and makes a mess. Lay down the strip, press firm, then use painter’s tape to hold it tight while it dries. No fancy clamps needed if you’re smart with tape.
Work one side at a time. Why? Because doing all four at once is like herding cats in a thunderstorm—stuff slips and slides, and it’ll look sloppy. Let each piece set a few minutes before moving on. And if glue squeezes out? Wipe it now, not later. Dried glue is a nightmare to sand.
Here’s what saved my bacon once: after taping, I flipped the door over and stacked a couple books on it. That extra pressure helps the bond set strong. Wait at least an hour—overnight’s better. Then peel off the tape and admire your work. If you see tiny gaps, no shame—grab some wood filler and patch them up. Once dry, sand everything smooth so it looks like one solid piece.
Patience here pays off. Rush it, and you get wobbly trim that’ll haunt you every time you open a cabinet. Take your time, do it right, and you’ll have doors that look like a pro made them—because, in a way, you just did.
Sanding and Smoothing: The Secret to That Soft-as-Butter Finish
Confession time: I used to hate sanding. Felt pointless. But then I saw the difference—smooth, pro-looking lines that make paint glide on like silk. Start with 120 grit to knock down any rough spots or glue blobs. Then move to 220 grit for that buttery feel. Don’t rush. Feel every inch with your hand. If it snags, keep sanding.
Focus on the trim edges and the seam where trim meets door. Your goal? Make it look like a single, solid panel, not a patch job. Sometimes I cheat and run a tiny bead of wood filler along the seam, then sand it flush. Adds about five minutes, but the payoff is huge.
Dust everything off with a tack cloth or damp rag. Skipping this step is like cooking on a dirty grill—ruins the whole meal. Fresh reports from 2025 say the new self-leveling paints work best on super-clean, dust-free surfaces, so don’t skimp here.
And here’s a tip from one of my biggest screw-ups: I once painted over hidden glue smears. Looked fine wet, but dried like a horror show—paint wouldn’t stick, shiny patches everywhere. So always double-check for residue. Sanding’s boring, sure, but it’s what separates the “meh” from the “wow.”
Priming and Painting: Making Your New Shaker Doors Pop (Without Brush Marks or Regrets)
Here’s where you turn all that sweat into something stunning. Start with a high-quality primer. It seals the wood, hides imperfections, and gives paint something to grip. I learned the hard way: skip primer, and you get blotchy, peeling paint within months. No thanks. Roll or brush it on, then let it dry fully—usually a couple hours.
Next, grab a zero-VOC, self-leveling paint—2025’s best have come a long way and won’t gas you out. Apply thin, even coats with a foam roller or quality brush. Don’t slop it on; thick coats invite drips and brush marks. Two coats usually do it, three if you’re picky like me.
Between coats, do a light sand with 220 grit. Just a quick pass to knock down bumps. Wipe off dust, then hit it again. This layering gives you that glass-smooth finish pros charge thousands for. And if you spot a run or drip? Sand it flat, repaint. No shortcuts here.
Painting’s the home stretch. Take your time, crank some tunes, and picture those crisp Shaker lines waking up your whole kitchen. Because when that last coat dries, and you peel off the tape, you’re gonna smile so big you forget all the sweat it took to get here.
Reinstalling Doors and Hardware: The Final Lap That Makes or Breaks Your Whole Project
This part sounds easy, but I’ve botched it plenty. Like that time I hung a door crooked and had to stare at it every morning over coffee. So here’s my save-you-some-grief plan: start by labeling each door and matching hinge when you took them down. If you didn’t, no worries—just take your time fitting them back.
Attach hinges loosely first, so you can adjust. Check that the gap between doors—called the reveal—is even. Uneven reveals scream “DIY fail.” Shim with cardboard or adjust screws until it’s right. Then tighten everything down.
If you’re upgrading pulls or knobs, now’s the moment. Measure carefully, drill clean holes, and screw them in tight. New hardware is like new shoes—it finishes the look. And if you’re feeling bold, add soft-close hinges; 2025’s models are dirt cheap and worth every penny.
Final step: step back, squint a little, and admire your work. Open and close every door. Listen for clicks, check for rubs. This is your victory lap. And if something’s off? Tweak it now, not six months from now when you’re ready to scream. Because once everything hangs right, you’ll feel like a million bucks—and nobody has to know it cost way less.
Cost Breakdown and Time Commitment: The Real Price of Doing It Yourself in 2025
Let’s get real—money talks. So here’s what I shelled out last round, and what you can expect in 2025:
| Item | 2025 Average Cost | My Experience |
|---|---|---|
| Plywood strips | $50 | Poplar, smooth finish |
| Glue, filler, sandpaper | $30 | Don’t cheap out |
| Paint + primer | $70 | Worth every penny |
| Hardware (optional) | $50 | New knobs, soft-close hinges |
| Total | $200 | Saved thousands |
Time-wise, plan on a weekend. Sanding and drying take the longest, so don’t rush. I’ve done it in two long days, but three is more sane. And that’s still way faster than waiting six weeks for custom doors.
Bottom line: for about $200, you get a kitchen facelift. Compare that to $5,000+ for new Shaker cabinets, and the choice is clear. Plus, you get bragging rights—and nobody can put a price on that.
Common Mistakes to Dodge: What I Screwed Up So You Don’t Have To
I’ve made a pile of bonehead moves. Here are the biggies—and how to avoid ‘em:
- Skipping primer: Paint peels and looks patchy. Always prime.
- Using too much glue: Oozes out, leaves bumps. Thin bead only.
- Bad measurements: Leads to crooked trim. Measure twice.
- Not sanding enough: Shows seams, rough edges. Sand smooth.
- Rushing dry times: Paint or glue fails. Be patient.
My worst? Slapping on trim crooked, then painting over it hoping nobody’d notice. Spoiler: everyone noticed. Had to rip it off, sand the door raw, and start over. Cost me a day and a lot of pride. So if you spot a mistake early, fix it then. Saves way more pain later.
Remember, perfect is the enemy of done. Aim for solid, clean work—not showroom flawless. This is about making your space yours, not impressing HGTV. So laugh off the flubs, learn from ‘em, and keep moving forward.
Tips, Tricks, and Hacks for a Pro Look (Without Paying Pro Prices)
Over the years, I’ve picked up a few nuggets that make life easier:
- Use painter’s tape as a clamp: Cheap, easy, no dent marks
- Lightly round trim edges before painting: Looks more polished
- Label pieces as you cut: Saves puzzle headaches later
- Keep a wet rag handy: Wipe glue drips fast
- Use a foam roller for paint: Fewer brush marks
One secret weapon? A tiny artist brush for touch-ups. Saved my butt a dozen times. Also, don’t be afraid to mix paints or finishes. In 2025, two-tone kitchens are hot—think bold navy lowers with crisp white uppers. Adds custom flair with zero extra cash.
And if you’re stuck? Step back, walk away, grab a cold drink. Fresh eyes fix more problems than fancy tools. Because sometimes, the best trick is just giving yourself grace to figure it out.
FAQ: Your Burning Questions About Making Shaker Doors from Flat Fronts
How long does the whole process take?
Plan on a weekend—two to three days. Dry times are the biggest holdup. Remember when I said patience pays? This is where it counts.
Can I use MDF strips instead of real wood?
Absolutely. MDF is smooth, cheap, and easy to work with. Just be gentle sanding edges—they dent easy. It’s what I used on my last redo, and it turned out great.
Do I have to remove the doors first?
You can work in place, but I highly recommend removing them. Easier to clamp, cut, and paint flat. Plus, you avoid drips and mess.
What paint finish works best?
Satin or semi-gloss. They’re durable, easy to clean, and hide minor flaws. Flat paint looks chalky and shows fingerprints.
What if I mess up a cut or placement?
Welcome to the club! Sand, fill, recut, or replace the trim. Remember when I said nobody’s grading you but you? Fix it now, and move on.
Conclusion: Why This Beats Buying New—and Why You’ll Thank Yourself Later
So here’s the raw truth: transforming flat-fronts into Shaker perfection isn’t just a cheap fix—it’s a full-on rebellion against settling for less. You’re taking the scraps life handed you and building something you can be damn proud of. Like finally patching that leaky Seattle roof or beating back a Texas weed jungle, it’s a fight worth winning. Because every time you walk into that kitchen, you’ll see your grit, sweat, and stubborn hope shining back. Not some factory-perfect, soulless slab—but a story you built with your own hands.
So here’s what I want: tell me about your mess. Your wins, your screw-ups, your big dreams. Drop it in the comments, pass this along to anyone stuck with ugly cabinets, or just come back for more of my hard-won lessons. Because the only real mistake is thinking you can’t do it. And if an old fool like me can pull this off—with shaky hands and a pile of busted boards—so the hell can you.
Looking back, every cut, every splinter, every midnight second-guess was worth it. I remember standing in that kitchen, paint still tacky, sweat on my neck, thinking, “I did this. I saved my space, my wallet, maybe even my sanity.” And you can too. Don’t wait another year hating what you see. Grab those tools, face those fears, and build something better. Because sometimes, the best way to fix what’s broken is to get your hands dirty and start now.