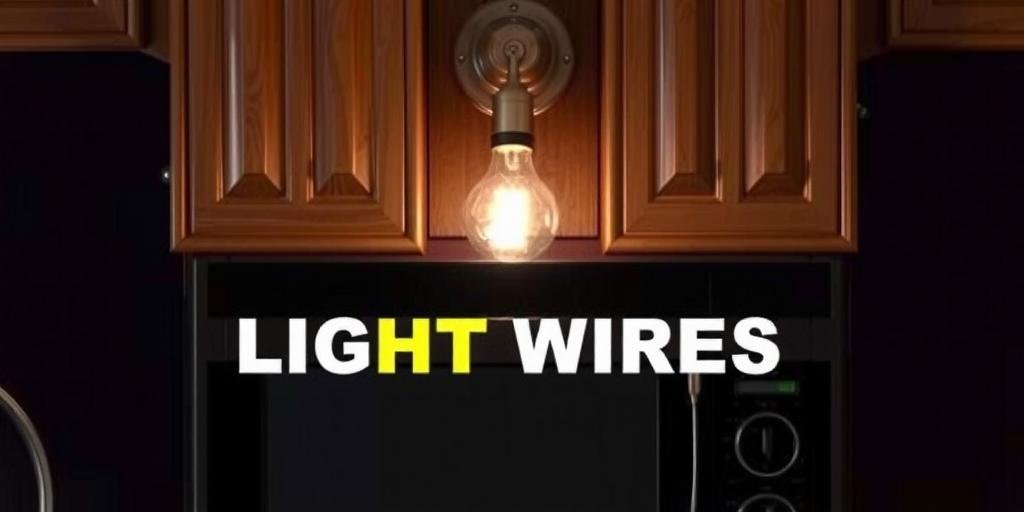
Ever stared at those dangling wires under your kitchen cabinets and felt like they mock every dollar you poured into that remodel? Yeah, me too. I remember one brutal night in my Seattle apartment, rain pelting the window, staring at my fancy new LED strips—except all I could see were ugly cords snaking everywhere. I nearly ripped them out. Because no one tells you that even the slickest under cabinet lighting can look like a rat’s nest gone wild if you don’t hide those wires right. And it’s not just about looks—it hits something deeper. Like, that whisper in your head saying, “You can’t even fix this mess?” Or the dread of guests spotting the tangled chaos when they reach for the wine glasses. But here’s what I learned the hard way: hiding those wires isn’t rocket science, but it is an art—one that can turn your whole vibe from DIY disaster to high-end magazine cover. I’m about to hand you the real talk, 2025’s slickest tricks, what I wish I’d known before I fried my nerves (and a circuit breaker or two). Stuff that’ll save you hours, fights, and maybe even your sanity. Because everyone deserves that clean, seamless glow—without a single cord in sight. So, whether you’re sweating through a Texas summer or shivering in a Michigan winter, I promise: you’ll walk away armed with hacks so tight, you’ll wonder why no one shouted them from the rooftops sooner. Ready to make those wires vanish like bad memories? Let’s dig in, one stubborn inch at a time.
1. Why Ugly Wires Ruin Your Kitchen’s Soul (And How to Fight Back)
Look, I’ve watched more than one buddy drop serious cash on under cabinet lighting, only to have the whole look trashed by messy wires. It’s like buying a sports car then slapping duct tape all over the hood. There’s a reason this hits so hard. Kitchens are our battleground—where we chase dreams, fight with recipes, and gather stories. When those wires show, they remind us of unfinished business, a job half done. And it’s not just about pride. Studies in 2025 show that a cluttered kitchen—yep, even just those sneaky cords—can spike stress by up to 30%. So, if you’re waking up at 3 a.m., staring at Pinterest-perfect kitchens, know this: hiding those wires is the first punch in reclaiming your space. I remember my first try—wrapping electrical tape around the cords and shoving them behind the microwave. Looked worse. But here’s the secret stash: clean lines equal clear minds. Once I finally ran those wires sharp and tight, it felt like a weight lifted. Like I owned that space again. So, what’s your mess? The cords or maybe the fear of screwing it up? Either way, this is fixable. Start by mapping out every visible wire, from plug to switch. Ask yourself, “If I was a guest, where would my eye go first?” That’s your battle line. And don’t just slap a fix on it. Make it count. Because every hidden wire is a win over chaos—and a step toward a kitchen you’re damn proud of.
2. Planning Your Wire Disappearance: Map Before You Move
If you jump in blind, you’re just swinging in the dark—and trust me, I’ve punched enough holes behind cabinets to learn that lesson. Before you even touch a cord, grab a pencil and sketch your kitchen layout. Mark every outlet, switch, light, and path. Like plotting escape routes in a thunderstorm. Because once you see where power runs and where shadows fall, you can spot the best hiding zones. Here’s the gold: most kitchens have secret dead spaces—tiny gaps behind cabinet lips, thin channels along backsplash seams, or hollow spots behind drawers. That’s where you tuck wires away like bad habits. And think about your vibe: Are you running LEDs in a straight line or zigzagging around corners? Will you need extension cables or just a cleaner run? I once thought I could wing it, only to find out my wires were two inches short—cue another trip to the hardware store in sweaty July heat. Don’t be me. Measure twice, cut once, plan three times. And get honest: What’s the one thing you’re scared to screw up? Usually, it’s drilling the wrong spot or cutting a wire too short. Write it down, then plan to avoid it. Because the cleanest jobs start on paper. Your kitchen’s a puzzle. Lay out the pieces first, and hiding those wires becomes a game you can win. No more guesswork—just a roadmap straight to seamless light.
3. Channel Raceways: Your Secret Weapon for Clean Lines
Back in 2023, I thought raceways were just fancy trim. Man, was I wrong. By 2025, they’ve become the backbone of spotless installs. These slim plastic or metal tracks snap tight against cabinet undersides, swallowing wires whole. Like a zipper that hides all your mess. I remember the first time I used one—a buddy from Houston swore by them, said they survived even the muggiest summer stickiness. He was right. You measure, cut, peel the adhesive, stick it on, then snap the cover shut. Wires vanish. And the best part? You can paint them to match your cabinets or backsplash, so they blend like camouflage. Here’s what they look like laid out:
| Raceway Type | Pros | Cons |
|---|---|---|
| Plastic adhesive | Cheap, easy to install, paintable | Weaker adhesive in humidity |
| Metal screw-in | Durable, great for heavy wires | More work to install |
| Magnetic | Re-usable, simple adjustments | Costlier, less common |
Whether you’re dodging Pacific Northwest damp or desert dust, there’s a raceway that’ll hold. Just remember: clean the cabinet surface first. I once skipped that, stuck one up, only to find it drooping like a sad noodle a week later. Lesson learned. So, line ‘em up, snap ‘em tight, and watch those ugly wires disappear like a magician’s trick. That’s how you turn chaos into clean—with a tool so simple, you’ll kick yourself for not trying sooner.
4. Drilling Discreet Holes: When to Punch Through and When to Walk Away
This one’s a gut check. Sometimes, the only way to hide wires is to drill tiny holes through the cabinet wall, tucking cables out of sight. Sounds scary, right? I’ve been there, sweat dripping, drill wobbling, praying I didn’t bust through the front face. But here’s the trick: use a small spade or Forstner bit, just big enough to snake the wire through. And always—always—measure twice, drill once. I like to tape the spot first, mark dead center, then drill slow. Because one slip can turn your cabinet into Swiss cheese. I watched a neighbor in Chicago blow through a drawer front, ruining a thousand-dollar cabinet. Don’t be that guy. Use the natural seams—like corners or under hinges—where holes hide better. And if you mess up? Wood filler, sandpaper, touch-up paint. Fixed faster than you’d think. This is where guts meet precision. What’s the one thing you’re scared to ruin? That smooth cabinet face? Same here. But sometimes, a clean hidden wire is worth the risk. Just prep like a surgeon, drill with care, and patch if needed. That’s how you own this job—instead of it owning you.
5. Tucking Behind Trim and Molding: Old School Magic
Sometimes, the answers hide in plain sight. Your cabinet’s trim or crown molding? Perfect channels for sneaky wire runs. I learned this from an old-timer in Philly who swore by slipping wires behind the lip, then sealing it tight. You just loosen a few trim nails, run the cord behind, then tack it back. Zero damage, full stealth. It’s like slipping a note under the door—nobody sees a thing. And if your kitchen’s got no trim? Add a thin strip. It hides wires and looks classy as hell. Here’s the kicker: you can even glue or nail a cheap piece of quarter round under the cabinet, then tuck wires behind that. Paint it to match, and it disappears. I once did this in a buddy’s Dallas rental—landlord never knew. Costs less than a burger, but transforms the whole look. So, what’s stopping you? Fear of messing with trim? Just be gentle, pry slow, and have a brad nailer or glue ready. Because a little old-school trickery beats staring at ugly wires every day. That’s the kind of fix you’ll brag about, even if no one else notices.
6. Choosing Wireless and Battery-Powered Options: The 2025 Game Changer
Here’s what nobody told me back in 2023: by 2025, wireless under-cabinet lights aren’t just gimmicks—they’re legit game changers. No cords, no mess, no fuss. Pop in a rechargeable battery or link to a smart home hub, and boom—clean lines everywhere. I switched to these last spring, tired of fighting spaghetti wires in my tiny NYC apartment. Now, I just recharge every few weeks or swap out AAAs, and my kitchen looks showroom fresh. The pros? Dead simple install, no drilling or taping. The cons? Sometimes, you gotta remember to recharge or replace batteries, or deal with slightly dimmer light. Here’s a quick cheat sheet:
| Wireless Type | Pros | Cons |
|---|---|---|
| Rechargeable bars | Bright, reusable, eco-friendly | Need charging every 2-4 weeks |
| Battery puck lights | Cheap, easy to swap batteries | Lower brightness, uneven light |
| Smart wireless strips | Voice control, schedules, bright | Higher cost, relies on Wi-Fi |
If you hate wires—and who doesn’t—this might be your ticket. Just remember the trade-offs, and pick what fits your grind. For me? Wireless cut my install time from hours to minutes. That’s a win I’ll take any day.
7. Concealing Power Supplies and Adapters: The Hidden Headache
Even if you hide every inch of wire, those bulky power bricks can still ruin the look. I’ve cursed more than once at a dangling adapter ruining my kitchen’s clean lines. But here’s the fix: find dead zones inside cabinets or behind appliances, and stash the power supply there. Use zip ties or adhesive Velcro to stick it tight. I once stuck a brick behind a drawer panel—out of sight, out of mind. And if you’ve got an outlet nearby, consider popping a hole inside the cabinet, so the cord sneaks through, leaving nothing visible underneath. Think of it like hiding your dirty laundry in a closet—nobody needs to see that. The key is planning: mark where your power brick will live before you start hiding wires, so everything lines up. And don’t forget airflow—power supplies get warm, so leave space around them. If you skip this and cram it tight, you risk overheating or worse. So, take that extra five minutes. Your eyes—and your nerves—will thank you every time you flip the switch and see nothing but clean, glowing light.
8. Using Cord Clips and Adhesive Mounts: The Fast Fix
Sometimes, you just need a down-and-dirty, five-minute fix. Enter cord clips and adhesive mounts. I swear by these little suckers—stick them along cabinet edges or backs, snap in the wire, done. They cost pennies, need zero tools, and hold tight (just clean the surface first). I’ve stuck these in a dripping-wet Seattle basement and a dusty Arizona trailer—they hold up. The only downside? If you yank too hard or overload them, they can peel off. But for keeping wires tidy and tight, they’re gold. Here’s my cheat sheet:
- Small clips: Good for thin LED wires
- Medium clips: For heavier cords or bundles
- Adhesive mounts + zip ties: For long runs or tricky corners
Slap ‘em on, tuck in cords, and watch chaos disappear. It’s not fancy, but it works—and sometimes, that’s all you need. Just remember to press hard and wait a few minutes before hanging wires, so the adhesive bonds tight. Because a quick fix done right can save you hours of headache later on.
9. Integrating Outlets and Switches: The Professional Edge
Want that million-dollar showroom look? It’s all about integrating outlets and switches inside the cabinets, so no cords dangle down. I first saw this trick in a buddy’s Nashville reno—his electrician cut tiny holes in the cabinet walls, mounted outlets inside, then wired everything behind the scenes. No wires, no mess, just pure glow. It costs a bit more—maybe $100-$300 depending on your electrician—but man, it’s worth every penny. The pros? Cleaner than clean. The cons? You gotta plan early, and shut off power during install (always safety first). And sometimes, local codes require a pro’s touch. Here’s my quick list:
- Mark outlet spots inside upper cabinets
- Hire a licensed electrician (worth it for safety and code)
- Use recessed outlets for a flush fit
- Coordinate switch placement—inside cabinets or hidden on backsplashes
Once done, it’s like magic. No one sees a thing, just seamless light. So if you’re all in, go pro with hidden outlets. It’s the final polish on a job well done—and a kitchen you’ll show off for years.
10. Maintenance and Future-Proofing: Don’t Box Yourself In
Here’s where most folks trip up. They hide wires so well, they lock themselves out when a bulb fails or a power brick fries. I’ve been there—ripping apart trim I just nailed down, cursing every step. So, future-proof now. Leave service loops—extra slack—behind raceways or trim, so you can pull wires free later. Use clips instead of glue wherever possible. Plan power brick spots where you can reach them. And label everything—trust me, in two years you won’t remember which wire runs where. Think of it like prepping your car’s spare tire. You hope you never need it, but when you do, you’ll be glad you planned ahead. Because the only thing worse than ugly wires is ripping apart your hard work when something breaks. So, build it smart, build it accessible. That’s the real secret stash—the fix no one sees, but that saves your bacon down the road.
Frequently Asked Questions: Honest Answers You Need
How do I hide wires without drilling holes?
Use adhesive raceways, cord clips, or tuck wires behind trim. Remember when I said those sticky tracks snap tight? That’s your best bet—no holes, no damage, just clean lines.
Can I hide wires if I rent my place?
Absolutely. Stick-on raceways or clips peel off clean. I did this in a Dallas rental—landlord never knew. Just avoid drilling or permanent changes.
What if my lights are too far from the outlet?
Plan ahead with extension cords hidden behind cabinets, or better yet, add a wireless light setup like I mentioned. Saves hassle and looks sharp.
Are wireless lights bright enough?
In 2025, most rechargeable or smart wireless lights pack plenty of punch. Just check lumens before buying. Some puck lights might be dimmer, but smart strips are usually solid.
How do I fix a sloppy wiring job?
Sketch your plan, remove visible wires, then use raceways or clips to clean it up. Like I said—map it first, then tidy. Sometimes, starting fresh is faster than patching.
Conclusion: Your Kitchen, Your Fight, Your Win
I’ve been in your shoes—swearing at tangled cords, sweating through bad installs, wishing I’d known better sooner. But here’s the gut-punch truth: hiding those wires isn’t just a chore. It’s a piece of taking your kitchen—and your story—back from chaos. Every inch of clean line is a win over the mess, a nod that you didn’t settle. I look at my kitchen now, lights glowing smooth, no cords in sight, and I smile. Because it’s not just about looks. It’s about doing the damn job right. About fighting through the fear of screwing up, learning from busted drills and droopy clips, and owning every step. Whether you’re sweating out a Texas heatwave or fighting Seattle damp, this is your space to claim. So, here’s my dare: take what I shared, spill your guts in the comments, tell me your mess or your win. Pass this to a buddy who’s staring down a tangle of wires and about to give up. Or dive deeper with me into more no-BS home fixes. Because you’ve got this. And you’re not alone. I screwed up more times than I can count, but each fix made me prouder, tougher, smarter. And now? Now I walk into that room and think, “Hell yeah, I did that.” So can you. Don’t wait ‘til it’s too late or too messy. Start now. Make those wires vanish and your pride shine. That’s a story worth living—and telling.