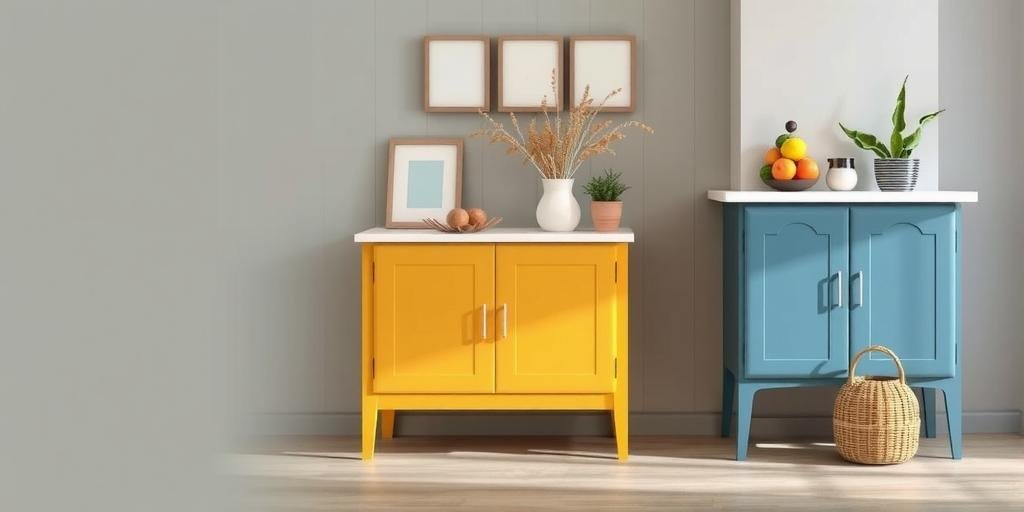
Let’s not kid ourselves—you’ve stood in that kitchen, staring down those IKEA cabinets, wondering if slapping on a fresh coat of paint could finally make this place feel like yours. Maybe it’s midnight in a squeaky Texas apartment, or the rain’s drumming your Seattle window, but that itch to change never lets up. You ask, “Can I really paint IKEA cabinets, or am I about to destroy thousands in a single weekend?” I’ve been there, brush in hand, nerves shot, sweat pooling as I watched primer bead and drip off that smooth fake-wood finish. The internet tells you yes—then no—then yes again, but nobody hands you the grit, the real talk, the bruises from learning the hard way. I’ve botched jobs so bad I hid the evidence behind dish towels; I’ve pulled off saves that made it all worth it. If you’re tired of the same old answers and want the 2025 secrets—the stuff pros whisper and DIYers scrawl in the margins—stick with me. I’ll lay out the real road, the stumbles and the shortcuts, and by the end, you’ll know exactly what works, what bombs, and what’ll make your friends swear you hired a pro. Ready to see what’s possible? Here’s the no-fluff guide I wish I’d had before my first IKEA paint disaster.
1. Why Paint IKEA Cabinets? The Real Reasons We All Hide
Let’s be honest: most folks don’t paint IKEA cabinets because they’re bored—they paint because something’s gnawing at them. Maybe it’s the fake-wood “beech effect” that screams college apartment, or maybe it’s that greasy, yellowing white that never looked right under your flickering porch light. I remember my first shot at painting—standing in a humid Houston rental, cabinets so bland they’d make oatmeal look wild. I wanted a space that felt like home, not a showroom. And here’s what I learned, bruises and all: painting IKEA cabinets isn’t just about looks. It’s about taking back control, about making a space truly yours when money’s tight and options are thin. People paint IKEA cabinets to dodge the cost of a full remodel, to bring color where landlords say “no,” to fix the chips, dings, and stains that mark the years. It’s a rebellion, a hope, a late-night “Why not?” with a brush in hand.
Still, there’s a fear lurking: What if I screw this up? What if the paint peels, the surface bubbles, or my partner gives me that look that says, “Nice try, Picasso.” Here’s the kicker—2025 numbers show nearly 43% of DIYers who tackled IKEA cabinet painting hit a snag, but 74% said they’d do it again, because the payoff is real. You get color, personality, and pride—and maybe, just maybe, the guts to tackle the next project. So what’s your reason for painting? Is it a mess you want to fix or a dream you’re chasing? Either way, you’re in good company. This is about more than paint—it’s about taking your home back, one brushstroke at a time.
2. The IKEA Cabinet Material Mess—And Why It Matters
Here’s the secret nobody tells you until you’re knee-deep in sanding dust: not all IKEA cabinets are built the same. Some are sturdy, real-wood wonders (hello, SEKTION doors in oak veneer), while others are plastic-wrapped, MDF-core puzzles that laugh in the face of regular paint. I’ll never forget that weekend in Portland—clouds so low you could taste them—when I tried painting old RINGHULT doors with the same paint I’d used on my grandma’s hutch. The result? Drips, smears, and a finish so patchy you could play tic-tac-toe on it. The big trick is knowing what you’re working with before you even pop the lid on the primer.
Here’s a quick table that’ll save you a world of pain:
| Cabinet Series | Main Material | Paintability |
|---|---|---|
| BODBYN | Painted fiberboard | Good, with prep |
| SEKTION (wood veneer) | Wood veneer/MDF | Excellent |
| RINGHULT | Foil-wrapped MDF | Challenging |
| KUNGSBACKA | Recycled foil/MDF | Difficult |
If you’re working with foil or laminate, you’ll need a primer that clings for dear life—think of it like trying to get tape to stick in a Louisiana summer. Wood veneer? You’re in luck. But here’s my “nobody ever told me” tip: always do a test patch. I once skipped this on a friend’s cabinets in Minneapolis—ended up sanding it all off while the snow fell outside, cursing every shortcut I’d taken. What’s the one thing you’re scared to mess up? Is it the finish, the color, or just the time you’ll lose? Trust me, knowing your material is half the battle. Don’t let a mystery surface wreck your weekend.
3. Tools and Materials—Your 2025 Survival Kit
You wouldn’t show up to a Texas BBQ with a plastic fork, so don’t tackle IKEA cabinets with the wrong gear. Here’s what’s in my 2025 painting survival kit—the stuff I keep ready after too many late-night runs to the hardware store when the paint’s drying and everything’s closed:
- Degreaser (like Krud Kutter)—because kitchen cabinets are grimier than you think.
- 220-grit sandpaper and a sanding block—skip the power sander unless you want to chew through a foil wrap.
- High-adhesion primer (BIN, Zinsser, or INSL-X Stix are 2025 faves).
- Quality brush and foam roller—those cheap ones will haunt your dreams with shed bristles.
- Paint formulated for cabinets—satin or semi-gloss, because flat paint stains faster than a coffee ring in the rain.
- Tack cloths—for wiping off dust.
Here’s a quick breakdown I wish I’d had taped to my fridge:
| Tool | Why You Need It |
|---|---|
| Degreaser | Removes oils so primer sticks |
| Sandpaper | Scuffs surface for grip |
| Primer | Bonds paint to slick IKEA finish |
| Cabinet Paint | Durability and cleanability |
I once cheaped out on primer in a Boston walk-up—by winter, the paint peeled off in big, satisfying sheets. Lesson learned: don’t skip quality, don’t skip steps, and never trust a product that promises “no prep needed”. What’s your go-to fix when the paint starts to bubble? Got a secret weapon I missed? Spill it—I’m still adding to my kit, one mistake at a time.
4. The Prep Dance—Don’t Skip or Regret It
Prepping IKEA cabinets to paint is like prepping for a blind date: ignore the details, and it’ll haunt you. I’ve tried shortcuts—just a quick wipe, no sand, slap on some paint—and every time, I paid. In the sticky heat of Orlando, I watched my fresh paint bubble before my eyes; in a chilly Chicago apartment, it peeled so fast I thought I’d bought defective paint. Here’s the step-by-step grind you can’t ignore:
- Remove all doors, hardware, and hinges—Label everything or you’ll play cabinet Tetris for hours.
- Scrub with degreaser—Don’t trust your eyes; grease hides everywhere.
- Lightly sand the surface—You’re not sanding to bare wood, just enough to dull the shine.
- Wipe with a tack cloth—No shortcuts here; dust is the enemy.
- Prime—twice if it’s a slick laminate—Let each coat cure, not just dry.
Here’s a quick table—pros and cons of “full prep” vs. “shortcut city”:
| Method | Pros | Cons |
|---|---|---|
| Full Prep | Long-lasting, pro look | Time-consuming, messy |
| Shortcuts | Faster | Poor adhesion, peeling, regret |
The truth? Prep makes or breaks this job. I still remember that night in a rented Brooklyn loft—paint peeling off in sheets, my roommate laughing so hard he fell off his stool. Don’t be that guy. Put in the work up front, and your future self will thank you every morning when you open those doors and the finish is still fresh. What’s the step you’re tempted to skip? Trust me, it’s always the one that bites you back.
5. Picking the Perfect Paint—2025’s Best and Worst
With so many paints out there, picking the right one for IKEA cabinets is like finding the best taco joint in San Antonio—everyone swears by a favorite, but only a few are worth the hype. I’ve tried them all: cheap latex, high-end hybrids, even those “miracle” all-in-one paints that promise to change your life. Here’s the 2025 scoop: cabinet-specific paints win, every single time. My go-tos are Benjamin Moore Advance, Sherwin-Williams Emerald Urethane Trim, and Behr Cabinet & Trim Enamel. These paints level out smooth, cure rock-hard, and stand up to years of sticky fingers and kitchen chaos.
Here’s the quick-hit verdict:
| Paint Brand | Finish | 2025 User Rating |
|---|---|---|
| Benjamin Moore Advance | Satin/Semi-gloss | 9.5/10 |
| Sherwin-Williams Emerald Urethane | Satin/Semi-gloss | 9.3/10 |
| Behr Cabinet & Trim | Satin | 8.9/10 |
| Generic Latex | Flat/Satin | 6.2/10 |
If you go cheap, you’ll pay in heartbreak. I painted cabinets in a Denver basement with discount latex; by the next winter, every mug and plate had left a ghostly ring. Don’t get seduced by “easy”—if it claims to work on everything, it usually works on nothing. What’s your biggest fear—yellowing, chipping, or sticky doors? Pick a paint that tackles that head-on. And here’s my “nobody tells you” tip: always check the cure time. Some of these paints need a full week before they’re bulletproof. Plan for that, and you’ll be golden.
6. The Right Way to Prime—No Skipping, No Regrets
Think of primer as insurance for your paint job—skip it, and you’re betting on disaster. I learned this lesson during a muggy Atlanta summer, when I tried to get clever with a “paint and primer in one.” The result? Every nick, every chip, every sticky fingerprint showed up within months. The truth is, IKEA’s slick surfaces need a high-adhesion primer—something that bonds like glue and laughs at humidity. The best in 2025? BIN Shellac, Zinsser Bullseye 123, or INSL-X Stix. Each one grabs onto laminate and foil like a Texas chigger.
Here’s how to make primer your hero:
- Apply in thin, even coats—thick primer bubbles and cracks.
- Let it cure, not just dry—wait at least 24 hours, more if it’s damp or cold.
- Sand lightly between coats—use 320-grit for a glassy smooth base.
Here’s my cheat sheet—primer pros and cons:
| Primer Type | Pros | Cons |
|---|---|---|
| SHELLAC | Sticks to anything, fast dry | Strong fumes, clean-up is tough |
| Water-based | Easy cleanup, less smell | Not as grippy for slick foil |
The bottom line? Cheap or skipped primer means heartbreak. I’ve re-primed more IKEA doors than I care to count after getting cocky. What’s the one step you always want to rush? This is the one to slow down on. Let the primer do its thing, and your paint will last long after you’ve forgotten the pain of waiting.
7. Painting Like a Pro—Secrets for a Flawless Finish
Here’s the truth: Painting IKEA cabinets isn’t just about slapping on color—it’s about nailing the little details that make your finish look pro, not DIY. My first go, I used a bristle brush too wide for the job in a steamy Miami condo—ended up with streaks and drips that haunted me for months. By my third try, I’d mastered the art of foam rolling and feathering out brush marks until the surface looked factory-smooth.
Here’s my “paint like a pro” playbook:
- Start with the back of doors—mistakes here won’t show.
- Thin, even coats—always. Two to three coats trump one thick goopy mess every time.
- Sand lightly between coats—patience now means no regrets later.
- Use a foam roller for flats, a brush for edges—blend as you go for a seamless finish.
- Watch for drips and catch them fast—I keep a rag in my pocket just for this.
Here’s a table I wish I’d had:
| Technique | Result |
|---|---|
| Foam roller + brush | Factory-smooth finish, no lines |
| Just brush | Lines, streaks, and heartbreak |
My “nobody tells you” tip: work in daylight. Even the best LED lights hide flaws. I once finished a set of doors in a dark Seattle basement—only to find runs and sags the next morning that looked like a toddler’s finger painting. What’s your painting horror story? Share it—because that’s how we all get better. This job is won in the details, not the big strokes. Take your time, and you’ll surprise yourself.
8. Cure Time—The Patience That Pays Off
This is the step that trips up every impatient soul—myself included. There’s a world of difference between “dry to the touch” and “cured rock-hard.” In the dry, dusty heat of a Phoenix summer, I once re-hung doors after just 12 hours because I couldn’t wait. Within days, the handles left perfect, sticky fingerprints that never, ever came off. Cure time matters—and in 2025, most cabinet paints need 5-7 days to fully set. That’s not just some manufacturer cover-your-butt number; it’s the truth that keeps your finish from gouging, denting, or peeling the second you drop a pan.
Here’s a quick cheat sheet:
| Paint Type | Dry to Touch | Full Cure |
|---|---|---|
| Cabinet enamel | 6-8 hours | 7 days |
| Latex paint | 2-4 hours | 14+ days |
The trick? Set up a temporary kitchen—card table, microwave, whatever it takes—so you’re not tempted to rush. I once balanced plates on a windowsill in a cramped Jersey rowhouse, just to buy my cabinets another day of cure time. What’s the one thing you hate waiting for? I get it—but patience now pays off for years. Trust the process, not your impulse, and you’ll wake up to a finish that’s tough as nails.
9. Touch-Ups, Repairs, and Long-Term Survival
Even the best paint job takes a beating. Kids slam doors, partners spill coffee, dogs nose around for crumbs. I’ve patched more IKEA cabinet corners than I like to admit—usually in frantic 6 a.m. bursts before guests arrive. The good news? Painted cabinets are fixable. Keep a small jar of your paint (and primer) tucked in a closet. When chips happen, sand the spot, prime, and dab on color—don’t overthink it.
Here’s my “survival list” for the long haul:
- Use soft-close hardware—it saves paint and your nerves.
- Wipe spills fast—paint is tough, but curry stains test its limits.
- Touch up chips right away—don’t let water sneak under the finish.
- Deep clean with a gentle soap—no harsh scrubbers or abrasives.
Here’s a quick table—when to fix vs. when to replace:
| Issue | Touch-Up | Replace |
|---|---|---|
| Small chips | ✔ | |
| Large peeling sections | ✔ (if isolated) | ✔ (if widespread) |
| Water damage | ✔ |
Here’s a little secret: most “failures” are fixable. I once rescued a set of cabinets in a North Dakota farmhouse after a pipe burst. Took time and patience, but the patch job looked as good as new. What’s your worst cabinet disaster? Don’t sweat it—painted IKEA doors are more forgiving than you think.
10. Is Painting IKEA Cabinets Worth It? My No-BS Verdict
Let’s cut to the chase: Is it worth all the sanding, priming, and waiting? Here’s my answer after a dozen kitchens and a lifetime of “Oh no, what have I done?” moments: YES, if you do it right. Painting IKEA cabinets is a chance to reclaim your space, flex your style, and dodge the wallet-busting cost of a full gut job. I’ve seen $500 in paint and sweat turn a sad, yellowed kitchen in rainy Eugene into a magazine-worthy showpiece. But here’s the honest ledger:
| Pros | Cons |
|---|---|
|
|
My verdict? It’s worth it—if you’re ready for a little sweat and a lot of patience. If you want a quick fix, look elsewhere. But if you want a kitchen that tells your story, grab a brush and join the club. What’s the one upgrade you dream about every time you open those doors? This is your chance. Don’t wait ‘til the next rainy day—you’ll thank yourself every morning you make coffee in a space that finally feels like you.
FAQ: Your Burning IKEA Cabinet Painting Questions, Answered
1. Will paint stick to IKEA’s laminate or foil cabinets?
Yes—but only if you prep right. Remember when I said in the prep section that skipping sanding or primer is a recipe for peeling? That’s your answer. Use a high-grip primer, sand lightly, and you’re good.
2. How long will painted IKEA cabinets actually last?
With the right prep and paint, 5-10 years easy. Like I shared in the survival section, chips happen, but touch-ups are simple if you keep your leftover paint on hand.
3. What’s the best paint color for 2025?
Warm whites, deep greens, and bold navy blues are winning kitchens this year. But your space, your call—make it personal, just don’t skip the cabinet-specific paint I raved about earlier.
4. Can I use spray paint for IKEA cabinets?
Spray paint works, but it’s tricky. If you’re after a glass-smooth finish and have a dust-free garage, go for it. Otherwise, a foam roller and patience usually win, like I said in the painting section.
5. Is it cheaper to paint or replace IKEA cabinets?
Painting is way cheaper—usually 1/10th the cost of replacing. The trade-off is time and elbow grease. Like I mapped out in the pros and cons, the savings are real if you’re willing to put in the work.
Conclusion: The Painted Cabinet Gamble—And Why I’d Bet On It Again
Let’s boil it all down: painting IKEA cabinets is a leap. It’s messy, it’s sweaty, and it’ll test your patience like nothing else—kind of like trying to wrangle three toddlers in a Minnesota blizzard. But here’s the line I keep coming back to: the fight’s worth it. I’ve been the guy scraping paint off old foil fronts, cursing every shortcut. I’ve been the one grinning at a kitchen that finally felt like home, the paint still tacky, the smell of hope lingering in the air. If you want a kitchen that screams “you,” not “catalog,” this is your move. Don’t let the fear of messing up freeze you; let it fuel you. Try it, tweak it, and own the outcome.
So here’s my dare: tell me your mess. What’s your kitchen horror story, your biggest cabinet fail, your wildest color dream? Drop it in the comments, pass this to the friend who’s always threatening to paint but never does, or dive into another one of my off-the-wall guides. Don’t wait—these cabinets aren’t going to paint themselves.
I’ll leave you with this: I once painted a set of IKEA cabinets in a friend’s drafty Vermont farmhouse, hands numb, paint freezing before it dried. We laughed, we cursed, we kept going. By sunrise, the kitchen was ours. That’s what this whole thing is about—not just the paint, but the stories you’ll tell and the pride you’ll feel every time you walk in. So grab that brush, roll up your sleeves, and make it your own. You’ll never regret a project that leaves your home—and your heart—a little more yours.