Building inset cabinet doors is a fun DIY project. It lets you make custom doors that match your needs and look great. To start, you need to know the steps and what materials to use. With some planning, you can make doors that look like they were made by a pro.
Key Takeaways
- Understanding the basics of inset cabinet door construction is crucial for a successful DIY project
- Measuring and planning are essential steps in building custom inset cabinet doors
- Choosing the right materials and tools is vital for achieving professional-looking results
- DIY inset cabinet doors can be a cost-effective way to enhance the look of your cabinets
- With the right guidance, you can build custom inset cabinet doors that fit your specific needs
- Inset cabinet door construction requires patience and attention to detail
- Learning how to build inset cabinet doors can be a rewarding and creative experience
Understanding Inset Cabinet Doors
Inset cabinet doors are loved for their clean look. To make them, you need a good build inset doors tutorial or inset door building guide. This helps the doors fit smoothly into the cabinet.
Inset doors are also very strong. They don’t get worn out easily because they fit inside the frame. Plus, they don’t stick out, making it easy to move around.
In inset cabinet doors woodworking, you can pick from many styles. You can use different materials and designs to match your taste. Some common styles are:
- Flat panel doors
- Raised panel doors
- Recessed panel doors
With the right guide and materials, you can make inset doors that look great. They can make your kitchen or bathroom look even better.
Essential Tools and Materials Needed
To start making inset cabinet doors, you need the right tools and materials. You’ll need a table saw, miter saw, drill press, and sandpaper. Knowing the steps to make inset doors means knowing what tools to use and how.
A table saw is great for straight cuts in wood. A miter saw is perfect for precise angled cuts.
For inset door assembly tips, the right materials are key. You’ll need wood, hinges, and hardware. The wood you choose affects the doors’ look and strength. The hardware must match the wood and door design.
- Table saw for straight cuts
- Miter saw for angled cuts
- Drill press for precise drilling
- Sandpaper for smoothing out surfaces
- Wood for the door panels and frames
- Hinges and other hardware for assembly
By knowing the steps to make inset doors and following inset door assembly tips, you can do a great job. The secret to success is preparation and having the right tools and materials.
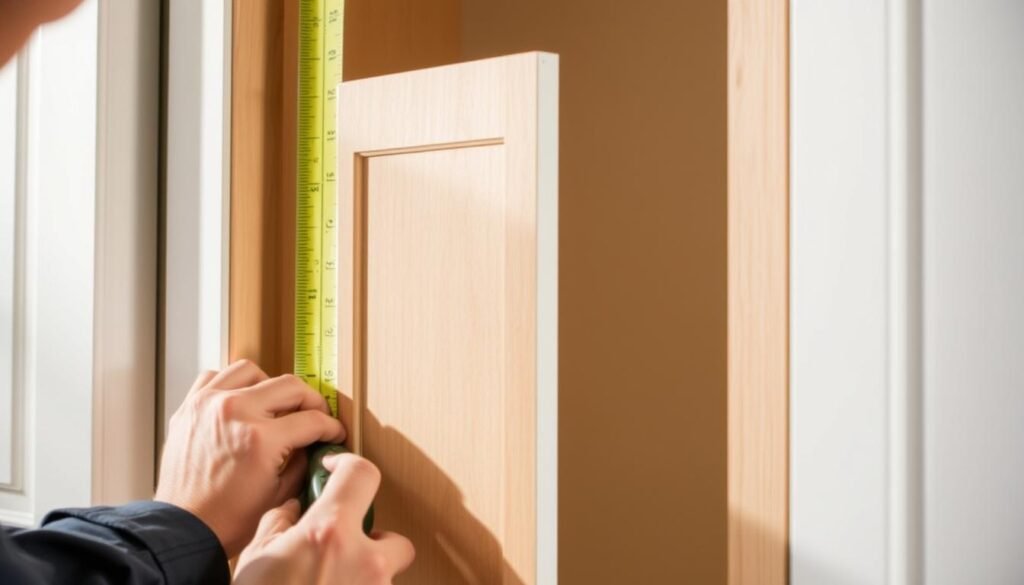
Measuring and Planning Your Inset Cabinet Doors
Measuring and planning are key steps in making inset cabinet doors. You need to get the door sizes right and know how much space they need. This guide will help you measure and plan your doors well.
Think about your cabinet’s design and how it will work. Consider the hinges and hardware you’ll use. Accurate measurements are crucial for a good fit and to avoid mistakes.
First, make a list of what you need for the project. This keeps you organized and makes sure you have everything. You’ll need:
- Door frames and panels
- Hinges and hardware
- Measuring tape and calculator
- Table saw and drill press
By following these steps, you can make cabinets that look great and work well. Double-check your measurements and lists to avoid mistakes.
Selecting the Right Wood for Your Project
Choosing the right wood is key for building inset cabinet doors. It affects the doors’ look and how long they last. Think about the wood type, grain, and color to match your cabinet’s style.
For a great diy inset cabinet doors project, learn about different woods. Each wood has its own look and feel.
There are many types of wood for inset cabinet doors. Here are a few:
- Oak: strong and has a unique grain
- Maple: versatile with a smooth texture
- Cherry: loved for its rich, reddish-brown color
Think about your cabinet’s style when picking wood. Oak fits traditional styles well. Maple works for modern looks. Cherry is great for classic designs.
For a great how to build inset cabinet doors project, plan well and pay attention to details. The right wood makes your doors look amazing and adds value to your home.
| Wood Type | Characteristics | Suitability |
|---|---|---|
| Oak | Strong, distinctive grain pattern | Traditional cabinet styles |
| Maple | Smooth, even texture | Modern designs |
| Cherry | Rich, reddish-brown color | Classic, elegant designs |
Safety Precautions and Workshop Setup
When you start a build inset doors tutorial, safety first is key. A clean workspace and the right gear, like safety glasses and a dust mask, keep you safe. This makes sure your inset door project goes smoothly.
Here are some important steps for a safe and neat workshop:
- Required safety equipment, including safety glasses, a dust mask, and ear protection
- A well-organized workspace with clear walkways and minimal clutter
- Tool safety guidelines, such as regular maintenance and proper storage
By following these tips, you can make a safe and effective workshop. This lets you focus on your build inset doors tutorial. You’ll make high-quality inset cabinet doors.
Always stick to safety rules and best practices when using power tools. With a good workshop setup and safety knowledge, you can finish your inset door project with confidence. You’ll get professional-looking results.
| Safety Equipment | Description |
|---|---|
| Safety Glasses | Protective eyewear for preventing eye injuries |
| Dust Mask | Respiratory protection for preventing inhalation of dust and debris |
| Ear Protection | Hearing protection for preventing noise-induced hearing loss |
How to Build Inset Cabinet Doors Step-by-Step
To start making inset cabinet doors, you need to know the steps and get all your tools ready. Making inset cabinet doors needs careful work and precision. You will cut wood, build the frame, and add the panel.
Here are the main steps to build inset cabinet doors:
- Cut the frame parts, like rails and stiles, to the right size.
- Put the frame together using mortise and tenon joints or other good ways to join.
- Put the panel on the frame, making sure it’s right and fixed well.
When making inset cabinet doors, always follow safety rules and use the right methods to avoid mistakes. Making inset doors can be hard, but with practice, you can get great results.
By following these steps and tips, you can make beautiful inset cabinet doors. They will make your kitchen or bathroom look better. Take your time and measure well to get accurate cuts and a smooth build.
| Step | Description |
|---|---|
| 1 | Cut the frame components |
| 2 | Assemble the frame |
| 3 | Attach the panel |
With these steps and tips, you’ll be on your way to making amazing inset cabinet doors. They will show off your woodworking talent.
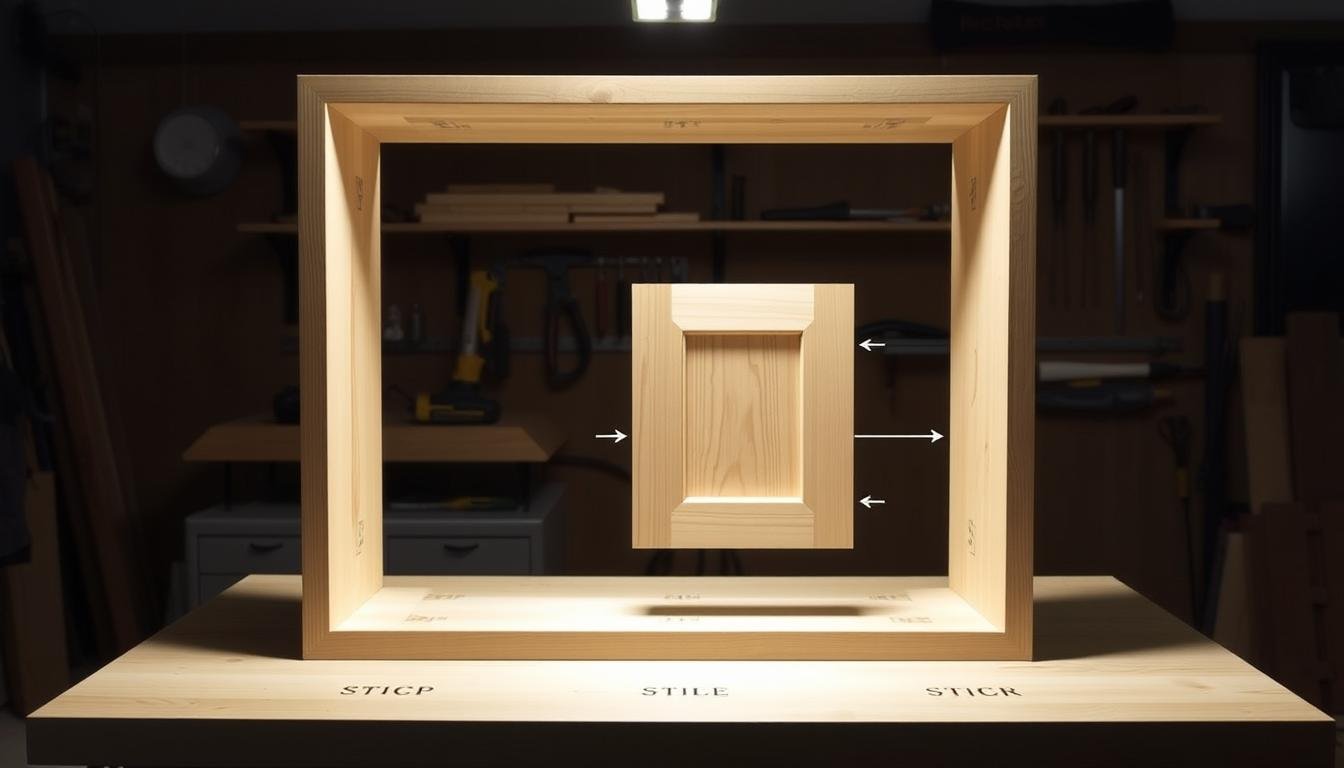
Creating Rail and Stile Joints
Building inset cabinet doors starts with making rail and stile joints. This means cutting special joints and picking the right tools. It’s important to do it right for a good inset door assembly.
Here are some tips for a strong joint:
- Choose a top-notch router bit for mortise and tenon joints.
- Make sure your cuts are exact for a perfect fit.
- Press down evenly and clamp the joint to hold it in place.
A good rail and stile joint is key for your door’s look and strength. By using these inset door assembly tips, you can get a pro finish. This makes your inset cabinet door installation a success.
Always be safe and use the right methods with power tools. With time and effort, you’ll get better at making these joints. Your inset cabinet doors will look great and last a long time.
| Joint Type | Router Bit | Assembly Tips |
|---|---|---|
| Mortise and Tenon | High-quality router bit | Apply even pressure, use a clamp |
| Dado | Specialized dado router bit | Ensure accurate measurements, use a jig |
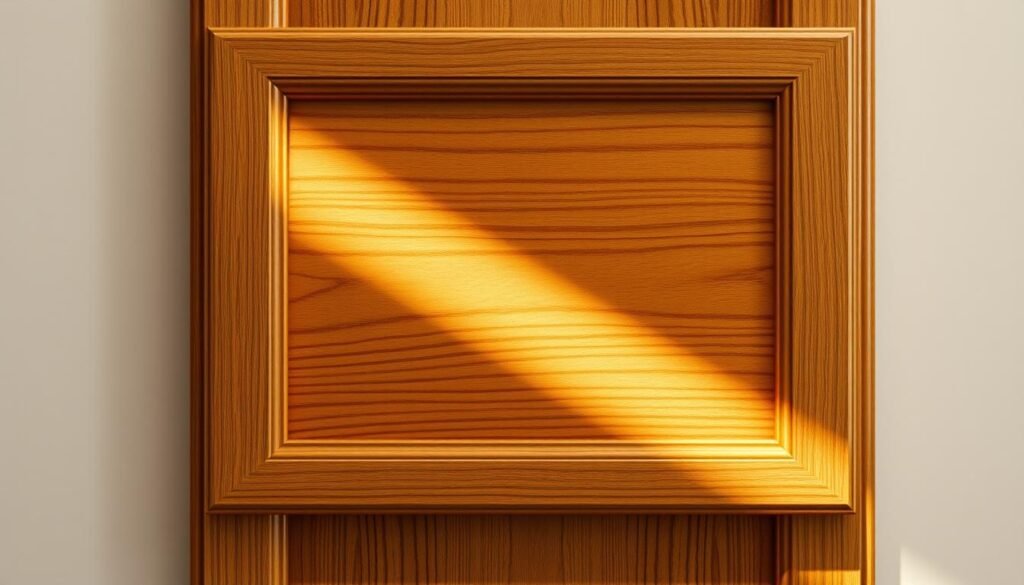
Panel Construction and Fitting
Learning to build inset cabinet doors starts with panel construction and fitting. You need to pick the right material and cut it to size. For your project, use plywood or MDF for the panel.
Fit the panel into the frame carefully. Use glue and nails or screws for a tight fit. Make sure to measure everything right.
After fitting, sand and finish the panel. You can stain or paint it. This makes your cabinet door look great.
Some important things to remember include:
- Choosing the right material for the panel
- Cutting the panel to the right size
- Securing the panel with glue and nails or screws
- Sanding and finishing the panel before fitting
Sanding and Surface Preparation
Sanding and surface prep are key for inset cabinet doors. A good build inset doors tutorial will tell you to pick the right grit. It also shows how to use grits in order to avoid scratches. Here, we’ll explore sanding and prep, giving you a detailed inset door building guide for pro-looking results.
First, learn about progressive grit selection. Start with a coarse grit and move to finer ones. This removes blemishes and scratches, making the surface smooth for finishing.
- Using the right type of sandpaper for the job
- Working in a well-ventilated area to avoid inhaling dust and debris
- Using a dust mask or respirator to protect yourself from harmful particles
- Applying edge treatment techniques to prevent scratches and imperfections
Follow these tips and use a top-notch build inset doors tutorial or inset door building guide. You’ll make stunning and useful inset cabinet doors. They’ll make your kitchen or bathroom look great.
Progressive Grit Selection
Progressive grit selection is key in sanding and prep. Using finer grits in order gives a smooth, even finish. This finish is free from blemishes and scratches.
Edge Treatment Techniques
Edge treatment is vital for a pro finish. The right techniques and materials prevent scratches and blemishes. This ensures a smooth, even finish that lasts.
| Grit | Description |
|---|---|
| 120 | Coarse grit for removing large imperfections |
| 220 | Medium grit for smoothing out surfaces |
| 320 | Fine grit for final sanding and polishing |
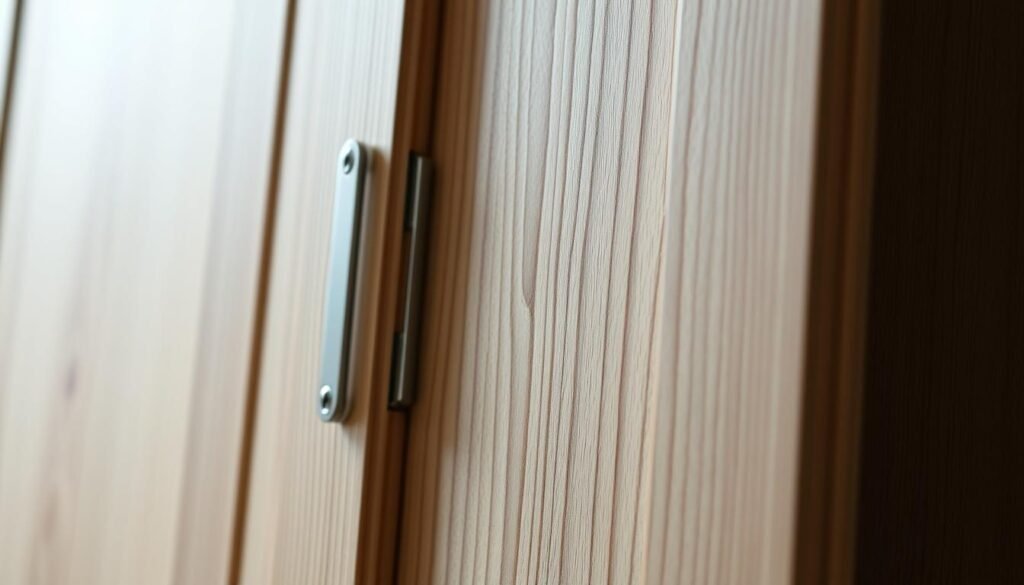
Hardware Selection and Installation
Choosing the right hardware is key for inset cabinet door installation. You need to pick hinges and handles that match your cabinet doors’ design. The inset door building process needs careful thought for these parts to work well.
First, pick the right hinge for your cabinet doors. You can choose from soft-close hinges or concealed hinges. Soft-close hinges are great for busy cabinets because they close quietly and smoothly.
Next, pick the handles for your cabinet doors. You can choose knobs, pulls, or a mix. Make sure the handles fit your cabinet doors’ style and your desired look. Inset cabinet door installation needs detail, so pick handles that match well.
Here are some important things to think about for hardware selection and installation:
- Choose hinges and handles that are durable and long-lasting
- Consider the weight and size of your cabinet doors when selecting hardware
- Think about the overall design and style of your cabinet doors and choose hardware that complements it
By picking and installing the right hardware, your inset door building process will give you beautiful and useful cabinet doors. These doors will last for many years.
Applying Finishes and Protective Coatings
Learning to make inset cabinet doors means finishing them right. The right finishes and coatings make them look great and last long. You need to pick the right stain, seal it well, and add a protective layer.
Choosing the right stain is key. You can pick from many colors and methods. Options include oil-based, water-based, and gel stains. Each one works differently with wood and looks.
Sealing Methods
After staining, you need to seal your doors. A good seal keeps them safe from water, scratches, and fading. You can use polyurethane, varnish, or wax. Each has its own benefits and drawbacks.
Final Protective Layers
The last step is adding a protective layer. This can be a clear polyurethane coat or wax. It seals in the stain and sealant, keeping your doors looking good for years. By following these steps, you can make beautiful, lasting cabinet doors.
| Staining Options | Sealing Methods | Final Protective Layers |
|---|---|---|
| Oil-based stains | Polyurethane | Clear coat of polyurethane |
| Water-based stains | Varnish | Layer of wax |
| Gel stains | Wax | Clear coat of varnish |
Installing Your Completed Inset Doors
Installing your inset doors needs careful steps. Choosing the right hinges and mounting them right is key. This makes the doors work well and look good.
Installing inset cabinet doors needs planning and detail. Here are important things to remember:
- Choose the right hinges for your doors, considering factors such as weight capacity and durability.
- Mount the hinges correctly, ensuring they are level and securely attached to the door and cabinet frame.
- Align the doors properly, taking into account the clearance requirements and the overall aesthetic you want to achieve.
By following these tips and ensuring a proper installation, you’ll get beautiful and useful doors. They will make your kitchen or bathroom look better.
Always follow the maker’s instructions for hardware and materials. If you’re not sure about installation, get professional help.
| Inset Door Assembly Tips | Importance Level |
|---|---|
| Choose the right hinges | High |
| Mount hinges correctly | High |
| Align doors properly | Medium |
Troubleshooting Common Issues
When you follow a build inset doors tutorial, you might face some problems. One big issue is doors that don’t line up right. This can happen if you measure wrong or put them together wrong. Check your inset door building guide and make sure your measurements are right.
To keep your doors tight, make sure everything fits well and is held in place. If you run into trouble, look at your build inset doors tutorial for help. Here are some common problems and how to fix them:
- Door misalignment: Check the hinge placement and adjust as needed.
- Loose joints: Re-tighten screws or re-glue joints according to your inset door building guide.
- Uneven surfaces: Sand or plane the surface to achieve a smooth finish.
By using these tips and looking at your build inset doors tutorial or inset door building guide, you can fix common problems. This way, your inset doors will be built right and work well.
Maintenance and Care Tips
To keep your inset cabinet doors lasting long, regular care is key. Building your own inset cabinet doors can be fun. But, knowing how to take care of them is just as important. A well-kept door looks great and works well.
Make a plan to check your doors often. Look for any wear or damage. Also, check the hinges and handles to make sure they’re right. And, make sure the doors close and lock right.
Regular Maintenance Schedule
- Inspect doors monthly for signs of wear or damage
- Check hinges and handles quarterly for proper alignment
- Ensure doors are properly closed and secured daily
Cleaning Recommendations
Keep your inset cabinet doors clean to keep them looking good. Use a soft cloth and mild soap to clean them. Stay away from harsh chemicals or rough cleaners.
By following these tips, you can make your inset cabinet doors last longer. They’ll stay beautiful and work well. Whether you’re making your own or following a project, remember to care for them well.
| Maintenance Task | Frequency |
|---|---|
| Inspect doors | Monthly |
| Check hinges and handles | Quarterly |
| Clean doors | Weekly |
Conclusion
Building inset cabinet doors is a fun DIY project. It needs careful planning and the right tools. This article shows you how to make custom doors for your kitchen or bathroom.
Always be safe while building. Use the right methods and take your time. This way, you can make your cabinets look great. So, get ready to start your inset door project!
FAQ
What tools and materials are needed to build inset cabinet doors?
You'll need tools like a table saw and miter saw. Also, a drill press and sandpaper. You'll need wood, hinges, and hardware too.
How do I measure and plan for inset cabinet doors?
Measuring and planning are key. You must figure out the door size and clearance. Make a cut list for accurate cuts.
What safety precautions should I take when building inset cabinet doors?
Safety is very important. Wear safety glasses and a dust mask. Keep your workspace clean and organized.
How do I create rail and stile joints for inset cabinet doors?
Making rail and stile joints is important. Cut mortise and tenon joints. Use the right router bit and assemble correctly for strength.
How do I install the completed inset doors?
Installing the doors is the last step. Choose the right hinges and mount them right. Make sure the doors align well for smooth function.
How do I maintain and care for my inset cabinet doors?
Keeping your doors in good shape is important. Clean them often and prevent damage. Follow a regular maintenance schedule.