I often wonder how to cover gaps between cabinets and walls. I’m not alone in this. There are many ways to do it, including using cabinet gap filler. In this article, we’ll look at different methods and materials for covering these gaps.
Gaps between cabinets and walls can be a problem in kitchens. They can make the room look bad. To fix this, we need to know how to cover these gaps. Using cabinet gap filler is a good way to do it.
When covering gaps, we need to think about a few things. The size of the gap matters, as does the type of cabinet and wall. We also need to think about how we want the kitchen to look. By choosing the right materials and techniques, we can make our kitchen look great.
Key Takeaways
- Understanding the different methods for covering gaps in kitchen cabinets is essential for achieving a professional-looking result.
- Cabinet gap filler is a popular solution for covering gaps between cabinets and walls.
- Choosing the right materials and techniques is crucial for creating a seamless and professional look in the kitchen.
- Considering the size of the gap, the type of cabinet and wall material, and the desired aesthetic is essential for selecting the right approach.
- Homeowners can choose from a variety of methods for covering gaps between cabinets and walls, including how to cover gap between cabinet and wall using different techniques.
- Covering gaps in kitchen cabinets can enhance the overall beauty of the kitchen and create a more polished look.
- By following the right steps and using the right materials, homeowners can achieve a professional-looking result and enjoy their newly renovated kitchen.
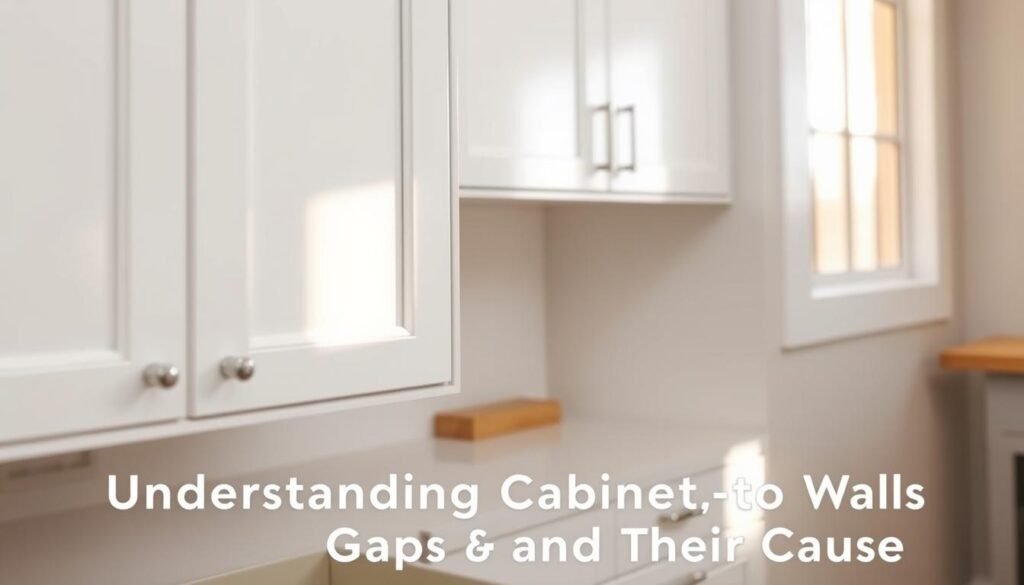
Understanding Cabinet-to-Wall Gaps and Their Causes
Kitchen design can be tricky, especially with gaps between cabinets and walls. These gaps can ruin the kitchen’s look. Knowing why these gaps happen is key to fixing them.
There are many ways to hide these gaps. You can use trim or molding. But first, let’s look at why these gaps occur. Gaps can be caused by uneven walls, mistakes in cabinet installation, or a house settling.
Common Reasons for Wall Gaps
- Uneven walls: If walls are not straight, gaps can form.
- Cabinet installation errors: Mistakes in installing cabinets can cause gaps.
- Settling of the house: As a house settles, walls can shift, creating gaps.
Impact on Kitchen Aesthetics
Gaps between cabinets and walls can really affect a kitchen’s look. They can make the kitchen seem unfinished or poorly designed. To fix this, we need to cover these gaps effectively.
Structural Considerations
Wall gaps are not just about looks. They can also cause problems like water damage or pests. So, it’s important to find good ways to hide these gaps.
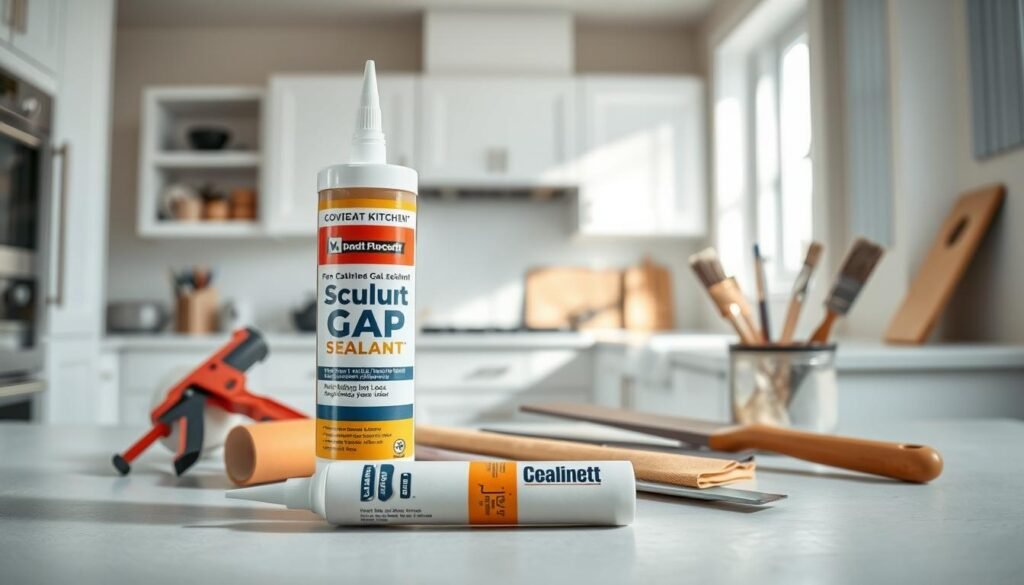
Essential Tools and Materials for Gap Coverage
To fix gaps between cabinets and walls, you need the right tools and materials. A kitchen cabinet gap sealant is key for hiding gaps. Look for one that’s durable, flexible, and looks good.
Some important tools and materials for covering gaps are:
- Caulk gun for applying sealant
- Filler strips for bigger gaps
- Sandpaper for making surfaces smooth
- Paint or stain to match the area
When fixing gaps between cabinets and walls, picking the right materials is crucial. A good sealant can greatly improve your kitchen’s look. With the right tools and materials, you can get a finish that looks like a pro did it and hide the gap between cabinet and wall well.
Measuring and Assessing Your Cabinet Gap
To cover gaps in kitchen cabinets, you need to measure and assess the gap. This means figuring out how to fill the gap between your cabinet and wall. I’ll show you how to get accurate measurements.
Use a tape measure and a level to get precise measurements. This is key to knowing the gap’s size and choosing the right filler.
Proper Measurement Techniques
Measuring the gap right is important. Start by measuring the gap’s width at the top, middle, and bottom. This tells you if the gap is the same size everywhere.
- Place the tape measure at the top of the gap and record the measurement.
- Move the tape measure to the middle of the gap and record the measurement.
- Finally, place the tape measure at the bottom of the gap and record the measurement.
Determining Gap Type
Knowing the gap’s size helps you pick the right filler. Use your measurements to decide if the gap is small, medium, or large. This choice makes covering the gap easier.

By following these steps and using the right tools, you can accurately measure and assess the gap. This makes it easier to choose the best filler for your kitchen cabinets.
Quick and Temporary Solutions for Small Gaps
Small gaps between cabinets and walls can be fixed quickly. You can use caulk or sealant to fill them. This is a simple and cheap way to hide gap between cabinet and wall.
Filler strips are another good option. They are easy to put up and can be taken down without harm. This makes them perfect for gap between cabinet and wall solutions.
Here are some quick and temporary solutions for small gaps:
- Caulk or sealant to fill the gap
- Filler strips for a removable solution
- Temporary trim or molding to cover the gap
These fixes are easy and won’t cost much. They are great for those who want a quick fix. Even though they are temporary, they can still make your kitchen look neat.
In conclusion, for small gaps, there are many quick fixes. You can use caulk, sealant, filler strips, or temporary trim. These solutions can be a temporary fix while you plan a more lasting solution. They are all ways to cover gaps between cabinets and walls.
| Solution | Ease of Use | Affordability |
|---|---|---|
| Caulk or Sealant | Easy | Affordable |
| Filler Strips | Easy | Affordable |
| Temporary Trim or Molding | Moderate | Moderate |
How to Cover Gap Between Cabinet and Wall Permanently
To make your kitchen look smooth, you need to fix the gaps between cabinets and walls. Use a kitchen cabinet gap sealant for this. It’s made to fill gaps and make your kitchen look neat.
Before you start, plan and prepare well. Here’s how:
- Check the gap’s size and type to pick the best fix
- Choose a good material, like caulk or sealant, for the gap
- Clean and dry the area where you’ll work
- Put the material in the gap, as the maker says to
Looking at a material guide can help you pick the right stuff. Silicone and polyurethane caulk are good choices. They last long and move with your cabinets. Using the right sealant and following the steps, your kitchen will look great.
Think about moisture and color when picking a sealant. This makes your kitchen look good and work well. With the right stuff and some patience, you can make your kitchen look amazing.
| Material | Characteristics | Suitability |
|---|---|---|
| Silicone-based sealant | Flexible, waterproof, and durable | Ideal for most kitchen applications |
| Polyurethane-based caulk | Strong, flexible, and resistant to moisture | Suitable for areas with high humidity |
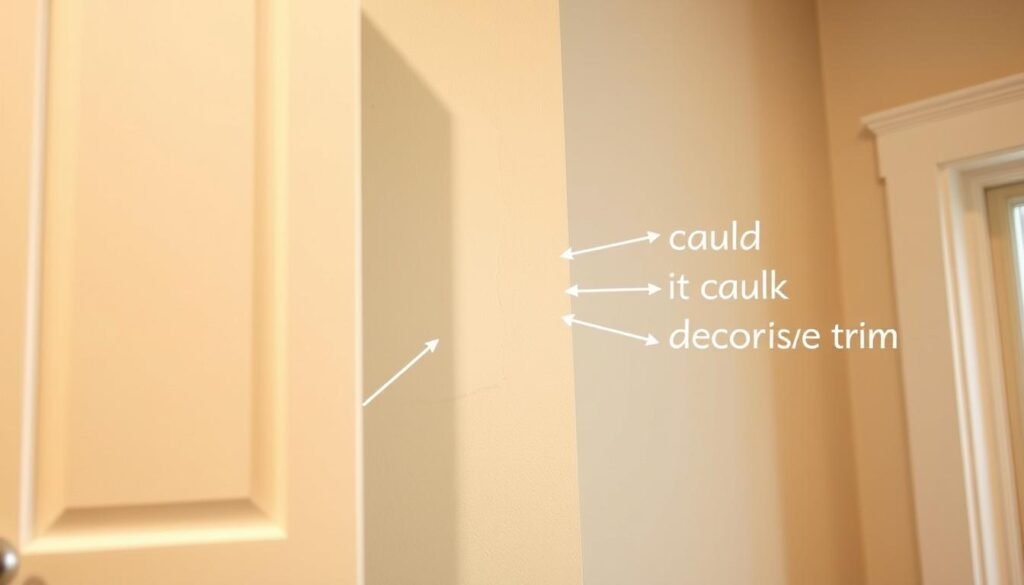
Using Molding and Trim Solutions
Using molding and trim is a great way to cover gaps between cabinets and walls. It not only hides the gap but also adds beauty. It’s important to pick the right molding and trim for a professional look.
Here are some molding and trim options for kitchen cabinets:
- Wood molding: a classic choice that can be stained or painted to match the surrounding cabinets
- MDF molding: a cost-effective option that is easy to work with and can be finished in various ways
- PVC molding: a durable and low-maintenance option that is resistant to moisture and humidity
Measuring the gap right and cutting the molding to size is key. Use a miter saw or a coping saw for precise cuts. A little caulk or wood glue helps the molding stay in place.
Molding and trim solutions can cover gaps well, making your kitchen look better. It’s a good way to learn how to cover gaps between cabinets and walls. With the right materials and skills, you can get a professional finish and enjoy a gap-free kitchen.
| Type of Molding | Benefits | Drawbacks |
|---|---|---|
| Wood | Classic look, can be stained or painted | Can be expensive, requires maintenance |
| MDF | Cost-effective, easy to work with | May not be as durable as other options |
| PVC | Durable, low-maintenance, resistant to moisture | May not be suitable for all design styles |
Caulking and Sealant Methods
To cover gaps between cabinets and walls, caulk or sealant is a top choice. It’s easy and cheap, making it perfect for homeowners. Caulking and sealant are great for hiding gaps between cabinets and walls.
There are many types of caulk and sealant. Each has its own good points and bad points. When picking one, think about your project’s needs. For covering gaps between cabinets and walls, a flexible one works best.
Here’s how to use caulk or sealant to hide gaps:
- First, clean the surface well and remove any old stuff.
- Then, use a caulk gun or applicator to apply it.
- Finally, smooth it out with a damp cloth or putty knife.
By following these steps and choosing the right caulk or sealant, you can hide gaps. This makes your cabinets and walls look seamless and professional.
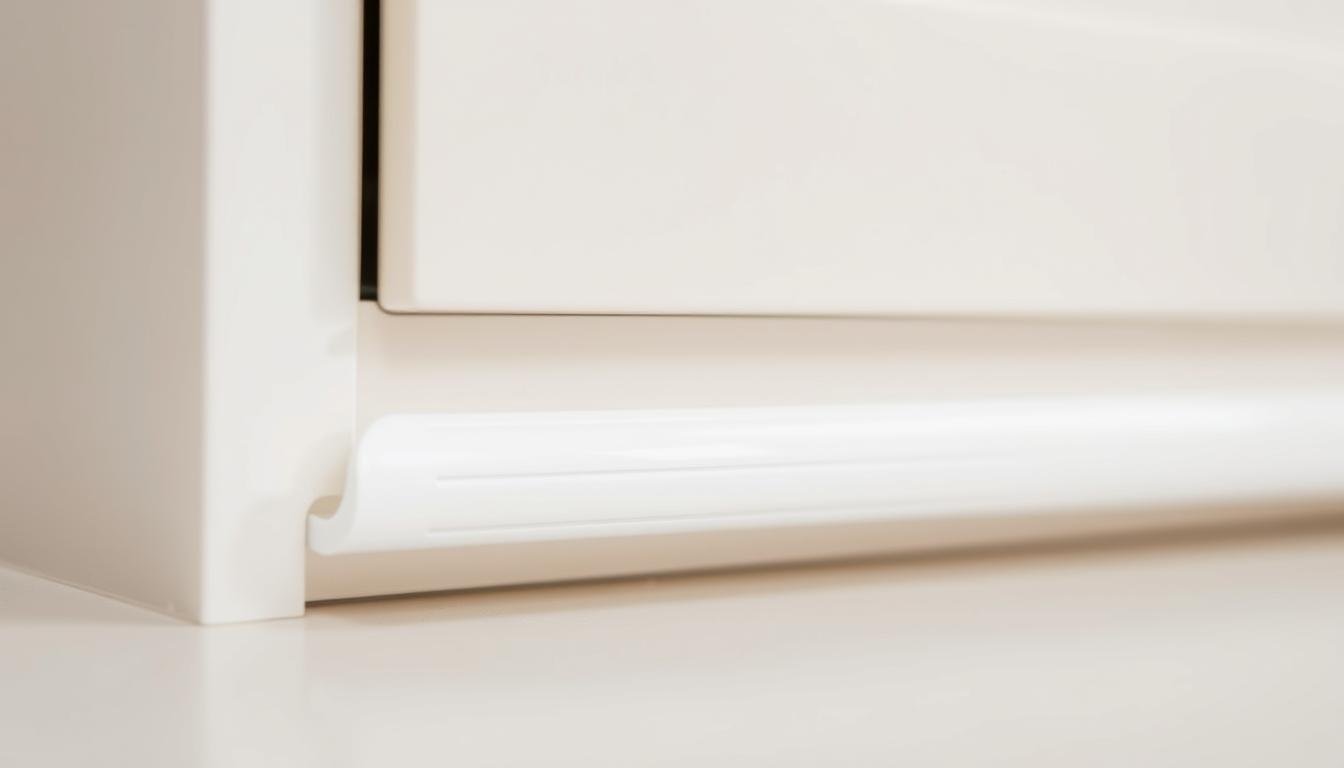
Custom Filler Strips and Their Installation
To hide the gap between cabinet and wall, custom filler strips work well. They can be used with a kitchen cabinet gap sealant for a smooth look. First, measure for the filler strips with a tape measure and level.
After measuring, cut the strips with the right tools. You might use a miter saw or a coping saw. Then, attach them to the cabinet or wall with nails, screws, or adhesive.
Measuring for Filler Strips
Measuring for filler strips needs careful attention. You must measure the gap’s width and the area’s length. Using a kitchen cabinet gap sealant with the strips makes the finish look professional.
Cutting Techniques
Cutting the strips needs the right tools and skills. Here are some ways to cut:
- Using a miter saw for precise angled cuts
- Using a coping saw for curved cuts
- Using a utility knife for straight cuts
With the right cutting and a kitchen cabinet gap sealant, you can hide the gap well.
Attachment Methods
How you attach the strips is key. Here are some ways:
- Using nails for a quick and easy attachment
- Using screws for a more secure attachment
- Using adhesive for a strong and lasting bond
Choosing the right attachment method and using a kitchen cabinet gap sealant keeps the strips in place. This makes fixing gaps between cabinets and walls last longer.
Professional Solutions vs DIY Approaches
Homeowners have two main choices for covering gaps between cabinets and walls. You can go for professional solutions or try DIY. Think about the cost, time, and skill needed for each option. Covering gaps in kitchen cabinets can be easy or need a pro, depending on the gap size and complexity.
A cabinet gap filler works well for small gaps. But, big gaps might need new molding or trim. If you’re not sure what to do, look at the gap and pick the best way. You can hire a pro or use caulk or sealant yourself.
Here are some things to think about when choosing between professional help and DIY:
- Cost: Pros might cost more but give a better, lasting fix.
- Time: DIY can be faster but takes more effort and time from you.
- Level of expertise: If DIY isn’t your thing or you lack skills, get a pro.
The choice between professional help and DIY depends on what you need and want. Think about the points mentioned and the good and bad of each. This way, you can decide and get a great result in covering gaps in kitchen cabinets.
| Approach | Cost | Time | Level of Expertise |
|---|---|---|---|
| Professional Solutions | Higher | Variable | High |
| DIY Approaches | Lower | Variable | Medium to Low |
Preventing Future Cabinet-Wall Gaps
To stop cabinet-wall gaps, keep up with maintenance and check things often. This way, your cabinets and walls stay in great shape. Any problems can be fixed right away.
Maintenance Tips
Keeping gaps hidden means cleaning and taking care of them. Use a vacuum and a damp cloth to get rid of dust and dirt. You can also use caulk or sealants to fill gaps.
- Regularly clean the gaps between cabinets and walls to prevent dust and debris accumulation.
- Use a damp cloth to wipe down the surfaces and remove any dirt or grime.
- Apply gap between cabinet and wall solutions, such as caulk or sealants, to fill in any gaps that may appear.
Regular Inspections
Checking things often helps find problems early. Look at the gaps between cabinets and walls for damage or wear. You can use molding and trim to cover these gaps.
By following these tips and checking things often, you can avoid future gaps. Always use ways to hide gaps and solutions to keep your cabinets and walls in good shape.
Color Matching and Aesthetic Considerations
Color matching and looks are key when hiding gaps between cabinets and walls. It’s important to pick the right sealant and finish that fits the area. Use paint swatches and finish samples to get a perfect match.
Fixing gaps needs careful attention, especially with color and finish. A good sealant can hide the gap. But, it’s also vital to think about the kitchen’s look. Choose a sealant that matches the cabinets and walls for a cohesive look.
- Use a top-notch kitchen cabinet gap sealant made for hiding gaps.
- Pick a finish that goes with the area, like paint or stain that matches the cabinets and walls.
- Follow the maker’s instructions to apply the sealant or finish smoothly and evenly.
By using these tips and thinking about color and looks, you can make a kitchen that looks amazing. Always pick a sealant right for fixing gaps and choose a finish that goes well with the area.
Cost Analysis of Different Gap Solutions
Costs for covering kitchen cabinet gaps vary a lot. It depends on the gap size, material, and method. For example, a cabinet gap filler costs $5 to $10 per packet. But, hiring a pro can cost $100 to $500 or more, based on location and rates.
Popular ways to cover gaps include caulk, molding, and custom strips. Each option has its price. Caulk costs $5 to $15 per tube. Molding or trim is $20 to $50 per piece. Custom strips start at $50 to $100 or more, depending on size and material.
Here are some estimated costs for different gap solutions:
- Cabinet gap filler: $5 to $10 per packet
- Caulk or sealant: $5 to $15 per tube
- Molding or trim: $20 to $50 per piece
- Custom filler strips: $50 to $100 or more per piece
Remember to think about labor and equipment costs too. If DIY is not your thing, hiring a pro might be cheaper. But, if you’re up for it, using a gap filler or caulk can save money. Knowing the costs helps you pick the best option for your budget and needs.
Conclusion
We’ve looked at many ways to hide the gap between cabinets and walls. This includes quick fixes and lasting solutions. Fixing these gaps can make your kitchen look better and keep pests away.
Choosing between DIY methods like molding or hiring a pro is important. The right choice can really change your kitchen’s look. Think about cost, material, and upkeep when deciding.
When you start making your kitchen better, remember to cover gaps well. This makes your kitchen look smooth and nice. With the right steps, you can get the kitchen you’ve always wanted.
FAQ
What are the essential tools and materials needed to cover cabinet-to-wall gaps?
You'll need caulk, sealant, and filler strips to cover gaps. Also, a tape measure, level, utility knife, and caulk gun are important. The right materials depend on the gap's size and type.
How do I properly measure and assess the gap between my cabinets and walls?
Start by measuring the gap's width and depth with a tape measure. Check the size at different points. Use a level to see if the wall or cabinets are uneven.
What are some quick and temporary solutions for small gaps between cabinets and walls?
For small gaps, caulk, sealant, or filler strips work well. They're easy to use and cheap. But, they might not last long.
How can I cover the gap between my cabinets and walls permanently?
To cover gaps permanently, use custom filler strips or molding. You can also apply caulk or sealant. The best method depends on the gap size and your skills.
What are the benefits of using molding or trim to cover cabinet-to-wall gaps?
Molding and trim give a clean look to gaps. They come in wood, MDF, or PVC. You can paint or stain them to match your kitchen.
How do I properly apply caulk or sealant to cover cabinet-to-wall gaps?
First, clean and dry the surface. Then, use a caulk gun to apply the material smoothly. Use a wet finger or tool to smooth it out.
What are the benefits of using custom filler strips to cover cabinet-to-wall gaps?
Custom filler strips offer a seamless fix. They're cut to size and attached with nails, screws, or adhesive. You can paint or stain them to match your decor.
What are the key differences between professional and DIY approaches to covering cabinet-to-wall gaps?
Professionals have more skill and use better materials. This makes their work last longer and look better. DIY methods are cheaper but need more effort for a good result.
How can I prevent future cabinet-to-wall gaps from forming?
Keep your kitchen cabinets and walls clean and check them often. Fix any damage or shifting right away. Using cabinet shims can also help keep things tight.
How can I ensure that the color and finish of my gap coverage solutions match the surrounding cabinetry and decor?
Choose materials that match the color and finish of your kitchen. Use paint swatches or samples to find the right shade. Think about the finish type, like matte or glossy, for a perfect match.
How do the costs of different gap coverage solutions compare?
Costs vary based on materials, gap size, and whether you do it yourself or hire a pro. Caulk and sealant are cheap but not lasting. Custom filler strips and pro work are pricier but last longer.