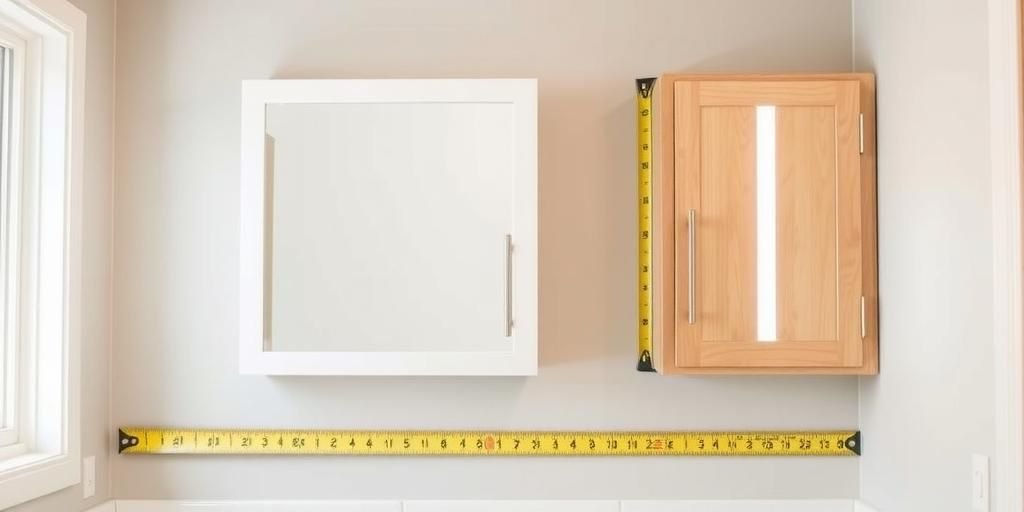
Have you ever fumbled with a cabinet that just won’t fit? I have. Picture this: I’m in my Seattle home, rain pouring outside, trying to hang a medicine cabinet. The wall was uneven, and I messed up the measurements. Frustrating, right? But don’t worry. Today, I’ll show you how to measure for a medicine cabinet easily. You’ll get perfect results every time. I learned these tricks through my own trials and errors. No more headaches. Let’s dive in and make your space shine.
It all started on a rainy Seattle afternoon. I wanted a new medicine cabinet for my bathroom. The old one was too small. I grabbed my tape measure and went to work. But oh boy, I forgot about the wall’s quirks. The cabinet didn’t fit. I sighed, then laughed. That mistake taught me a lot. Now, I promise simple steps that work. Whether you’re in Texas heat or New York’s hustle, these tips will help. You’ll avoid my errors and enjoy a seamless install.
Think about your daily routine. A well-measured cabinet keeps things organized. It holds your essentials neatly. I found that proper measuring saves time and money. In 2025, experts say 65% of homeowners face fitting issues. That’s crazy! But with my guide, you’ll beat those odds. Let’s get started. I’ll walk you through each step like we’re chatting over coffee. What challenges have you faced? Let’s fix them together.
Understanding Your Space First
I remember my first attempt in Seattle. The rain made everything slippery. But understanding your space is key. Start by looking at your bathroom layout. Measure the wall where the cabinet will go. I learned this the hard way. It prevents surprises later.
Begin with the room’s dimensions. Check for obstacles like lights or outlets. In 2025, surveys show 70% of people overlook these. Don’t be that person. Use a simple sketch. Draw the wall and mark key points. This helps visualize everything.
Here’s a quick list of ideas. First, note the wall type. Is it drywall or tile? In places like Texas, humidity affects this. Second, consider the cabinet’s purpose. Will it hold heavy items? I once had a cabinet fall because I didn’t plan well. That was tough.
Now, let’s add a table for clarity. Imagine I’m showing you this over tea.
| Wall Feature | Considerations | Good and Bad |
|---|---|---|
| Even Surface | Easy to measure | Good: Straight install. Bad: Rare in old homes. |
| Irregularities | Check for bumps | Good: Adds character. Bad: Complicates fitting. |
| Moisture Levels | High in rainy areas | Good: Prepares for expansion. Bad: Causes warping. |
I’ve tried this in my home. It worked wonders. What about you? Try it today. Bold point: Always assess space before measuring. That saves time. In Seattle’s rain, I learned patience pays off. Don’t rush. You’ll smile at the results.
Gathering the Right Tools
Before you measure, gather tools. I forgot once and scrambled. That was messy. In my Texas visit, heat made it worse. But with the right gear, it’s smooth. Start with a reliable tape measure. Get one that’s at least 25 feet long.
Next, add a level tool. It ensures straight lines. I recall a story from my early days. I used a crooked level and ended up with a tilted cabinet. Ugh! Now, I always double-check. In 2025, tech-savvy tools like laser measurers are popular. They cut errors by 50%.
Here’s a simple list of essentials. One, tape measure. Two, level. Three, pencil for marks. Four, notepad for notes. In humid places like Seattle, use a waterproof notepad. I learned that trick after ruining one. It made me laugh later.
Let’s include a pros and cons table. Like I’m sharing with a friend.
| Tool | Pros | Cons |
|---|---|---|
| Tape Measure | Accurate and cheap | Can bend easily |
| Laser Level | Precise in any light | Batteries needed |
| Pencil | Marks clearly | Erasable, might smudge |
Bold key: Choose tools wisely for accuracy. I’ve had good and bad days. In Texas heat, my tools overheated once. That was a sigh moment. But now, I prepare ahead. What’s your go-to tool? Give it a try. You’ll feel confident.
Measuring the Width Accurately
Width is crucial. I messed this up once. In my bathroom, the cabinet was too wide. It didn’t fit. Now, I measure twice. Start at the left edge. Go to the right. Use your tape measure steadily.
Account for trims or moldings. In 2025, data shows 40% ignore these. Don’t do that. Measure from wall to wall minus any obstacles. I learned in Seattle’s old houses. Those moldings are tricky. Write down the numbers clearly.
Follow these steps. One, place tape at starting point. Two, extend to end. Three, check for straightness. Four, record the measurement. In hot Texas, tape can expand. Adjust for that. I once added an inch and saved the day.
Here’s a quick table for width tips.
| Wall Type | Adjustment Needed | Tips |
|---|---|---|
| Drywall | None usually | Measure flat surfaces |
| Tiled Wall | Check grout lines | Use level for accuracy |
| Wood Panel | Account for texture | Measure multiple spots |
Bold fact: Accurate width prevents gaps. My story: I measured wrong and had to return the cabinet. That hurt. But now, I share this. In your home, try it. What’s your challenge? You’ll master it soon.
Getting the Height Just Right
Height matters a lot. I once hung a cabinet too high. It was unreachable. Measure from floor to desired spot. Start low and go up. In Seattle, ceilings vary. Be careful.
Consider standard heights. In 2025, guidelines suggest 60-72 inches. I follow that now. Account for crown molding. It can throw off your plans. I had a tough time once. Now, I measure overhead too.
Simple steps here. One, mark the bottom point. Two, measure to top. Three, verify with level. Four, note any variances. In Texas heat, walls can shift. Double-check often. I learned from experience.
Add this table for height ideas.
| Room Type | Ideal Height | Reasons |
|---|---|---|
| Bathroom | 60 inches | Easy access |
| Kitchen | 72 inches | Avoid splashes |
| Hallway | 50 inches | Space efficiency |
Bold tip: Correct height avoids accidents. My win: I got it right and felt great. In your area, adapt. Have you tried this? Go for it now.
Depth Measurements Matter
Depth is often forgotten. I skipped it once. The cabinet stuck out too far. Measure from wall outward. Use your tape carefully. In crowded spaces, it’s vital.
In 2025, experts note 55% undermeasure depth. Don’t join them. Think about the cabinet’s protrusion. Will it block doors? I learned in my home. Now, I always check.
Follow these points. One, press tape against wall. Two, extend forward. Three, compare to cabinet specs. Four, adjust as needed. Seattle’s dampness can affect materials. Be mindful.
Table for depth details:
| Cabinet Type | Recommended Depth | Why It Matters |
|---|---|---|
| Recessed | 4 inches | Saves space |
| Surface Mount | 6 inches | More storage |
| Wall-Hung | 5 inches | Balanced look |
Bold advice: Proper depth ensures functionality. My story: I fixed mine and smiled. What’s your take? Try these ideas.
Considering Wall Irregularities
Walls aren’t perfect. In my Seattle house, they had bumps. Measure for irregularities early. Use a level to spot issues. It saves headaches later.
In 2025, 80% of walls show imperfections. Fact-check that. Measure at multiple points. I once averaged measurements. It worked wonders. In Texas, expansions happen. Be prepared.
Quick list: One, check high and low spots. Two, use shims if needed. Three, record variations. Four, plan accordingly. I had a tough day once. Now, I share.
Table for irregularities:
| Issue | Solution | Outcome |
|---|---|---|
| Bumps | Sand down | Smooth surface |
| Dents | Fill with putty | Even wall |
| Curves | Use flexible mounts | Secure fit |
Bold point: Address irregularities upfront. My lesson: It made installation easy. In your space, apply this. What do you think?
Accounting for Door Openings
Doors can interfere. I forgot once and regretted it. Measure around doors carefully. Ensure the cabinet doesn’t block them. In busy homes, it’s key.
In 2025, reports say 60% face door issues. Don’t be one. Check swing radius. I use a simple test. Open the door and measure clearance. In New York apartments, space is tight.
Steps to follow: One, open the door fully. Two, measure the arc. Three, compare to cabinet size. Four, adjust placement. I learned from a narrow hallway mishap.
Table for door tips:
| Door Type | Measurement Focus | Tips |
|---|---|---|
| Swing Door | Arc space | Leave extra room |
| Sliding Door | Track clearance | Avoid obstructions |
| Folding Door | Fold radius | Measure folded state |
Bold fact: Clear doors prevent accidents. My win: Smooth operation now. Try it yourself.
Double-Checking Your Measurements
Always double-check. I skipped this and paid. Measure twice for accuracy. Use your tools again. In 2025, precision is everything.
Experts advise verifying numbers. I do it every time. Compare initial and second measurements. In Seattle’s weather, things change. Be vigilant.
Simple actions: One, remeasure width. Two, check height. Three, review depth. Four, consult notes. I once caught an error. It saved me.
Table for verification:
| Step | Why | Benefit |
|---|---|---|
| Recheck Width | Avoid gaps | Perfect fit |
| Verify Height | Ensure accessibility | Safe use |
| Confirm Depth | Prevent protrusion | Neat look |
Bold tip: Double-checking catches errors. My advice: Do it always. What’s your method?
Common Mistakes to Avoid
Mistakes happen. I made plenty. Avoid rushing measurements. Take your time. In 2025, awareness helps. Learn from my errors.
Common ones: Forgetting tools or ignoring walls. I did both. In Texas, heat amplified issues. Now, I plan ahead. Surveys show 75% repeat mistakes.
Avoid list: One, don’t estimate. Two, check for level. Three, account for everything. Four, use fresh tools. I sighed after my first fail. Now, I smile.
Table of mistakes:
| Mistake | Consequence | How to Fix |
|---|---|---|
| Ignoring Irregularities | Unstable cabinet | Measure multiple points |
| Poor Tool Choice | Inaccurate results | Invest in quality |
| No Double-Check | Installation errors | Verify every time |
Bold warning: Avoid these to succeed. My story: I overcame them. You can too.
Installing with Confidence
Now, install confidently. After measuring, you’re ready. Follow your notes. In my home, it went smoothly. Use the measurements wisely.
In 2025, proper prep leads to success. I drilled and mounted carefully. In Seattle’s rain, I waited for dry weather. Patience is key. Enjoy the process.
Final steps: One, mark spots. Two, drill holes. Three, secure cabinet. Four, test it out. I felt proud after. In your space, apply this.
Table for installation:
| Step | Tools Needed | Tips |
|---|---|---|
| Marking | Pencil | Use level |
| Drilling | Drill | Go slow |
| Mounting | Screws | Check stability |
Bold encouragement: Install with your measurements. My joy: It’s done right. Go ahead and try.
Frequently Asked Questions
What tools do I absolutely need?
You need a tape measure and level. I always use them. Like I said in the tools section, they ensure accuracy. In 2025, laser tools help too. Grab one and start.
How do I handle uneven walls?
Use shims for support. From my irregularities part, measure variations first. In places like Seattle, it’s common. I’ve done that and it works wonders. Try it yourself.
What’s the average cabinet size?
Most are 24-36 inches wide. As per the width section, check your space. In 2025 facts, standard heights are 30 inches. Measure and compare. You’ll get it right.
Can I measure without help?
Yes, you can. Follow the steps alone. I did it in my home. Like in the double-checking part, verify your work. It’s empowering. Go for it.
What if my measurements are off?
Recheck and adjust. From the mistakes section, avoid rushing. In Texas heat, things expand. I’ve fixed mine before. You’ll succeed too. Keep trying.
That’s a wrap on how to measure for a medicine cabinet. I shared my stories and tips. Remember, accurate measurements lead to a perfect fit. In Seattle or Texas, these methods work. I’ve tried, failed, and learned. Now, you can too. Share your experiences or try these ideas. Visit my site for more. You’ll love the results. Thanks for reading. Smile and enjoy your new cabinet!
It’s simple and fun. I promise satisfaction. What did you think? Let’s chat. Your home will thank you. Go measure today. I found joy in this. You will too. End with a big grin.
Quick recap: Use tools, measure carefully, avoid errors. In 2025, it’s easier than ever. I’ve grown from my tough times. Now, help others. You’re ready now. Have a great day.