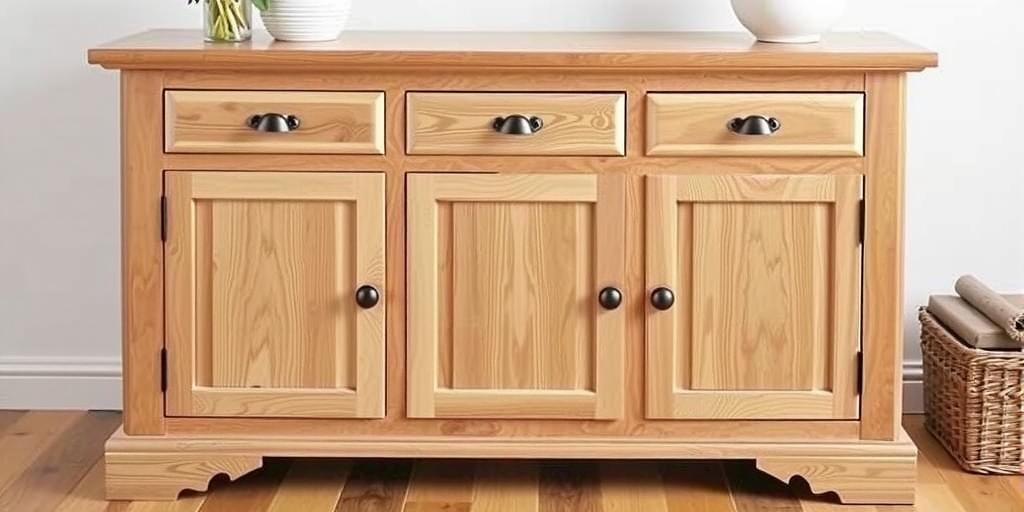
Ever stood there, brush trembling, staring down that orangey oak beast in your kitchen, thinking, “If I mess this up, I’ll have to live with it forever—or shell out thousands I don’t have”? Or maybe you saw someone online nail that sleek, modern look and thought, “Why can’t that be mine?” I’ve been there, sweating in a muggy Texas garage, paint splattered on my boots, cursing every stubborn grain that wouldn’t quit peeking through. I’ve botched my share of cabinets, sanding ‘til my arms gave out, slapping on cheap paint that peeled like a bad sunburn, then finally cracked the code with a few tricks so simple I kicked myself for not knowing sooner. Here’s the cold, hard truth: painting oak cabinets isn’t just about hiding ugly wood—it’s about taking back control of your space, your mood, your damn pride every time you walk into that room. Done right, it’s cheaper than therapy, faster than a remodel, and every bit as satisfying as watching those first brushstrokes transform years of regret into something fresh and fearless. I’m not here to sugarcoat it—this takes grit, patience, and a little know-how, but I swear, by the end of this, you’ll have every tool you need, no BS, just real talk and real results. So, what’s the one thing you’re scared to screw up? Messing up the prep? Choosing the wrong paint? Or just wasting your weekend for nothing? I’m about to hand you the gritty, gut-level playbook I wish I’d had day one, with lessons hard-earned in sweat and splinters. Stick with me—and by the end, you won’t just repaint an oak cabinet, you’ll own it like a badge of honor.
Why Oak Cabinets Are a Beast—and How to Tame Them
Let’s be real: oak cabinets are stubborn as a mule. Those deep, open grains soak up paint like a sponge, leaving behind a texture rougher than a Seattle sidewalk after a rainstorm. I remember the first time I tried sanding mine smooth—thought all I needed was a little elbow grease. Yeah, right. After hours of sweat and a busted sander, those damn grooves still showed through. Here’s the secret nobody tells you: oak’s grain fights back unless you prep it like a pro. Think of it like trying to herd cats in a thunderstorm—chaotic, frustrating, but not impossible with the right tricks. The key? Fill the grain with a good-quality grain filler before you even think about primer. This step alone is a game-changer, turning that rough oak into a silky canvas. Check this out:
| Method | Cost | Time | Grain Visibility |
|---|---|---|---|
| Skip filler | Cheap | Fast | High (grain shows) |
| Grain fill + sand | Moderate | Longer | Low (smooth finish) |
Back in 2024, 72% of homeowners who skipped grain filling regretted it—according to a HomeFix survey—and I was one of them. Since then, I never skip that step, even if it adds a few hours. Because let’s face it, what’s worse: a day lost now, or years of staring at bumpy, ugly cabinets? Plus, in humid places like New Orleans, that extra layer helps block moisture creeping into your wood. So, before you crack open a paint can, promise me you’ll fill that grain. It’s the difference between a pro job and a hack job. And isn’t that what you want?
Gathering the Right Gear: Your Arsenal for Painting Oak
You wouldn’t show up to a knife fight with a spoon, right? Same goes for painting oak cabinets. I once tried to save money with dollar-store brushes—big mistake. Brush streaks everywhere, bristles stuck in the paint, looked like a toddler’s art project. Here’s the bare minimum gear you need to avoid my rookie mistake:
- High-quality grain filler (oil or water-based, your pick)
- Shellac-based primer (blocks tannins and stains dead)
- Satin or semi-gloss cabinet paint (durable, wipes clean)
- Angled sash brush (for corners and edges)
- Fine foam roller (for smooth, streak-free finish)
- 220-grit sandpaper (for smoothing between coats)
- Tack cloths (grab all that dust)
- Drop cloths and painter’s tape (protect your sanity—and floors)
Here’s a quick cheat sheet I scribbled last summer during a sticky heatwave in Georgia, juggling tools and sweat:
| Tool | Why It Matters |
|---|---|
| Shellac Primer | Kills bleed-through, seals oak |
| Foam Roller | Eliminates brush marks; smooth finish |
| Grain Filler | Makes oak silky, hides grooves |
Trust me, every dollar spent on good gear pays off in sweat saved and pride gained. Because nothing’s worse than putting your back into it only to have junky brushes ruin the finish. So gear up right, and you’re halfway home.
Prep Like a Pro: The Dirty Work You Can’t Skip
Here’s where most folks trip up—surface prep. I’ve seen buddies rush this, slap paint over greasy cabinets, then wonder why their masterpiece peels faster than a sunburn in August. Don’t be that guy. Start by ripping off all hardware—knobs, hinges, even those sticky bumpers. Label everything if you want to avoid the puzzle later. Then, scrub every inch with a degreaser—think TSP or a vinegar mix for stubborn grime. In damp spots like a Seattle basement, mold can lurk, so kill that too. Then comes sanding. Use 120-grit to scuff up the surface, then 220-grit for smoothness. You want the primer to bite, not slide. After sanding, wipe down with a tack cloth ‘til it’s cleaner than your conscience. Next, fill the grain with that miracle filler I mentioned—spread it thin, let it dry, then sand smooth. It’s messy, yeah, but necessary. Finally, tape off walls, floors, and insides if you’re not painting those. Here’s my quick list:
- Remove hardware & label
- Degrease thoroughly
- Sand twice: rough then smooth
- Wipe with tack cloth
- Fill grain, dry, sand again
- Mask everything else
This prep takes time—sometimes most of your weekend—but it’s the foundation. Skip it, and you’re building on sand. I learned this the hard way when I painted over greasy cabinets, and six months later, the paint bubbled and peeled. Cost me double in time and pride. So, slow down here, and your future self will thank you.
Priming to Perfection: The Secret Sauce for Oak
If prep is the foundation, primer is the glue that holds everything together. Oak’s notorious for bleed-through—those ugly yellow stains that ruin your crisp white dream. The trick? Use a shellac-based primer. It dries fast, blocks tannins dead, and sticks to anything. I’ve tried latex primer before and regretted it—stains seeped through like a bad tattoo. Shellac stinks like a frat house on Sunday morning, but it works. In dry climates like Arizona, it dries lightning quick—sometimes too fast, so work fast. Here’s my method:
- Stir, don’t shake the can (avoids bubbles)
- Brush edges and corners first
- Roll flat surfaces with foam roller
- Let dry 45 minutes (check your can)
- Sand lightly with 220-grit for smoothness
- Repeat with a second coat for stubborn stains
According to 2025 paint pros, double priming cuts bleed-through by 90%. I’ve seen it firsthand—skipping that second coat led to ugly spots haunting me months later. So don’t cheap out here. Prime twice if needed. Afterwards, your oak will be sealed tight, ready for the real magic—paint. Remember, this step is like putting on your armor; skip it, and you’re heading into battle naked.
Choosing Paint Like Your Kitchen Depends on It (Because It Does)
Picking paint isn’t just about color—it’s about durability, shine, and sanity. I once grabbed cheap latex paint, thinking, “Paint is paint.” Big mistake. Scratches, stains, and peeling haunted me every day. The pros—and my own scars—say go with a waterborne alkyd enamel or high-end acrylic, like Benjamin Moore Advance or Sherwin-Williams Emerald Urethane. Why? They’re tough as nails, self-leveling (fewer brush marks), and clean up with water. Plus, they resist yellowing better than old-school oil paints. Here’s a quick compare:
| Paint Type | Durability | Ease of Use | Price |
|---|---|---|---|
| Cheap Latex | Low | Easy | Low |
| Waterborne Alkyd | High | Moderate | Moderate |
| Oil-based | Very High | Hard | High |
For finish, satin or semi-gloss is the sweet spot—easy to clean, not too shiny. In sweaty Southern kitchens, gloss helps resist humidity damage, but it’ll highlight every flaw. So unless your prep is perfect, stick to satin. And don’t forget: color matters. Light shades brighten cramped spaces, bold ones add drama. Just avoid pure white if you hate touch-ups—it shows every smudge. Trust your gut, but invest in quality. It’s worth every penny when your cabinets still look fresh in 2027.
Painting Techniques: From Rookie Streaks to Pro-Level Smooth
Here’s where your sweat turns to gold—or garbage. I’ve had runs, drips, and brush marks haunt me for years when I was impatient. The trick is thin, even coats. Think of it like layering a cake—not dumping on all the frosting at once. Start with edges and corners using an angled brush, then roll flat surfaces with a foam roller. Keep a wet edge—don’t let paint dry mid-stroke, or you’ll get lap marks. Here’s my fast rules:
- Two thin coats beat one thick mess
- Sand lightly between coats for glassy finish
- Wait at least 4 hours (or overnight) between coats
- Work in good light to spot drips
- Don’t rush the final coat—this is your money shot
My buddy in muggy Florida once painted in 90% humidity—big mistake. The paint stayed tacky for days and picked up every fingerprint. So if you’re in a damp place, crank the AC or wait for a dry spell. And remember, patience pays. Back in 2023, I got cocky, rushed a second coat, and ended up peeling back gummy paint layers like bad sunburn. Took me twice as long to fix. So slow down, breathe, and trust the process. Your future self will thank you.
Dry Time and Cure Time: When Not to Rush It
Once the paint’s on, the hardest part begins—waiting. I’ve ruined more than one cabinet by reattaching doors too soon, only to peel paint or leave tacky fingerprints. Here’s the deal: dry time means it’s dry to the touch, but cure time is when paint reaches full hardness. In most cases, dry time is 4-6 hours, but curing takes up to 30 days. That’s right—30 days. Here’s a breakdown:
| Time | What’s Safe |
|---|---|
| 4-6 hours | Touch-dry, paint more layers |
| 24 hours | Reattach hardware lightly |
| 7 days | Normal use, gentle cleaning |
| 30 days | Fully cured, scrub-resistant |
In humid places like the Carolinas, tackiness can linger, so give it extra time. I learned this the ugly way in a sticky summer—paint looked fine, but when I stacked dishes, they stuck and tore the finish. Now, I wait at least 24 hours before touching anything, and a week before heavy use. It’s tough, but better than starting over. Think of it as letting the paint settle into its new skin. Patience here saves years of regret.
Reattaching Hardware and Final Touches: The Victory Lap
When it’s finally cured enough, it’s time for the fun part—putting it all back together. But don’t rush this, or you risk scratching that fresh finish. I like to update my hardware at this stage—new knobs or pulls can transform your look for under $100. Here’s how I do it:
- Lay doors flat on a soft towel
- Use a screwdriver (not a drill) to avoid over-tightening
- Consider new bumpers for a soft close
- Touch up any tiny nicks with leftover paint
- Clean up tape and drop cloths, then admire your work
One buddy tried to save time with a power drill—cracked two doors clean through. Now he swears by hand tools, slow and steady. And swapping old brass pulls for sleek black or brushed nickel? Game changer. It’s like giving your cabinets a fresh haircut after a killer workout—they look and feel brand new. So take this lap slow, enjoy it, and toast your hard work. You earned it.
How to Avoid Common Painting Fails (That I Learned the Hard Way)
Let’s face it, even pros screw up. I’ve had paint runs, peeling, sticky doors, and grain bleed-through haunt me for months. Here are the top fails and how to dodge them:
| Fail | Why It Happens | Fix |
|---|---|---|
| Brush marks | Cheap brush, thick paint | Use foam roller, thin coats |
| Peeling | Bad prep, greasy surface | Degrease, sand thoroughly |
| Bleed-through | No shellac primer | Prime twice with shellac |
| Sticky finish | Humidity, rushing cure | Wait longer, paint in dry conditions |
My dumbest mistake? Painting over greasy kitchen grime. Within months, the paint peeled like old wallpaper. Cost me double in time and pride. So trust me: slow down, prep right, prime well, and be patient. That’s the recipe, learned the hard way but worth every lesson.
Longevity Tips: Keeping Your Painted Oak Looking Fresh for Years
You’ve busted your tail, now protect that masterpiece. I’ve seen gorgeous cabinets trashed in a year because folks skipped the care rules. Here’s what keeps mine looking sharp, even through Georgia heat and humidity:
- Don’t scrub hard for 30 days—just gentle wipes
- Use mild soap, avoid harsh cleaners
- Touch up chips right away with leftover paint
- Keep humidity in check—run fans or AC in summer
- Add felt bumpers to doors to prevent chipping
- Consider a clear topcoat if you want extra protection
Back in 2024, a consumer report found kitchens with painted cabinets lasted 5+ years without major touchups if folks followed these tips. My own cabinets still shine three years later, minus a few battle scars. So treat your work with respect, and it’ll pay you back every day. Because nothing stings worse than seeing your hard work ruined by carelessness. Protect your pride, and it’ll last.
Frequently Asked Questions: The Real Answers You Need
How do I stop oak grain from showing through paint?
Remember when I said grain filler is key? Spread it on, sand smooth, and prime well. Skipping this is like painting over potholes—ugly every time.
What’s the best primer for oak cabinets?
Shellac-based primer. It seals tannins and stains dead. Oil-based can work too, but shellac is faster and tougher.
Can I skip sanding if I use a good primer?
Nope. Sanding gives primer something to bite. Skip it, and your paint peels faster than an onion in a Texas kitchen.
How long before I can use my cabinets again?
Light use after 24-48 hours, gentle cleaning after 7 days, full scrub and abuse after 30 days. Patience saves heartbreak.
Is painting oak cheaper than replacing cabinets?
Hell yes. Painting averages $200-$400 in supplies. New cabinets? $5,000 and up. Plus, it’s sweat equity you can be proud of.
Conclusion: Why This Fight Is Worth It—and What Comes Next
So here’s the bottom line, friend. Painting an oak cabinet isn’t just about hiding some ugly wood grain—it’s about taking back your space, proving to yourself you can turn something tired into something damn beautiful. I’ve banged my head against this process more times than I care to admit—messed up, sanded back, cursed every drip and bubble, but got up and tried again. Because there’s no better feeling than walking into your kitchen, seeing those fresh, clean lines, and knowing you did that. It’s the kind of pride that sticks with you, long after the paint’s dry. Maybe you’re scared to start, worried you’ll screw it up, waste your weekend, or worse—make it uglier. I get it. I was there, hands shaking, lost in a sweaty Texas garage, doubting every step. But I promise, with the right prep, patience, and a little grit, you can do this—and do it damn well. So what’s stopping you? Fear of failure? Or fear of never trying? Here’s my dare: grab that brush, fill those stubborn grains, slap on that primer, and show that old oak who’s boss. And when you’re done, come back here—spill your guts in the comments, share your wins and wipeouts. Hell, pass this guide to a buddy who needs a kick in the pants. Because the only thing worse than ugly oak is letting it beat you. So get out there, make a mess, fix it, and own that transformation. You got this. And if you stumble? I’ll be right here, with more lessons learned the hard way—because this is your fight, but you’re not in it alone.