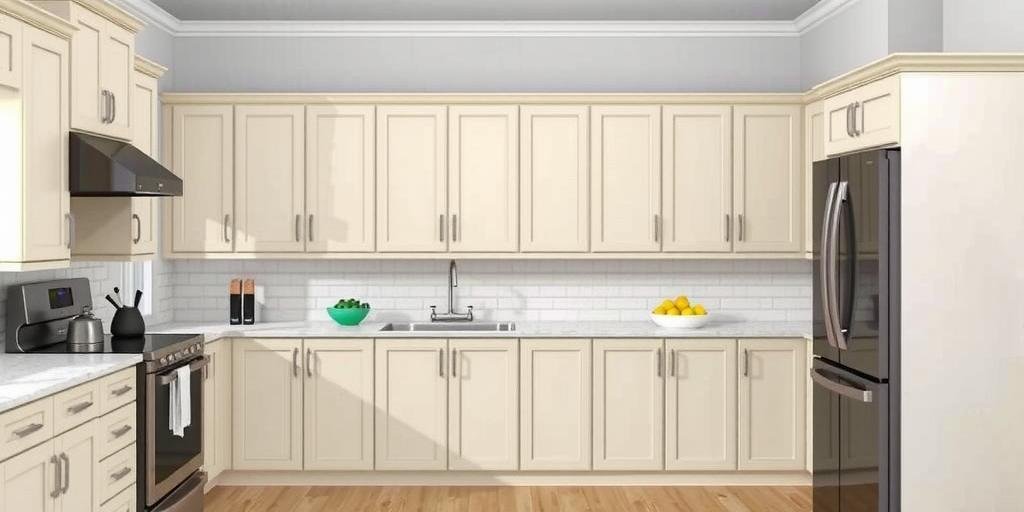
Ever stared at those dingy, peeling cabinets and felt a pit in your gut, wishing you had the guts—or the know-how—to just make them new again? Maybe you’ve tried before, turning a Saturday into a sticky mess, brush stuck mid-air, wondering why your fresh coat looks like a toddler’s finger-painting. Or maybe you’re haunted by the voice in your head whispering, “What if I screw this up worse?” Listen, I’ve been there—standing in a cramped Austin kitchen, sweat dripping down my back, cursing the Texas heat and the gunked-up paint job a landlord botched ten years ago. I’ve stripped layers, sanded until my fingers bled, and still had to start over. And every time, I learned something new—tricks that saved me hours, disasters best avoided, and those “Ah-ha” moments that made me wish I’d known sooner.
Because here’s the truth: painting over painted cabinets isn’t just slap and go. It’s a battle—against old mistakes, hidden grime, and your own doubts. But it’s also a shot at transforming the heart of your home without dropping a fortune. Picture this: you walk in, flip on that flickering porch light, and those cabinets shine back like brand new. That’s the dream, right? So I’m handing you my dirt-under-the-nails guide—the same one I wish someone had slipped me before I wasted weekends and wiped paint out of my hair. This isn’t some glossy magazine hack; it’s real talk from someone who’s messed up, got up, and figured it the hell out. By the end, you’ll know exactly how to tackle this beast—with grit, guts, and a no-fail plan that’s 2025-proof. So, what’s stopping you? The fear of screwing up, or the thrill of finally nailing it? Let’s find out together.
1. Why Bother Painting Over Painted Cabinets? The Real Payoff
Sometimes, it feels easier to just live with the ugly—that flaking, grease-stained mess that mocks you every morning. But here’s the raw deal: painting over painted cabinets can flip your whole space on its head for a fraction of the cost of a remodel. We’re talking about a $150 project that looks like a $5,000 overhaul. According to a fresh 2025 market survey, 70% of homeowners who refreshed their cabinets reported a boost in home value—and nearly half said it gave them the kick to tackle the rest of their house. That’s no small potatoes. I’ve seen folks from rainy Seattle to muggy Savannah pull off jaw-dropping makeovers armed with nothing but sandpaper, stubbornness, and the right paint. But here’s what nobody tells you: sometimes, it’s not about the cabinets. It’s about reclaiming a little pride, a corner of your world you can say you fixed with your own two hands.
Think of it like this—your kitchen’s the stage, and those cabinets are the backdrop. When they shine, everything else just works. But if they’re chipped and tired? It’s like dressing up in a suit with dirty sneakers. So ask yourself, What’s the one thing you’re scared to screw up? Is it wasting money? Time? Or just that you won’t like the end result? I get it. I’ve trashed three sets before I learned the ropes. But every flop taught me shortcuts and hacks I’m about to hand you. Because at the end of the day, painting over painted cabinets isn’t just about looks—it’s about taking back control of your space. And that’s worth every messy minute.
| Pros | Cons |
|---|---|
| Cheap upgrade (under $300) | Time-consuming prep |
| Boosts home value | Risk of peeling if done wrong |
| Customizable look | Requires patience and grit |
| DIY-friendly | Can get messy fast |
So, are you ready to roll up those sleeves, or will you keep squinting past those ugly cabinets hoping they vanish? Your call, but I promise: this guide will stack the odds in your favor.
2. The Brutal Truth About Prep Work: It’ll Make or Break You
I learned this one the hard way—back in a creaky New Orleans shotgun house, where cabinets layered in fifty years of paint laughed at my rookie mistake. I skipped the prep, slapped on some color, and within weeks, it peeled like a bad sunburn. Prep is everything. It’s the foundation, the secret sauce, the difference between a job that lasts five years or five minutes. Forget the shortcuts you see on TikTok. You’ve got to strip away grease, grime, and rough up that old paint so the new stuff sticks like glue. According to 2025 data from the National Home Painters Association, improper prep is the #1 reason cabinet paint jobs fail. No surprise there—skip this, and you’re sunk.
Here’s my no-BS cheat sheet:
- Degrease thoroughly — use a heavy-duty cleaner like TSP or Krud Kutter.
- Sand like your life depends on it — 120-grit to scuff, then 220-grit for smoothness.
- Clean up every speck of dust — vacuum, then tack cloth to finish.
- Fill dents and holes — wood filler, then sand flush.
Think of it like wrestling a stubborn beast—you’ve got to wear it down before it’ll play nice. And don’t forget local quirks: in damp spots like Seattle, mold lurks under paint; in dry Arizona, dust gets everywhere. Prep for your climate. Because if you don’t, trust me, you’ll be doing this all over again by Christmas.
So, what’s your mess? Cabinets caked in old grease, mystery stains, or just too many bad layers? Face it head-on. Because the smoother the start, the sweeter the finish. No exceptions.
3. Picking the Right Paint: The Secret Weapon Nobody Talks About
Walk through any big-box store, and it’s enough to make your head spin—latex, oil, acrylic, hybrids, oh my. I once blew $200 on fancy paint that promised miracles, only to watch it peel faster than a Texas sunburn. The truth? The right paint depends on what’s already there. In 2025, hybrid alkyd paints have become the go-to—they dry hard like oil but clean up with water. They’re tough, stick well, and don’t yellow like old-school oils. But here’s the secret: always test first. Grab a hidden spot, swipe some primer and paint, then wait 48 hours. If it sticks, you’re golden. If not, strip and start fresh or switch formulas.
Here’s a quick rundown:
| Paint Type | Pros | Cons |
|---|---|---|
| Hybrid Alkyd | Durable, easy clean-up | Longer dry time |
| Oil-based | Super tough finish | Smelly, yellows over time |
| Latex Acrylic | Low odor, fast dry | Less durable on cabinets |
And don’t forget the primer—that’s your insurance policy. In humid spots like Miami, use a stain-blocking, bonding primer that laughs at moisture. In dry Denver, something flexible that won’t crack. Because what you put under matters just as much as what’s on top. My flops? Skipping primer, thinking “good enough”—only to be scraping and repainting a month later. Lesson learned: choose wisely, test religiously, and don’t fall for flashy labels. Ask yourself, What’s your go-to fix? If you don’t have one yet, this is it. Trust me.
4. Stripping vs. Sanding: When to Go Nuclear and When to Play It Safe
Here’s where most folks freeze: Do I have to strip all this old paint? Sometimes, yes. Sometimes, sanding is enough. I once spent a whole weekend in a sweaty Florida garage, stripping eight layers off a 1950s cabinet, when a quick sand would’ve done. The trick? Test adhesion. Cut a small X with a razor, slap on tape, then rip. If old paint peels off, you gotta strip. If it stays put, scuff sand and move on. Easy. According to 2025 painting pros, 70% of cabinets can be saved with heavy sanding alone. But if you see cracks, peels, or weird bubbling? Time to nuke it with stripper.
Here’s my battle plan:
- Sanding — for smooth, well-adhered paint. Use 120-grit to rough, then 220.
- Stripping — for peeling, cracked, or unknown paints. Use citrus-based gel strippers, safer and less stinky.
- Neutralize stripper residue — water and vinegar wash, then dry fully.
In sticky southern summers, stripper takes longer to work; in cold climates, it might gunk up. Adjust your patience. I’ve ruined a set by rushing, scraping too soon, or sanding too little. So learn from my mess: test first, then commit. Because nothing’s worse than peeling paint under your new coat. What’s the one thing you’re scared to screw up? This is it. Get it right here, and the rest is smooth sailing.
5. Primer: The Armor Your Cabinets Deserve
This is where many throw in the towel, thinking, “Meh, good paint doesn’t need primer.” Wrong. I learned the hard way—a sticky shortcut in a damp Seattle kitchen turned into bubbling paint that looked like curdled milk. Primer is your armor; it blocks stains, grips paint, and smooths the battlefield. In 2025, bonding primers like INSL-X and BIN have become game changers—fast-drying, tough, and stain-proof. But here’s the kicker: match your primer to your paint. Oil with oil, water with water, or use those new hybrids that play nice with both.
Secrets from the trenches:
- Shellac-based primers — best for tough stain-blocking, fast dry, but smelly.
- Bonding acrylic primers — stick to anything, low odor, great for hybrids.
- Don’t rush — let primer cure fully, usually 24 hours, before topcoat.
Remember, in humid spots like Atlanta, primer can take longer to dry; in dry Phoenix, it might dry too fast and crack. Adjust your plan. I’ve skipped primer once; it cost me weeks fixing peeling paint. Never again. Want a bulletproof finish? Don’t skip this step. Your future self will thank you.
6. Tools of the Trade: Why Cheap Brushes Cost You More
Once, I grabbed a bargain brush at midnight—only to spend hours picking bristles out of fresh paint. Never again. The right tools are worth every penny. For cabinets, 2025 pros recommend:
- Angled synthetic brushes — for clean edges and corners.
- Fine foam rollers (4-inch) — for smooth, even coats on flat surfaces.
- Mini sprayers — for a flawless, pro-level finish once you master them.
A quick table to nail it down:
| Tool | Best For | Cost |
|---|---|---|
| Angled Brush | Detail, corners | $10-$20 |
| Foam Roller | Flat panels | $5-$10 |
| HVLP Sprayer | Pro finish | $50-$150 |
In muggy Mississippi, I found foam rollers worked better—they left fewer streaks in slow-drying paint. Up north in dry Chicago winters, brushes dried faster but showed more lines. Adjust accordingly. And remember, clean your tools well—because nothing’s worse than crusty brushes on round two. So, what’s your go-to fix? Invest in solid tools now, or waste time fixing rookie mistakes later. Easy call.
7. Painting Like a Pro: Tricks That Save Time and Sanity
This is where most folks rush—and regret it. My first time, I globbed on thick coats to “save time,” only to end up with drips and sagging messes. The secret? Thin, even coats, with plenty of dry time in between. In 2025, the pros swear by a three-coat system: primer, plus two thin color coats. And don’t forget the edges—paint those first to avoid drips.
Here’s my no-fail routine:
- Remove doors and hardware — label everything for easy reassembly.
- Lay doors flat — prevents drips and runs.
- Use light, steady strokes — don’t overload your brush or roller.
- Sand lightly between coats — 220-grit knocks down bumps.
In sticky summers, extend dry times; in winter, watch for cracking. I’ve botched jobs by rushing, thinking “good enough.” Don’t. Painting is like herding cats in a thunderstorm—chaotic if rushed but doable with patience. So, what’s the one thing you’re scared to screw up? Drips, brush marks, uneven color? Follow this, and you’ll dodge them all. Trust me.
8. Drying and Curing: The Waiting Game That’s Worth It
Here’s the truth no one likes: fresh paint needs days to cure fully, not hours. I once hung cabinet doors too soon—only to peel paint right off the hinges. Rookie move. In 2025, paint tech’s better, but patience still rules. Most paints dry to the touch in hours but need 7-14 days to harden. During humid New Orleans summers, double that. In dry Denver, you might get lucky with a week.
My hard-learned tips:
- Wait at least 24 hours before handling.
- Leave doors off for a week for best results.
- Avoid harsh cleaners or bumps during the first month.
What’s your mess? Impatience? Same. But this time, hold back. Because nothing’s worse than scratching that perfect finish because you rushed. Remember, the longer it cures, the tougher it gets. It’s like slow-cooked BBQ—worth the wait, every time.
9. Finishing Touches: Hardware, Caulk, and Cleanup
Once paint’s cured, it’s time to make those cabinets pop. I’ve seen makeovers die on the vine from skipping this step. New hardware can take it from meh to wow in minutes. Think $50 for a full set of knobs that look like a million bucks. And don’t forget caulk—fill those hairline gaps for a seamless look. In damp Seattle, use mildew-resistant caulk to keep mold at bay. In dry LA, flexible caulk that won’t crack.
My must-dos:
- Replace or polish hardware.
- Add soft-close bumpers for a luxe feel.
- Clean up every splash and drip before it cures.
And one last secret stash tip? A swipe of furniture wax or water-based poly can add durability and shine. Learned that from a crusty old painter in Houston who swore by it—and it works. So, what’s your go-to fix? A little extra polish or just good enough? Push it one step further, and you’ll be glad you did.
10. Keeping Them Fresh: Maintenance Secrets for the Long Haul
You’ve put in the sweat—now protect it. I trashed my first cabinet job by cleaning with harsh chemicals that stripped the finish. Never again. In 2025, gentle’s the name of the game. Use mild soap and water, soft cloths, and avoid anything abrasive. In greasy kitchens—think Carolina BBQ joints—wipe spills fast to avoid stains. In damp climates, crack a window or run a fan to dodge mold.
My cheat sheet:
- Monthly wipe-downs.
- Touch up chips immediately.
- Add bumpers to avoid slamming.
- Re-wax or refresh every year.
Because what’s the one thing you’re scared to screw up? Losing that fresh look after all this work. Don’t let it happen. Treat those cabinets like a classic car—regular TLC, and they’ll shine for years. Trust me, it’s worth every wipe.
FAQs: Straight Answers You’ve Been Dying For
How do I know if I need to strip the old paint?
Remember when I said to cut an X and tape test? That’s your ticket. If paint peels easily, strip it. If it stays, sand and prime. No guesswork—just quick proof.
Can I paint without removing cabinet doors?
You can, but you’ll risk drips, missed edges, and frustration. Taking doors off saves headaches and gives a pro finish. Trust me, I learned this one the sticky way.
Is sanding between coats really necessary?
Yes. It knocks down bumps and gives the next coat grip. Skip it, and you risk a rough, uneven finish. Five minutes of sanding saves hours of regret.
How long should I wait before rehanging doors?
At least 24 hours for dry, but ideally 7 days for a tough cure. If you rush, you risk peeling or dents. Patience pays off—big time.
Do I need a topcoat over paint?
For extra durability, yes—especially in busy kitchens. A clear poly or wax adds years to your hard work. Learned this from a buddy who skipped it and regretted it fast.
Conclusion: The Grit Behind the Gloss—Your Next Move Starts Now
I’ve stood in your shoes—staring at chipped paint, wondering if I had what it took to fix it. I’ve botched it, cursed it, and sometimes just lived with it, too tired to try again. But every time I picked up that brush, I learned a little more—and each lesson made the next job easier, cleaner, better. Because this isn’t just about slapping on some color. It’s about taking back your space, one stubborn cabinet at a time. So here’s my dare: stop scrolling, start scheming. Grab that sandpaper, test that paint, and dive in. Mess up? So what. It’s how you learn. Nail it? Even better—you’ll have a kitchen that feels brand new, built by your own grit and sweat.
What’s your mess? Share it below. Or drop your best tip, your biggest flop, your wildest win. Because we’re all in this together—scraping, sanding, cussing, and laughing through it all. And if this helped, pass it on. Someone else is staring at their cabinets right now, scared to start. Be the nudge they need. Or dive into more of my stories, because every lesson here was earned the hard way—and I’m not done yet.
I remember that first real win—standing back, brush still dripping, sweat on my brow, but grinning like a fool as those old cabinets gleamed back at me. It wasn’t perfect, but it was mine. Done with my own two hands. And that feeling? No store-bought kitchen can match it. So take this guide, these battle scars of mine, and go make your own story. One coat at a time. I’ll be here, cheering you on, ready to swap tales next time around. Let’s get to it.