Sealing cabinet paint is key to protecting the finish and making cabinets last longer. To get a durable and stunning look, learning how to seal cabinet paint is crucial. This involves understanding why sealing is important and using cabinet painting tips for top-notch results.
To seal painted cabinets right, you need the right tools and materials. By following a detailed guide on sealing cabinet paint, you can get a finish that lasts through daily use. This article will cover what you need and offer tips for a perfect finish.
Knowing how to seal cabinet paint is a skill every homeowner or DIY lover should have. With the right knowledge and methods, you can safeguard your cabinets and enjoy them for years. Whether you’re searching for cabinet painting tips or want to learn about sealing painted cabinets, this article is for you.
Key Takeaways
- Sealing cabinet paint is essential for protecting the finish and extending the lifespan of the cabinets.
- Understanding the importance of sealing painted cabinets is crucial for achieving professional-quality results.
- Following cabinet painting tips and using the right techniques and materials can help you achieve a durable and beautiful finish.
- Sealing painted cabinets requires the right tools and materials, including a high-quality sealant.
- Learning how to seal cabinet paint can help you protect your investment and enjoy beautiful, long-lasting cabinets.
- By following a step-by-step guide on how to seal cabinet paint, you can achieve a flawless finish that resists daily wear and tear.
Understanding the Importance of Sealing Painted Cabinets
Sealing painted cabinets is key to keeping them looking good and lasting long. A clear sealant protects against scratches and spills. This is vital for cabinets in busy areas like kitchens and bathrooms.
Sealing cabinets adds a protective layer. It helps them last longer and avoids expensive fixes. It also makes the paint finish last longer and look better.
Protection Against Daily Wear and Tear
For diy cabinet sealing, many options exist. You can pick from water-based and oil-based polyurethane, or natural waxes. The right sealant depends on the paint type and how much protection you need.
Enhanced Durability Benefits
Sealing cabinets also boosts their durability. This is crucial for cabinets near moisture or used a lot. A clear sealant helps prevent damage and extends cabinet life.
Aesthetic Advantages of Sealed Cabinets
Sealed cabinets also look better over time. They keep their color and shine. Using cabinet paint sealing techniques and the best sealant for painted cabinets ensures they stay beautiful for years.
Essential Tools and Materials for Cabinet Sealing
To get a professional look when sealing painted cabinets, you need the right tools and materials. This includes a top-notch sealant, a clean cloth, and a space with good air flow. Choosing the right sealant is key, based on your paint type and desired finish.
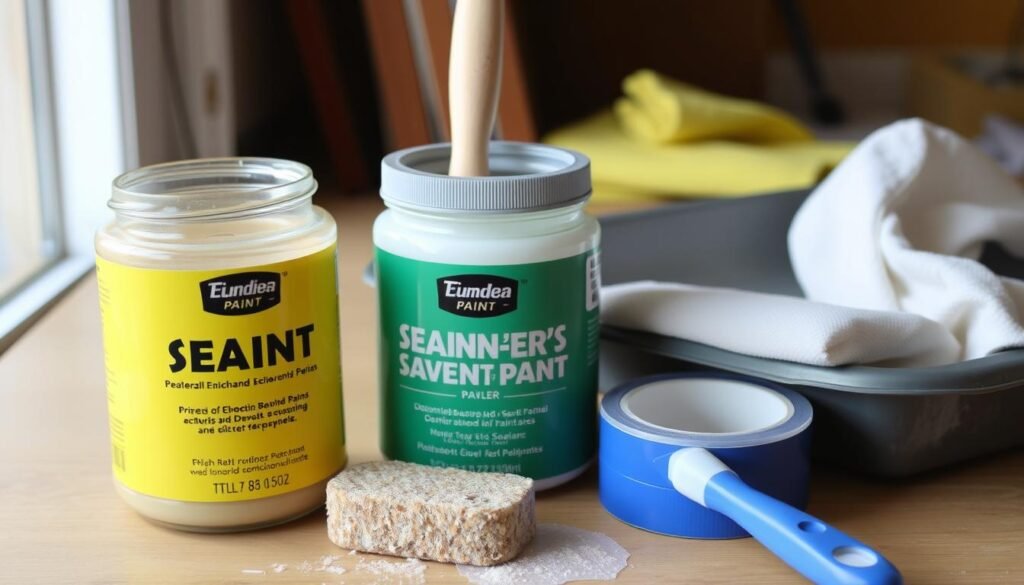
Some must-have tools and materials for sealing cabinets are:
- A high-quality sealant
- A clean cloth
- A well-ventilated workspace
- Sandpaper or a sanding block
- A paintbrush or foam brush
By following these cabinet painting tips and using the right materials, you can get a beautiful and lasting finish. To protect painted cabinets from daily wear, apply a clear sealant coat. This prevents chipping and fading, keeping your cabinets looking new.
For more on sealing painted cabinets, talk to a pro or do more research. With the right tools and materials, you can get a pro finish and enjoy your sealed cabinets for years.
Investing in the right tools and materials ensures a successful cabinet sealing project. You’ll enjoy the benefits of how to protect painted cabinets for years to come.
| Tool/Material | Purpose |
|---|---|
| High-quality sealant | To protect and seal the cabinet paint |
| Clean cloth | To apply and wipe away excess sealant |
| Well-ventilated workspace | To ensure safe and proper application of sealant |
Choosing the Right Sealant for Your Cabinets
Choosing the right sealant for painted cabinets is key. The right one makes your cabinets last longer and look better. You should look at water-based polyurethane, oil-based sealants, and natural waxes.
Water-based polyurethane is easy to apply and has a low odor. Oil-based sealants give a hard finish but dry slower. Natural waxes are eco-friendly but need more frequent use.
Think about your paint, desired finish, and durability needs. The right sealant and proper techniques give your cabinets a professional look. This protects and enhances them for years.
Types of Sealants
- Water-based polyurethane
- Oil-based sealants
- Natural wax alternatives
Knowing each sealant’s traits helps you choose the best. This way, you get a beautiful, lasting finish for your cabinets.
Preparing Your Space for Sealing Work
Before you start diy cabinet sealing, make sure your workspace is ready. Clear the area, cover the floor and surfaces, and ensure good air flow. A clean workspace helps you get a smooth finish. Here’s what to do first:
- Clear the area around the cabinets of any clutter or obstructions
- Cover the floor and surrounding surfaces with drop cloths or plastic sheets
- Ensure good ventilation by opening windows or using a fan
For how to seal cabinet paint, a clean workspace is key. These steps will help you get a pro finish. Also, keep these cabinet painting tips in mind for a great project:
A clean and well-ventilated workspace is essential for a successful cabinet sealing project.
By following these tips and preparing your space, you’ll get a beautiful, lasting finish. Always wear safety gear and use top-notch materials for the best results.
| Step | Description |
|---|---|
| 1 | Clear the area around the cabinets |
| 2 | Cover the floor and surrounding surfaces |
| 3 | Ensure good ventilation |
How to Seal Cabinet Paint: Step-by-Step Process
To get a top-notch finish when sealing cabinet paint, follow a clear process. First, prepare the surface, then apply the sealant, and finally, let it dry and cure. Sealing your cabinets right is key for a lasting and good-looking finish.
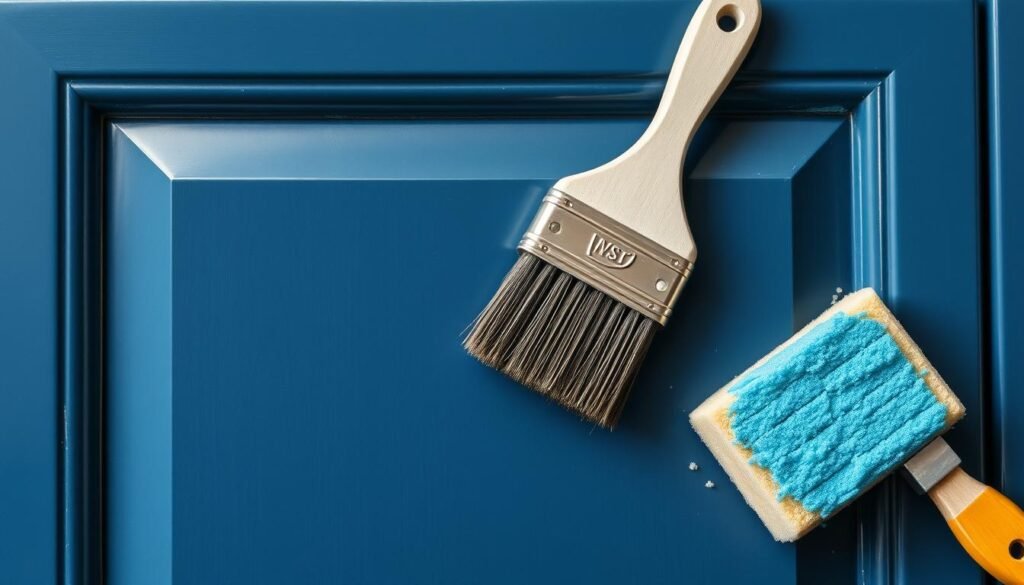
Surface Preparation Techniques
Before you start, make sure the surface is clean. Remove dirt, grime, and grease from the cabinets. Use a mild soap and water to clean them, then dry them completely.
For a smooth finish, lightly sand the cabinets. This helps the sealant stick better.
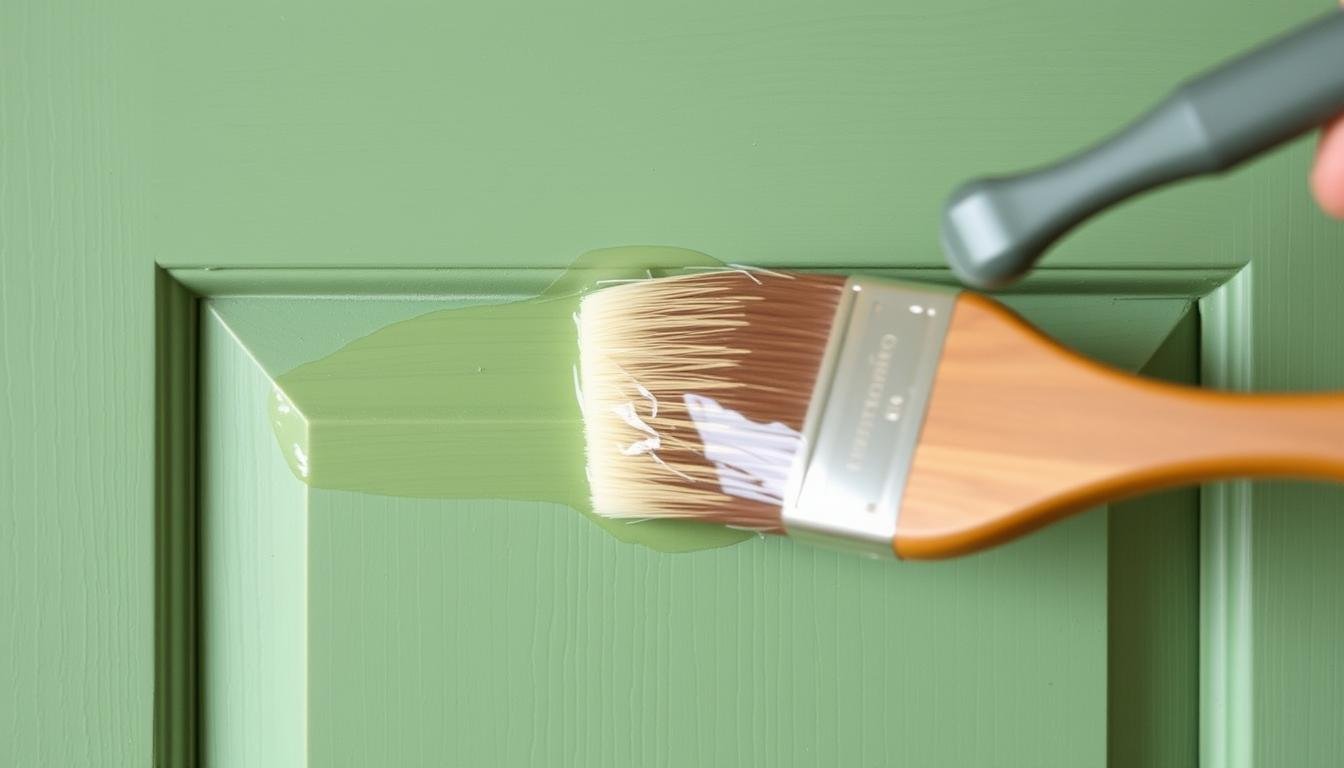
Sealant Application Methods
Choosing the right way to apply the sealant is important. Use a good brush or foam applicator. Work in small sections to keep the coverage even.
Apply a thin, even coat. Follow the instructions for how much to use and how long to wait for it to dry.
Drying and Curing Times
Let the sealant dry and cure as the instructions say. This can take a few hours to a few days, depending on the sealant. Make sure to wait until it’s fully cured before using the cabinets.
For cabinet paint finishing, consider using water-based or oil-based polyurethane. Apply a thin coat and wait long enough for it to dry and cure. These steps will help you get a professional finish for your sealing painted cabinets project. You’ll learn how to seal cabinet paint like a pro.
Professional Tips for a Flawless Finish
Getting a perfect finish on cabinet paint sealing techniques needs careful work and the right steps. To keep protect painted cabinets in great shape, following expert advice is key.
Some important things for a perfect finish are:
- Choosing the right sealant for your cabinets
- Putting on the sealant in thin layers to avoid mess and unevenness
- Letting the sealant dry and cure fully for a strong finish
By using these tips and the best cabinet paint sealing techniques, you can get a stunning, lasting finish. This will protect your painted cabinets from everyday damage. Always read the sealant’s instructions and wear safety gear when working with chemicals.
After sealing cabinets after painting, keeping them up is crucial for the finish to last. Stay away from strong chemicals and rough cleaners, as they can harm the sealant and paint.
By taking the time to properly seal and maintain your cabinets, you can enjoy a beautiful, functional kitchen for years to come.
| Sealant Type | Application Method | Drying Time |
|---|---|---|
| Water-based polyurethane | Brush or roller | 2-4 hours |
| Oil-based polyurethane | Brush or roller | 4-6 hours |
Common Mistakes to Avoid When Sealing Cabinets
When sealing cabinets yourself, knowing common mistakes is key. A smooth, even sealant application is crucial. Always follow the sealant’s instructions for drying times and conditions.
Don’t apply sealant in sunlight or high humidity. This can make the finish uneven or bubbly. Also, the wrong sealant for your cabinet material can ruin the finish. For instance, using water-based polyurethane on wax can melt the wax and cloud the finish.
To avoid these errors, prepare your cabinets well. Clean and sand them to get a smooth surface. By doing this and following cabinet painting tips, you’ll get a professional-looking finish that lasts.
Application Errors
- Applying the sealant in direct sunlight or high humidity
- Using the wrong type of sealant for the specific type of cabinet material
- Not following the manufacturer’s instructions for application and drying times
Environmental Considerations
Temperature and humidity can impact your finish. Always apply sealant in a well-ventilated area, away from sunlight and moisture.
Product Selection Mistakes
Choosing the wrong sealant can harm your finish. Pick a sealant made for your cabinet material. Always follow the manufacturer’s application and drying time guidelines.
| Mistake | Consequence | Prevention |
|---|---|---|
| Applying sealant in direct sunlight | Uneven finish | Apply sealant in a shaded area |
| Using the wrong type of sealant | Poor finish | Choose the correct type of sealant for the cabinet material |
| Not following manufacturer’s instructions | Poor finish | Follow the manufacturer’s instructions for application and drying times |
Maintenance of Sealed Cabinet Surfaces
To keep your sealed cabinet surfaces looking great, follow a regular maintenance routine. Clean them often with a soft cloth and mild soap. Avoid harsh chemicals and too much moisture. This helps keep your cabinet paint finishing looking good for longer.
When cleaning how to protect painted cabinets, be gentle. Don’t use abrasive materials or strong chemicals. Instead, use a soft, dry cloth and mild soap for cleaning. Regular cleaning keeps your cabinets looking good and prevents dirt buildup.
Also, avoid too much moisture on your sealed cabinets. This can damage the sealant and harm the sealing cabinets after painting. By following these steps, you can keep your cabinets looking great for a long time.
Here are some more tips for keeping your sealed cabinet surfaces in top shape:
- Avoid placing hot objects directly on the surface
- Use a trivet or mat to protect the surface from spills and stains
- Regularly inspect the sealed surface for signs of damage or wear
By following these simple maintenance tips, you can keep your sealed cabinet surfaces looking their best. Always be gentle when cleaning and avoid too much moisture. This will help prevent damage to the sealing cabinets after painting.
Troubleshooting Sealing Issues
Applying cabinet paint sealing techniques can sometimes lead to problems like bubbling and peeling. Or, you might end up with an uneven finish. To get a top-notch look, it’s key to figure out what’s causing these issues and find ways to fix them. Sealing painted cabinets needs careful attention and the right methods, including how to seal cabinet paint correctly.
Some common problems you might face include:
- Bubbling: This happens when air gets trapped between the paint and the sealant.
- Peeling: This can occur if the sealant isn’t applied evenly or if the surface isn’t ready.
- Uneven finish: This might be due to uneven sealant application or the wrong sealant choice.
To solve these problems, understanding the importance of proper surface prep and application is crucial. By using the right cabinet paint sealing techniques and materials, you can get a smooth finish. For instance, using a top-notch sealant and applying it in thin, even layers can prevent bubbling and peeling.
It’s also important to think about the sealant type and the environment it will be in. Taking the time to prepare the surface and apply the sealant correctly will lead to a professional-looking finish. Whether you’re sealing painted cabinets or using how to seal cabinet paint methods, being patient and detailed is key.
| Issue | Cause | Solution |
|---|---|---|
| Bubbling | Air trapped between paint and sealant | Apply sealant in thin, even coats |
| Peeling | Uneven application or poor surface preparation | Prepare surface properly and apply sealant evenly |
| Uneven finish | Incorrect sealant or uneven application | Use correct sealant and apply in thin, even coats |
Environmental Considerations and Safety Measures
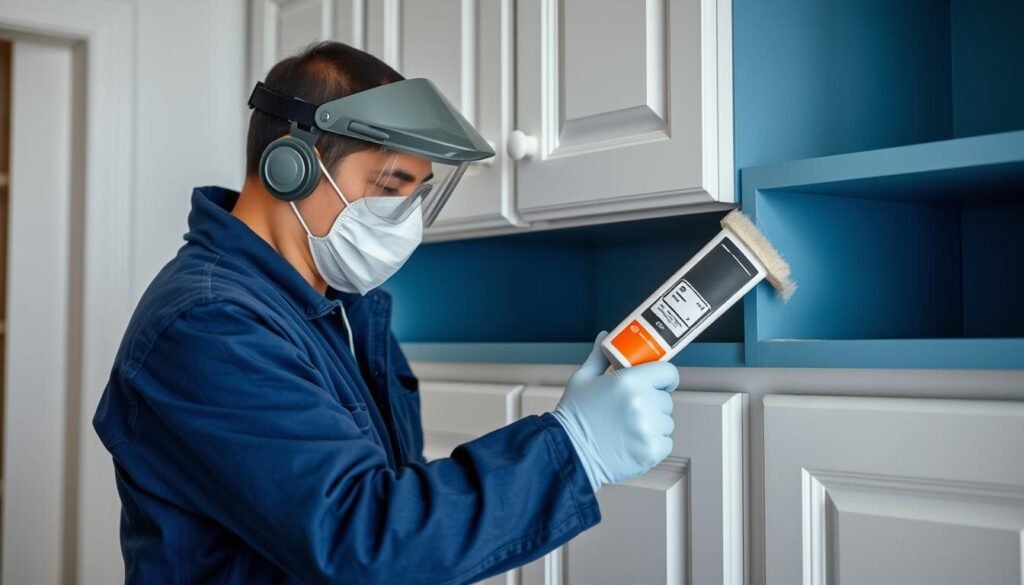
When you’re doing diy cabinet sealing, think about the environment and your safety. Make sure you work in a place with good air flow. Also, stay away from strong chemicals and follow safety rules to protect painted cabinets.
To get a perfect finish, follow cabinet painting tips and be careful. Here are some important things to remember:
- Choose eco-friendly sealants and paints to help the planet
- Wear gloves and a mask when using chemicals
- Keep the area well-ventilated to avoid breathing in fumes
By following these tips and being careful, you can do a safe and successful diy cabinet sealing job. Always put your health and the environment first. If you’re not sure about something, get help from a pro.
Being careful about the environment and your safety means you can enjoy your sealed cabinets for a long time. You’ll also feel good about how to protect painted cabinets in a way that’s good for the planet.
Time and Cost Considerations
Sealing painted cabinets requires careful planning of time and budget. A good plan ensures a professional finish. You need to think about the cost of materials, labor, and extra expenses for how to seal cabinet paint.
A solid budget helps avoid surprises and keeps your project on track. Here are important budget factors for sealing painted cabinets:
- Cost of sealant and other materials
- Labor costs, if you’re hiring a professional
- Any necessary equipment or tools
When planning your timeline, consider each step of the cabinet paint sealing techniques process. This includes preparation, application, and drying. A realistic timeline helps you manage your project well, avoiding delays or issues.
By thinking about time and cost carefully, you can have a smooth cabinet sealing experience. Choose the right materials and techniques for your needs. If unsure, don’t hesitate to get professional help.
| Factor | Considerations |
|---|---|
| Materials | Cost, quality, and compatibility with your cabinets |
| Labor | Cost, expertise, and availability |
| Equipment | Cost, quality, and necessity |
When to Seek Professional Help
Sealing cabinets can be a DIY project, but sometimes you need a pro. If you’re not sure about the sealant or have complex designs, get help. Cabinet painting tips are great, but they might not cover everything.
Also, for a high-gloss finish, a pro is usually the best choice. They have the skills and tools for a perfect finish. How to protect painted cabinets is key, and experts can show you the best ways.
Think about these points when deciding if you need a pro:
- Complexity of the cabinet design
- Type of sealant required
- Desired finish (e.g. high-gloss)
By weighing these factors and followingsealing cabinets after paintingtips, you can get a great finish that lasts.
Conclusion
Sealing your cabinet paint is a smart move to protect your investment. It keeps your kitchen or bathroom cabinets looking great. By following this guide, you can get a finish that lasts a long time.
Always think about safety and the environment when sealing. Choose quality products for the best results. With the right steps, your cabinets will become a highlight of your home.
When sealing, pick the right product for your needs. Whether it’s water-based polyurethane or natural wax, prepare well and follow the instructions. This way, your cabinets will stay beautiful and safe from damage.
Begin your cabinet sealing project today. It’s a great way to keep your cabinets looking their best. With the right sealant, your cabinets will be a lasting beauty in your home.
FAQ
What are the essential tools and materials needed for cabinet sealing?
You'll need a good sealant, a clean cloth, and a space with good air flow for sealing cabinets.
What types of sealants are available for painted cabinets?
There are water-based polyurethane, oil-based sealants, and natural wax alternatives. Each has its own benefits and drawbacks.
How do I prepare my workspace for cabinet sealing?
Clear the area around the cabinets. Cover the floor and nearby surfaces. Make sure the space is well-ventilated.
What are the steps involved in sealing cabinet paint?
First, prepare the surface. Then, apply the sealant. Finally, let it dry and cure properly.
What are some professional tips for achieving a flawless finish when sealing cabinets?
Use the right sealant and apply it in thin coats. Work in a well-ventilated area. These tips help get a perfect finish.
What are the common mistakes to avoid when sealing cabinets?
Avoid application errors and environmental mistakes. Also, choose the right product.
How do I maintain the sealed cabinet surfaces?
Clean them regularly. Avoid harsh chemicals. Keep them away from too much moisture.
How can I troubleshoot sealing issues, such as bubbling and peeling or uneven finishes?
Fix bubbling and peeling. Find ways to even out finishes. Troubleshooting helps solve these problems.
What environmental considerations and safety measures should I take when sealing cabinets?
Work in a well-ventilated area. Avoid harsh chemicals. These steps keep you safe while sealing cabinets.
How do I plan for the time and cost involved in sealing cabinets?
Plan your budget and timeline. Sealing cabinets takes time and money. Be prepared for this.
When should I seek professional help for cabinet sealing?
Get professional help if unsure about sealants. Have complex designs or want a high-gloss finish. Experts can help.